☃️ Banner logo ☃️ Up to 50% Off ☃️

Spellbinders Blog

October Card Kit of the Month is Here!

October Card Kit of the Month is Here!

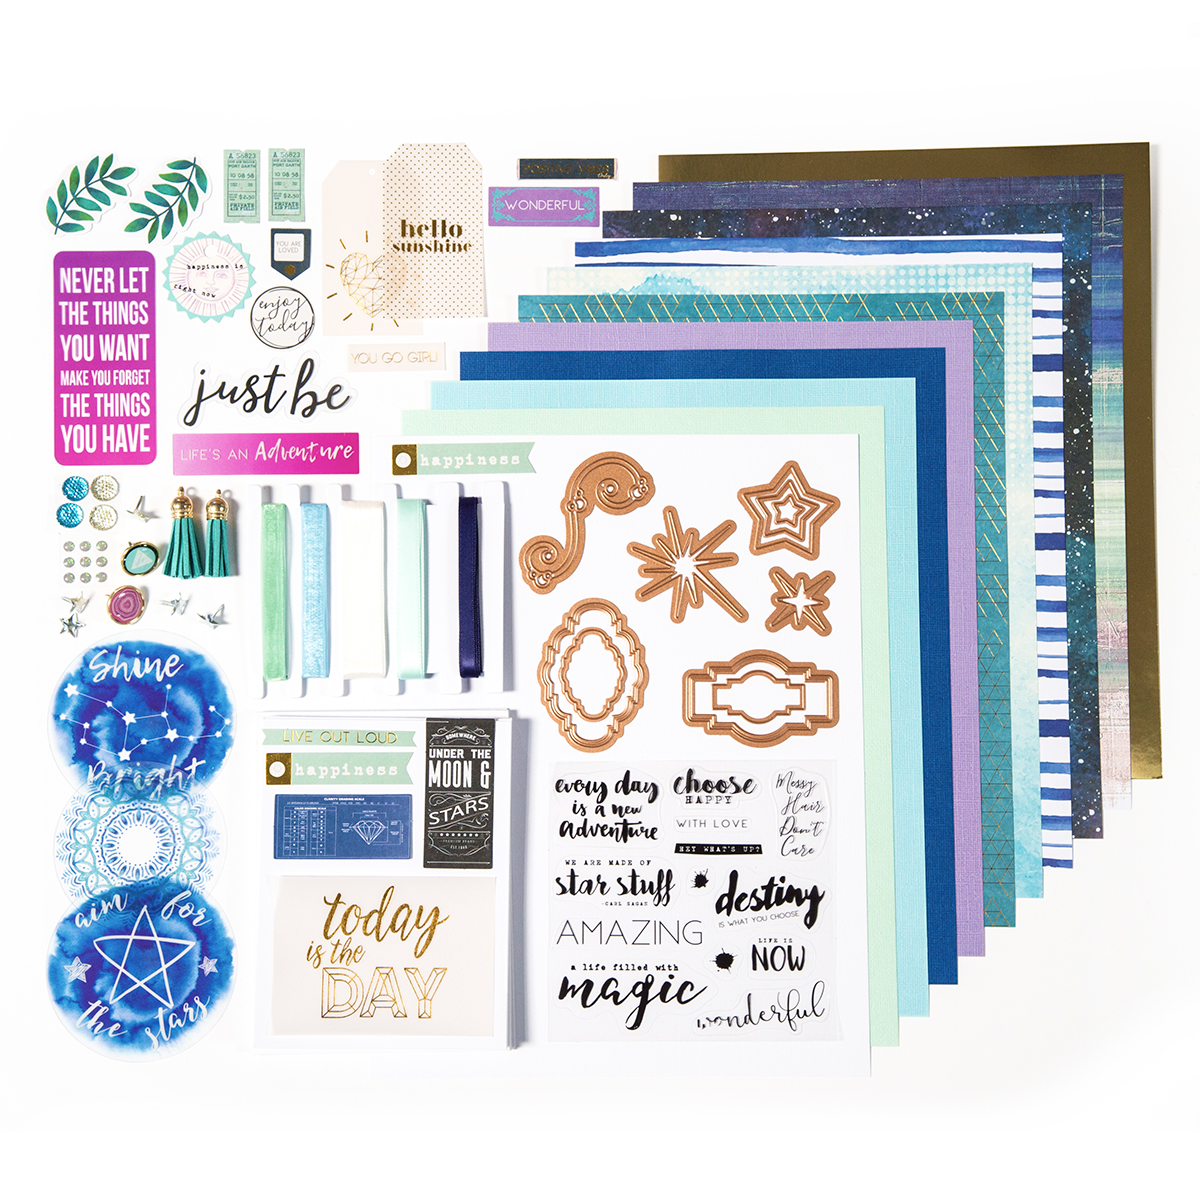
Our October Card Kit of the Month is here! This kit, like any other of our Card Kits, gives you everything you need to create 10 unique cards and more. Enjoy the step by step tutorial below as well as the video tutorial to get you started with this month’s kit! Make sure to show us what you create by tagging #SpellbindersClubKits on social media! This kit will be available October 1, 2017, make sure to get yours!

Spellbinders October 2017 Card Kit

This kit includes:

10 Cards & 10 Envelopes; 11 Sheets of 8.5 x 11" Paper/Cardstock; Set of 10 Dies; 5 Colors of Ribbon; Sparkles, Tassels & Brads; Die Cut Shapes & Embellishments; Sentiment Sticker; Sheet of Adhesive & Foam Dots.

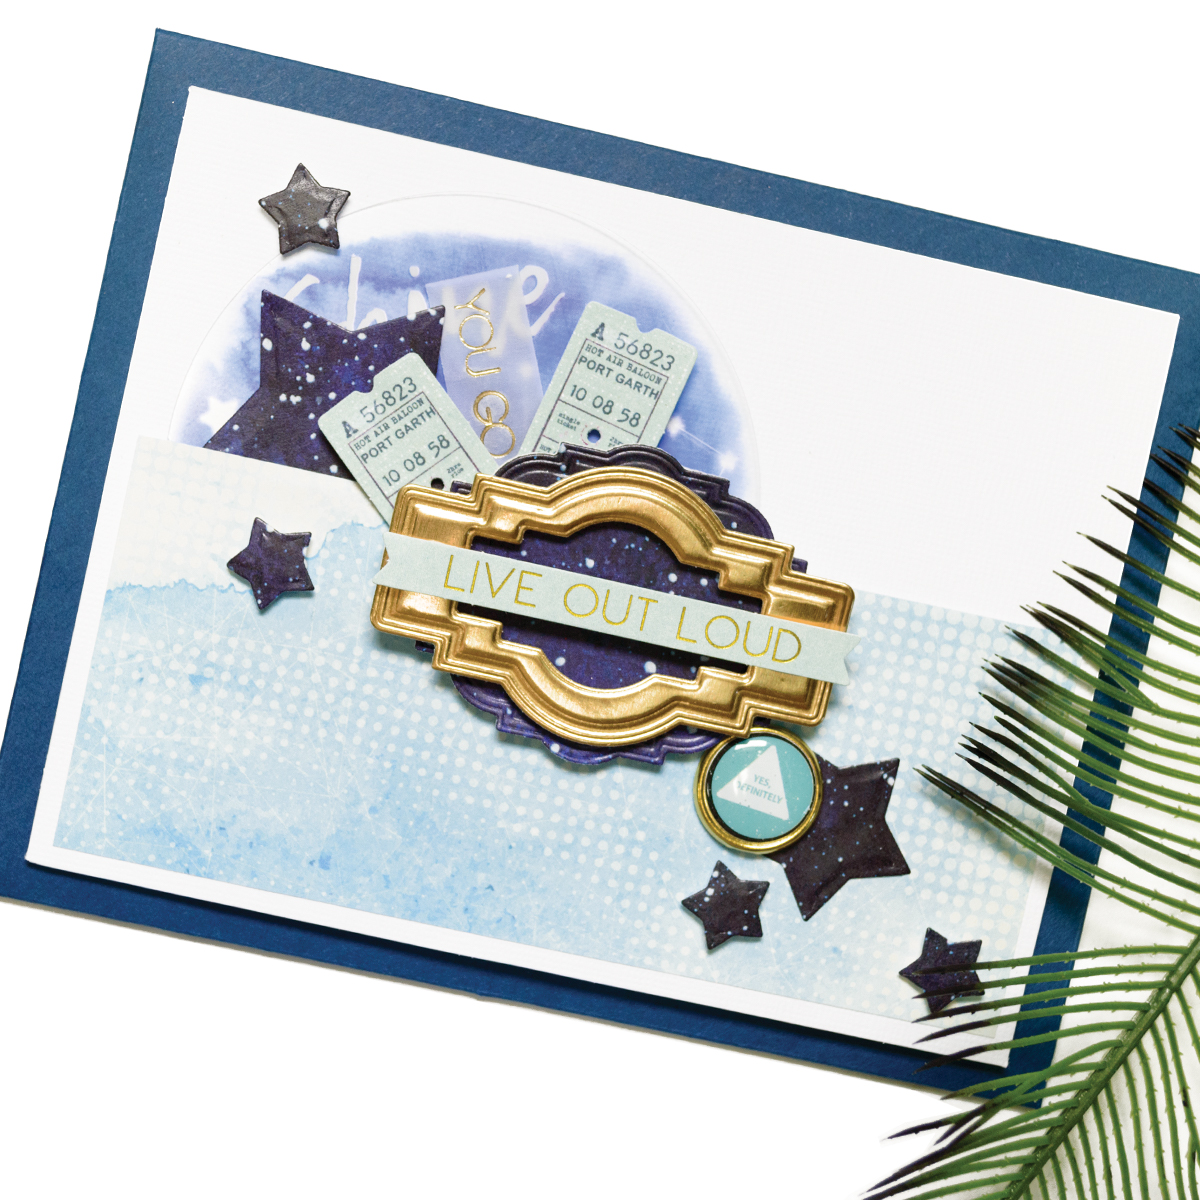
Live Out Love Card

Spellbinders October 2017 Card Kit

Catch step by step instructions for this project: Step 1: Adhere "Shine" embellishment onto the card base. Cut patterned paper to 2 1/4 " x 5 1/4 ", adhere onto the card.

Spellbinders October 2017 Card Kit

Step 2: Die-cut elements.

Spellbinders October 2017 Card Kit

Step 3. Foam mount gold foil frame onto blue label. Foam mount sentiment on top.

Spellbinders October 2017 Card Kit

Step 4: Foam mount onto the card and embellish with additional pieces from your kit.

Spellbinders October 2017 Card Kit

Video Tutorial - Positive Vibes Card

Watch video tutorial using this month kit below or on Youtube.

Additional inspiration

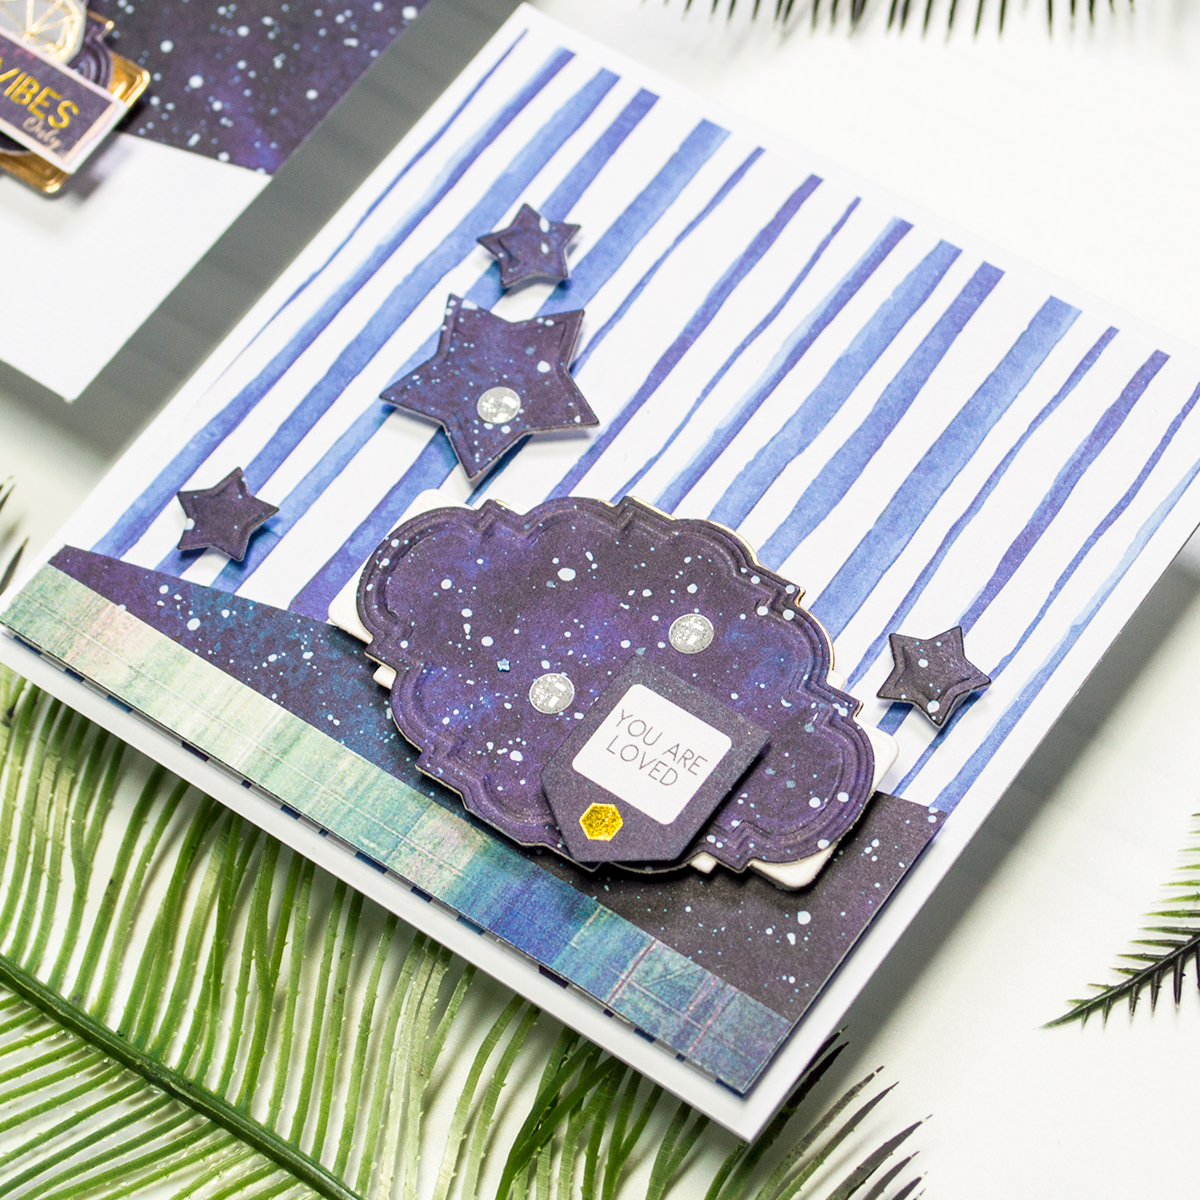
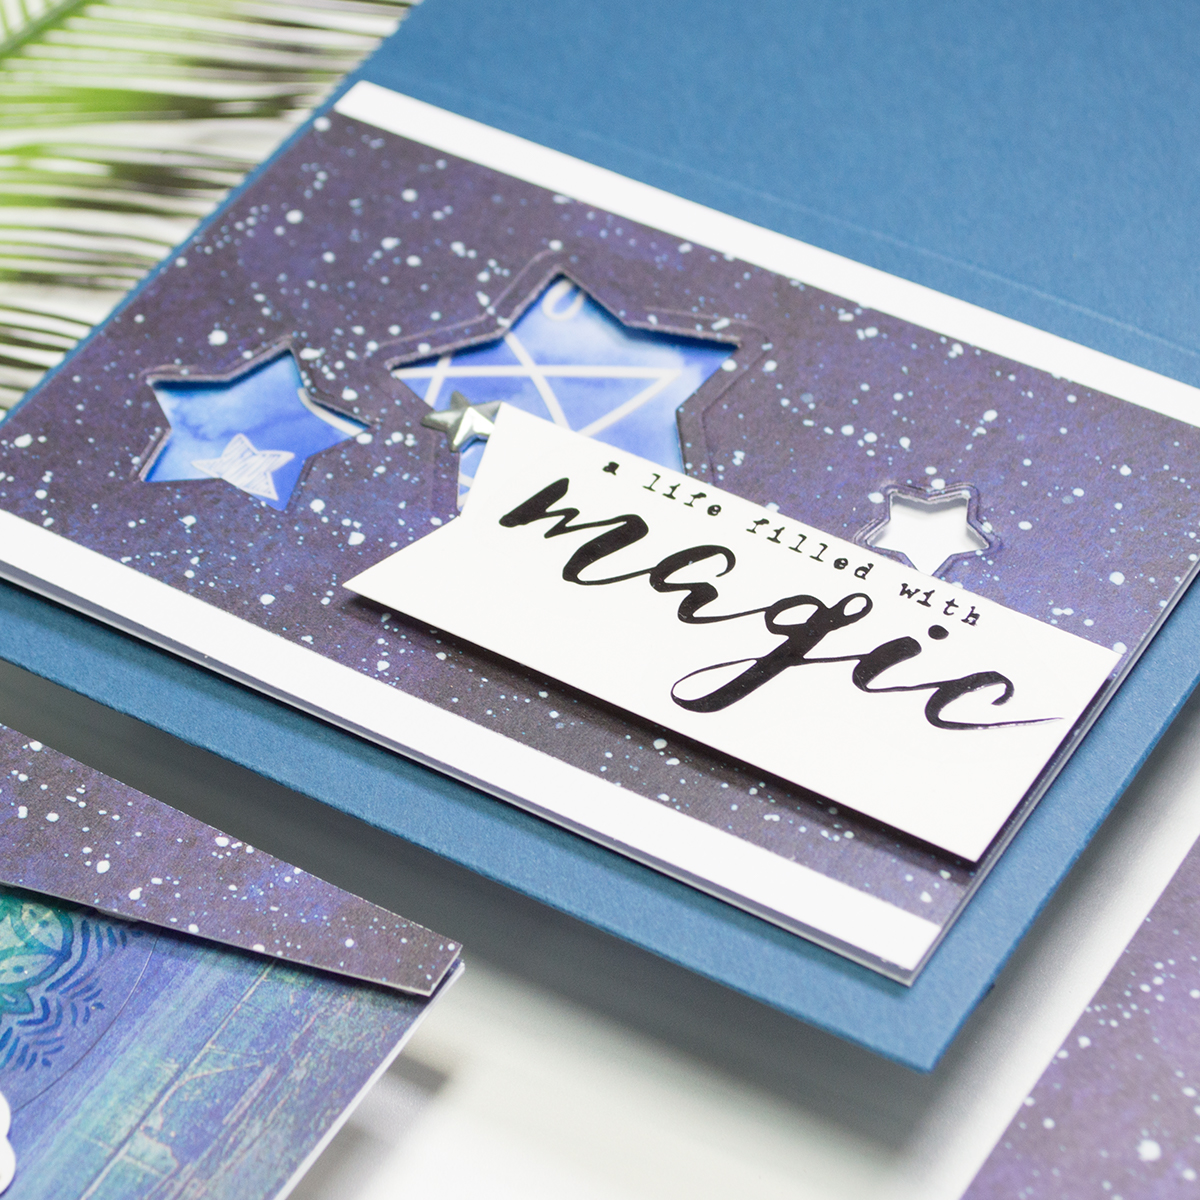
We have more than 3 projects to inspire you with this month, check out other card ideas created using October 2017 Card Kit:

Spellbinders October 2017 Card Kit

Spellbinders October 2017 Card Kit

Interested in becoming a member of Die of the Month, Large Die Of The MonthCard Kit of the Month clubs? Check out our Kit & Caboodle Membership.

Spellbinders October 2017 Card Kit

Read more

Layered Dimensional Die Cutting. Episode #4 - Christmas Bicycle Card

Layered Dimensional Die Cutting. Episode #4 - Christmas Bicycle Card

Hello everyone. This is Yana Smakula and thank you for joining me! This blog post and video is a part of a monthly feature I’m hosting on Spellbinders blog and Youtube channel called “Layered Dimensional Die Cutting”. I hope you’ve enjoyed pervious episodes, in case you missed them you can find them here.

What is “Layered Dimensional Die Cutting Series”? Once a month I’m sharing a card project along with a detailed video tutorial showcasing traditional Spellbinders style with lots of die-cut layers and dimension!

Layered Dimensional Die Cutting. Episode #4 - Christmas Bicycle Card by Yana Smakula for Spellbinders

I’m back with another Christmas card idea mixing and matching dies from several Spellbinders' die sets. Similar to a previous Holiday card I shared, by changing up the papers to non Christmas, taking out the Christmas Tree and using a non holiday sentiment this card design can be easily adapted to any other season or occasion.

Layered Dimensional Die Cutting. Episode #4 - Christmas Bicycle Card by Yana Smakula for Spellbinders

In fact, here’s a card I quickly put together using same dies and layout just to give you additional inspiration. In addition to the dies I used to create Christmas card (I have them listed below) I also used a fire hydrant from the Fido die set. My sentiment came from Mama Elephant - Labeled Messages stamp set and was stamped in Avery Elle Jungle ink color. The background patterned paper came from the Pretty Posy 12x12 paper paper from First Edition.

Layered Dimensional Die Cutting. Episode #4 - Christmas Bicycle Card by Yana Smakula for Spellbinders

So don’t limit yourself to just one season - there are many different ways one design can be interpreted and stretched to work all year round.

Layered Dimensional Die Cutting. Episode #4 - Christmas Bicycle Card by Yana Smakula for Spellbinders

I started working on my card by doing all of my die-cutting first. I used two largest dies from the Hemstitch Rectangles set to die-cut a red panel with a beautiful decorative hemstitch edge. I just love this die design and I feel you’ll see me use it over and over again if you haven’t already.

I also die-cut a white cardstock panel to layer under my die cut. I wanted to have white show through the hemstitch squares and not patterned paper I used for my card.

Layered Dimensional Die Cutting. Episode #4 - Christmas Bicycle Card by Yana Smakula for Spellbinders

Next, I cut Gossamer Knot rectangle out of gold glitter paper. I absolutely adore this die and even though it wasn’t designed as a holiday one it works wonderfully for Christmas projects.

Layered Dimensional Die Cutting. Episode #4 - Christmas Bicycle Card by Yana Smakula for Spellbinders

I also die-cut a bicycle out of white and gold foil cardstock. The inspiration for this project came from a photo a saw on Pinterest and I’m sure you’ve all seen it, too - a car or a truck with a Christmas tree on its roof. I wanted to do something similar so I decided to use this bicycle die instead.

Layered Dimensional Die Cutting. Episode #4 - Christmas Bicycle Card by Yana Smakula for Spellbinders

Another element I cut for this card is of course a Christmas tree. I used a tree from Deck The Hall set and cut it out of white glitter paper. This die will also cut little gifts and a star on the top of the tree - I didn't need those elements so I trimmed them off with scissors.

Layered Dimensional Die Cutting. Episode #4 - Christmas Bicycle Card by Yana Smakula for Spellbinders

The last two pieces I cut out were a little red bow and a word “Joy”. I cut the latter out of red cardstock that has been adhered onto fun foam with double sided sticky sheet on the back to make it easier to adhere it in place. I like to use Scrapbook Adhesive Adhesive Sheets or Stick it adhesive sheets when I need to adhere cardstock to fun foam and add a sticker to my die cuts.

When you go to put your card together you can also wrap baker's twine around the Christmas Tree and the bicycle to make it look like the tree is tied to the bike for a fun and interesting touch.

Spellbinders Supplies:

Other supplies:

First Edition Christmas Wishes 8x8” Paper Pad; Cardstock: Neenah Solar White 110 LB cardstock, My Colors Cardstock Red Cherry 12x12 cardstock, White Glitter Cardstock, Gold Glitter Cardstock, Gold Foil Cardstock; Self Adhesive White Pearls; White Fun Foam; Stick It Double Sided Adhesive Sheets; Adhesive: Scrapbook Adhesives 3D Foam Squares; Hero Arts Holiday Christmas Messages Clear Stamp; Versafine Onyx Black Ink Pad.

Video Tutorial:

Watch video tutorial below or on Youtube to learn how to make this project: Thank you so much for stopping by today and have fun die cutting!

Read more

Layered Dimensional Die Cutting. Episode #4 - Christmas Bicycle Card

Layered Dimensional Die Cutting. Episode #4 - Christmas Bicycle Card

Hello everyone. This is Yana Smakula and thank you for joining me! This blog post and video is a part of a monthly feature I’m hosting on Spellbinders blog and Youtube channel called “Layered Dimensional Die Cutting”. I hope you’ve enjoyed pervious episodes, in case you missed them you can find them here.

What is “Layered Dimensional Die Cutting Series”? Once a month I’m sharing a card project along with a detailed video tutorial showcasing traditional Spellbinders style with lots of die-cut layers and dimension!

Layered Dimensional Die Cutting. Episode #4 - Christmas Bicycle Card by Yana Smakula for Spellbinders

I’m back with another Christmas card idea mixing and matching dies from several Spellbinders' die sets. Similar to a previous Holiday card I shared, by changing up the papers to non Christmas, taking out the Christmas Tree and using a non holiday sentiment this card design can be easily adapted to any other season or occasion.

Layered Dimensional Die Cutting. Episode #4 - Christmas Bicycle Card by Yana Smakula for Spellbinders

In fact, here’s a card I quickly put together using same dies and layout just to give you additional inspiration. In addition to the dies I used to create Christmas card (I have them listed below) I also used a fire hydrant from the Fido die set. My sentiment came from Mama Elephant - Labeled Messages stamp set and was stamped in Avery Elle Jungle ink color. The background patterned paper came from the Pretty Posy 12x12 paper paper from First Edition.

Layered Dimensional Die Cutting. Episode #4 - Christmas Bicycle Card by Yana Smakula for Spellbinders

So don’t limit yourself to just one season - there are many different ways one design can be interpreted and stretched to work all year round.

Layered Dimensional Die Cutting. Episode #4 - Christmas Bicycle Card by Yana Smakula for Spellbinders

I started working on my card by doing all of my die-cutting first. I used two largest dies from the Hemstitch Rectangles set to die-cut a red panel with a beautiful decorative hemstitch edge. I just love this die design and I feel you’ll see me use it over and over again if you haven’t already.

I also die-cut a white cardstock panel to layer under my die cut. I wanted to have white show through the hemstitch squares and not patterned paper I used for my card.

Layered Dimensional Die Cutting. Episode #4 - Christmas Bicycle Card by Yana Smakula for Spellbinders

Next, I cut Gossamer Knot rectangle out of gold glitter paper. I absolutely adore this die and even though it wasn’t designed as a holiday one it works wonderfully for Christmas projects.

Layered Dimensional Die Cutting. Episode #4 - Christmas Bicycle Card by Yana Smakula for Spellbinders

I also die-cut a bicycle out of white and gold foil cardstock. The inspiration for this project came from a photo a saw on Pinterest and I’m sure you’ve all seen it, too - a car or a truck with a Christmas tree on its roof. I wanted to do something similar so I decided to use this bicycle die instead.

Layered Dimensional Die Cutting. Episode #4 - Christmas Bicycle Card by Yana Smakula for Spellbinders

Another element I cut for this card is of course a Christmas tree. I used a tree from Deck The Hall set and cut it out of white glitter paper. This die will also cut little gifts and a star on the top of the tree - I didn't need those elements so I trimmed them off with scissors.

Layered Dimensional Die Cutting. Episode #4 - Christmas Bicycle Card by Yana Smakula for Spellbinders

The last two pieces I cut out were a little red bow and a word “Joy”. I cut the latter out of red cardstock that has been adhered onto fun foam with double sided sticky sheet on the back to make it easier to adhere it in place. I like to use Scrapbook Adhesive Adhesive Sheets or Stick it adhesive sheets when I need to adhere cardstock to fun foam and add a sticker to my die cuts.

When you go to put your card together you can also wrap baker's twine around the Christmas Tree and the bicycle to make it look like the tree is tied to the bike for a fun and interesting touch.

Spellbinders Supplies:

Other supplies:

First Edition Christmas Wishes 8x8” Paper Pad; Cardstock: Neenah Solar White 110 LB cardstock, My Colors Cardstock Red Cherry 12x12 cardstock, White Glitter Cardstock, Gold Glitter Cardstock, Gold Foil Cardstock; Self Adhesive White Pearls; White Fun Foam; Stick It Double Sided Adhesive Sheets; Adhesive: Scrapbook Adhesives 3D Foam Squares; Hero Arts Holiday Christmas Messages Clear Stamp; Versafine Onyx Black Ink Pad.

Video Tutorial:

Watch video tutorial below or on Youtube to learn how to make this project: Thank you so much for stopping by today and have fun die cutting!

Read more