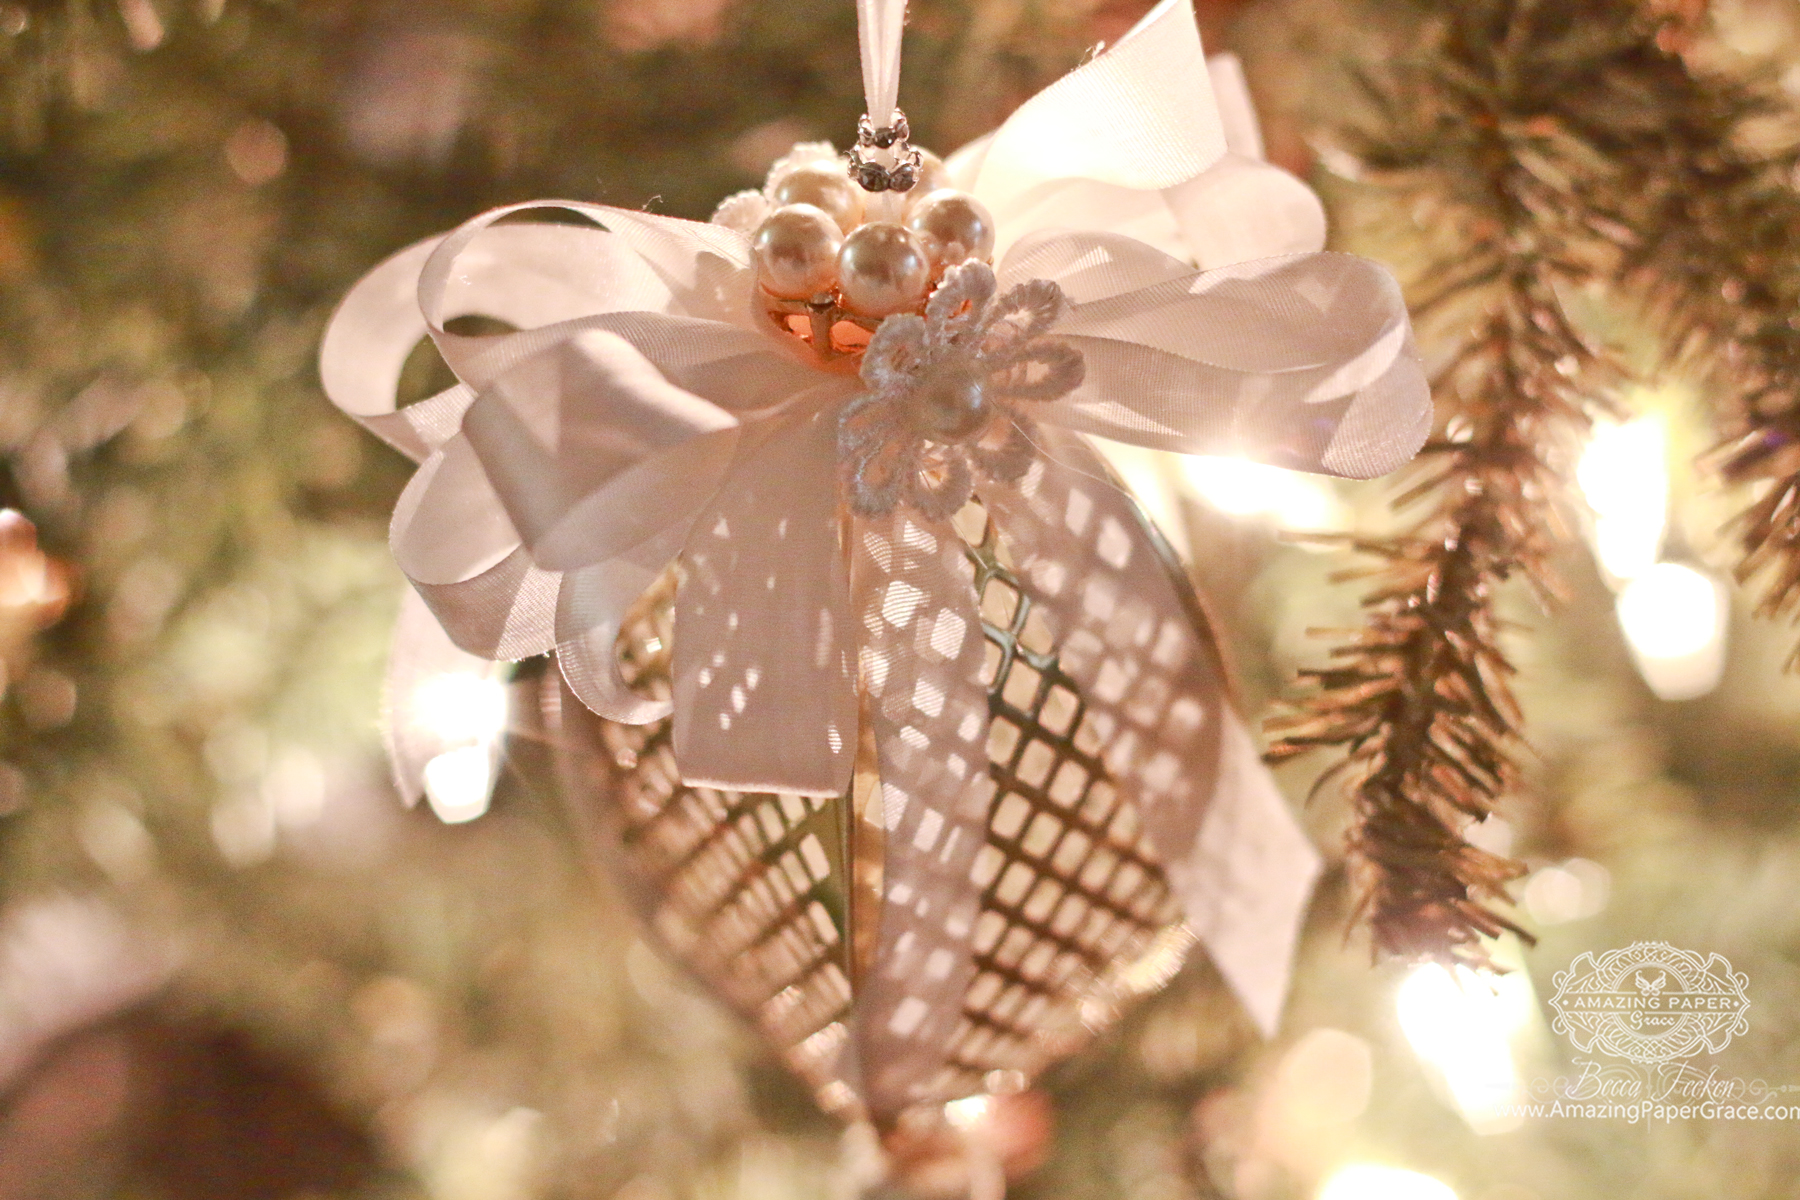
Picture this, you want a Christmas tree with all red foil ornaments or you want a vintage shade you can't find. What should you do? You should make and embellish your own ornaments to fit your special theme by using your dies. It's easy to do. I'm
Becca Feeken with
Amazing Paper Grace and today I'm going to show you a sweet and simple die cut ornament to make for your Christmas Tree - in fact you can mass produce these. Each ornament takes four pieces and your choice of special embellishments!

This is the second post of the Die Cut Ornament Series.
On my last post, I shared that my family and I have made it a tradition to add a unique heartfelt ornament to the tree every year. Somewhere along the line it dawned on us to make the ornaments. Even the making is a tradition - some years we've made one and one year we made many! The ornament I'm sharing today is very easy and the structure comes from an unexpected place.
Spellbinders S6-048 Tiered Multiloop Bows already pulls heavy duty by letting you create bows without having to buy them at the store. Well now, that same die will make an ornament.

This ornament actually goes together very quickly, if you are like me, it will take you longer to pick your embellishments. Keep it simple and you'll be able move though multiples quickly!

Assemble Your Simple Die Cut Ornament:

Gather two brads. Cut the largest Tiered Multiloop Piece with lattice inlay
4 times. Use a large brad to secure four end loops.

Gather the loops on the other end by putting opposing ends over the tails of the brad - facing inward. Spread the tails of the brad.

Here's what your ornament will look like.

Embellish by adding two double loop bows, two flowers, a button with ribbon looped through it along with a tassel. Hot glue one bow to the top front about 1/4" from the top. Hide the knot of the bow by hot gluing a flower in front of it. Mirror those embellishments on the back side. Glue decorative button on top. Glue tassel to the bottom. It's that easy.

Although we are only using four pieces for our ornaments today, I wanted to show you that with the smaller piece, you can get a full globe using six pieces. This will produce a smaller ornament! As a side note, it's a great idea to hang a tassel or some beads on the bottom as they give the ornament stability and will make it hang straight on your tree.

Handmade ornaments are beautiful and because you made it with your own hands, it 's bound to bring back memories of the making. Have a look in your stash for wonderful treasures for your tree!
Sending hugs!
Becca Feeken – www.amazingpapergrace.com

Spellbinders Supplies:
Other Supplies:
Neenah Classic Crest, Natural White, 80lb Smooth, Brads, Seam Binding, Decorative Button, Mulberry Flowers, Hot Glue Gun
Read more


 />
/>



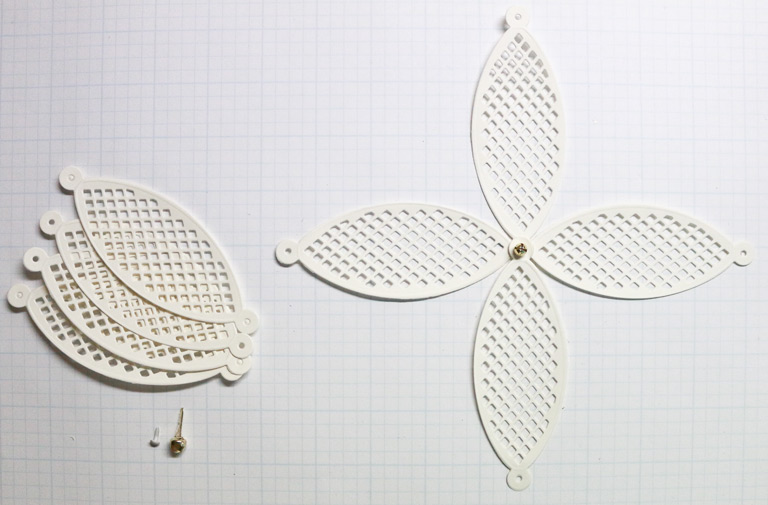 Gather two brads. Cut the largest Tiered Multiloop Piece with lattice inlay 4 times. Use a large brad to secure four end loops.
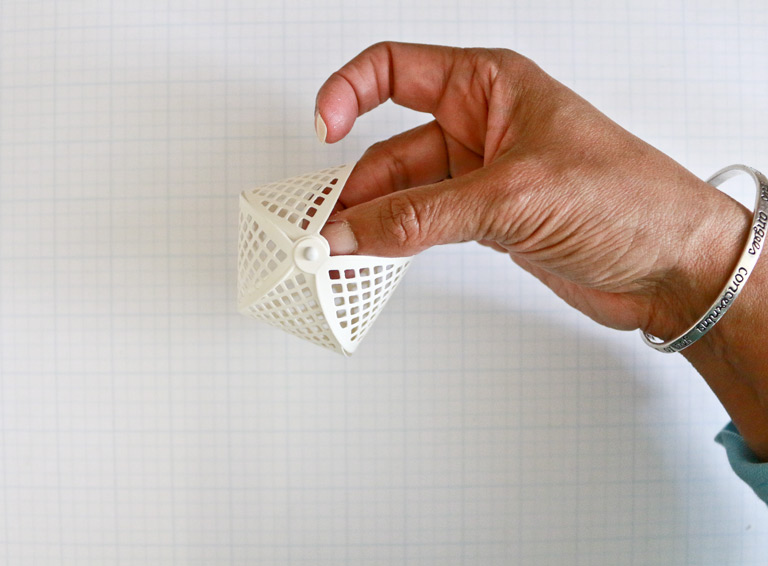 Gather the loops on the other end by putting opposing ends over the tails of the brad - facing inward. Spread the tails of the brad.
 Here's what your ornament will look like.
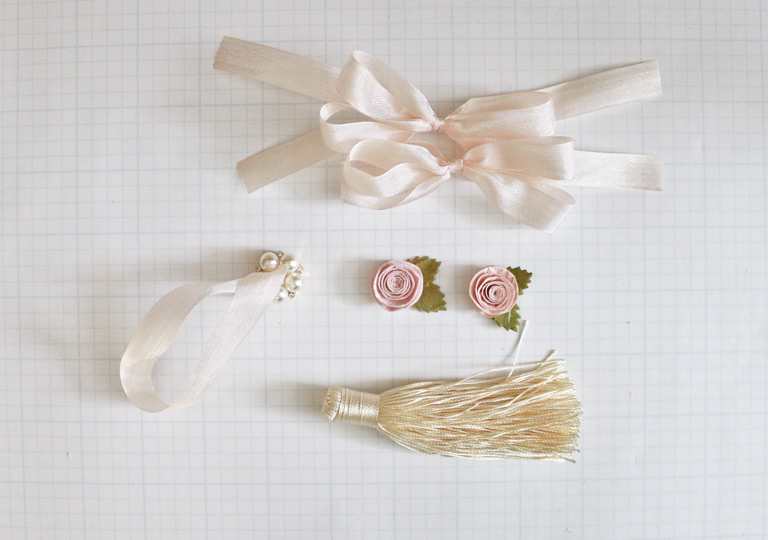 Embellish by adding two double loop bows, two flowers, a button with ribbon looped through it along with a tassel. Hot glue one bow to the top front about 1/4" from the top. Hide the knot of the bow by hot gluing a flower in front of it. Mirror those embellishments on the back side. Glue decorative button on top. Glue tassel to the bottom. It's that easy.
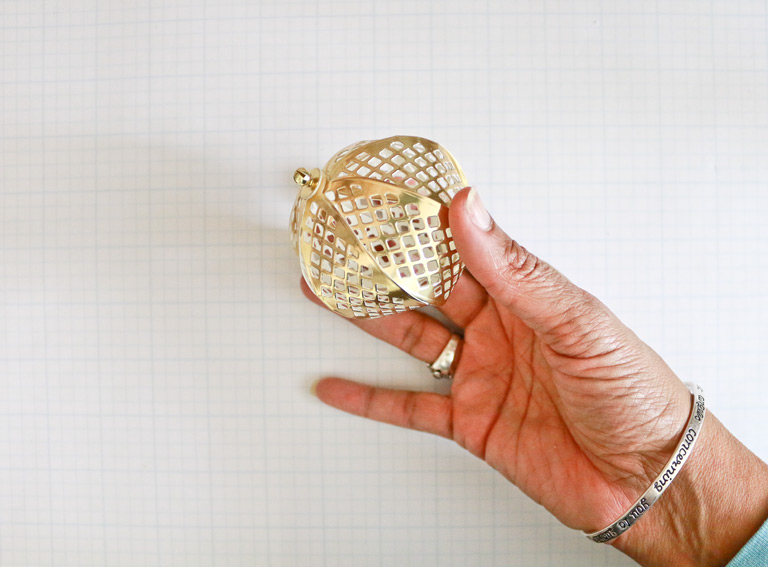 Although we are only using four pieces for our ornaments today, I wanted to show you that with the smaller piece, you can get a full globe using six pieces. This will produce a smaller ornament! As a side note, it's a great idea to hang a tassel or some beads on the bottom as they give the ornament stability and will make it hang straight on your tree.