☃️ Banner logo ☃️ Up to 50% Off ☃️

Spellbinders Blog

Embellish Your Mini Album with Spellbinders Dies

Embellish Your Mini Album with Spellbinders Dies

Hello everyone, it’s Elena here today. I have already shared with you that I like to create mini albums for kids. You might have seen the cover I made for my mini album here. Today I would like to show how easy it is to create embellishments for your albums with Spellbinders dies.

Embellish Your Mini Album with Spellbinders Dies. Project by Elena Olinevich

I love to do a lot of die cutting while creating my albums . It saves me a lot of time and money, as all of them can be easily made from the paper or fabric. There are some easy tips you can follow. I like using all kinds of frames, doily dies. They always look beautiful. I used some dies from the past collections: Majestic Oval and Triple Tear dies.

Embellish Your Mini Album with Spellbinders Dies. Project by Elena Olinevich

You can mix elegant and classy with some trendy ones, for instance I used Geo Flower.

Embellish Your Mini Album with Spellbinders Dies. Project by Elena Olinevich

But it’s easy to create with My Little Red Wagon dies by Debi Adams. I used Ella-Fant dies, there are 2 options to create 2 different elephants with them. Definitely, it is one of my favorite die from now. For my first elephant I used the floral paper to create the die cut:

Embellish Your Mini Album with Spellbinders Dies. Project by Elena Olinevich

For my other elephant I used pale pink cardstock to die-cut it, then I dry embossed it and topped the eyes of it with tiny pink pearls

Embellish Your Mini Album with Spellbinders Dies. Project by Elena Olinevich

The bows are always on demand. I used the glittered cardstock to create my bow with the Contour Bow-tique Steel Rule Die. I have used it so many times and still adore it.

Embellish Your Mini Album with Spellbinders Dies. Project by Elena Olinevich

Moreover you can use the negative space as a photo frame. I added stitching on the edge to attach 2 paper sheets, one with the negative frame. And I can assure you that the photos look great framed this way.

Embellish Your Mini Album with Spellbinders Dies. Project by Elena Olinevich

To create this frame I used Classic Label 33 Dies. It seems they are perfect for this purpose:

Embellish Your Mini Album with Spellbinders Dies. Project by Elena Olinevich

The good thing is that you can use the die cut separately as an embellishment meanwhile the negative space, even if it has a decorative edge. This is how I used the negative from the Classic Label 33 Decorative Elements Dies.

Embellish Your Mini Album with Spellbinders Dies. Project by Elena Olinevich

The feathers dies are always versatile. You can use them for any kind of the project, even for the boys and girls. I used one of the feather from the Feathers Set.

Embellish Your Mini Album with Spellbinders Dies. Project by Elena Olinevich

And what I like to do and usually do for my covers - is to die cut the frame and to stitch it to my cover, even a fabric one. I have already shared one of such kind of a cover in one of my previous post, I have already mentioned earlier in this post. I used the same oval frame from the Classic Label 33 set.

Embellish Your Mini Album with Spellbinders Dies. Project by Elena Olinevich

Spellbinders Supplies:

I hope you have like my mini album and I have inspired you to give it a try, too!

Read more

Card Front Dies Make a Lovely Gift Box and Card Ensemble

Card Front Dies Make a Lovely Gift Box and Card Ensemble

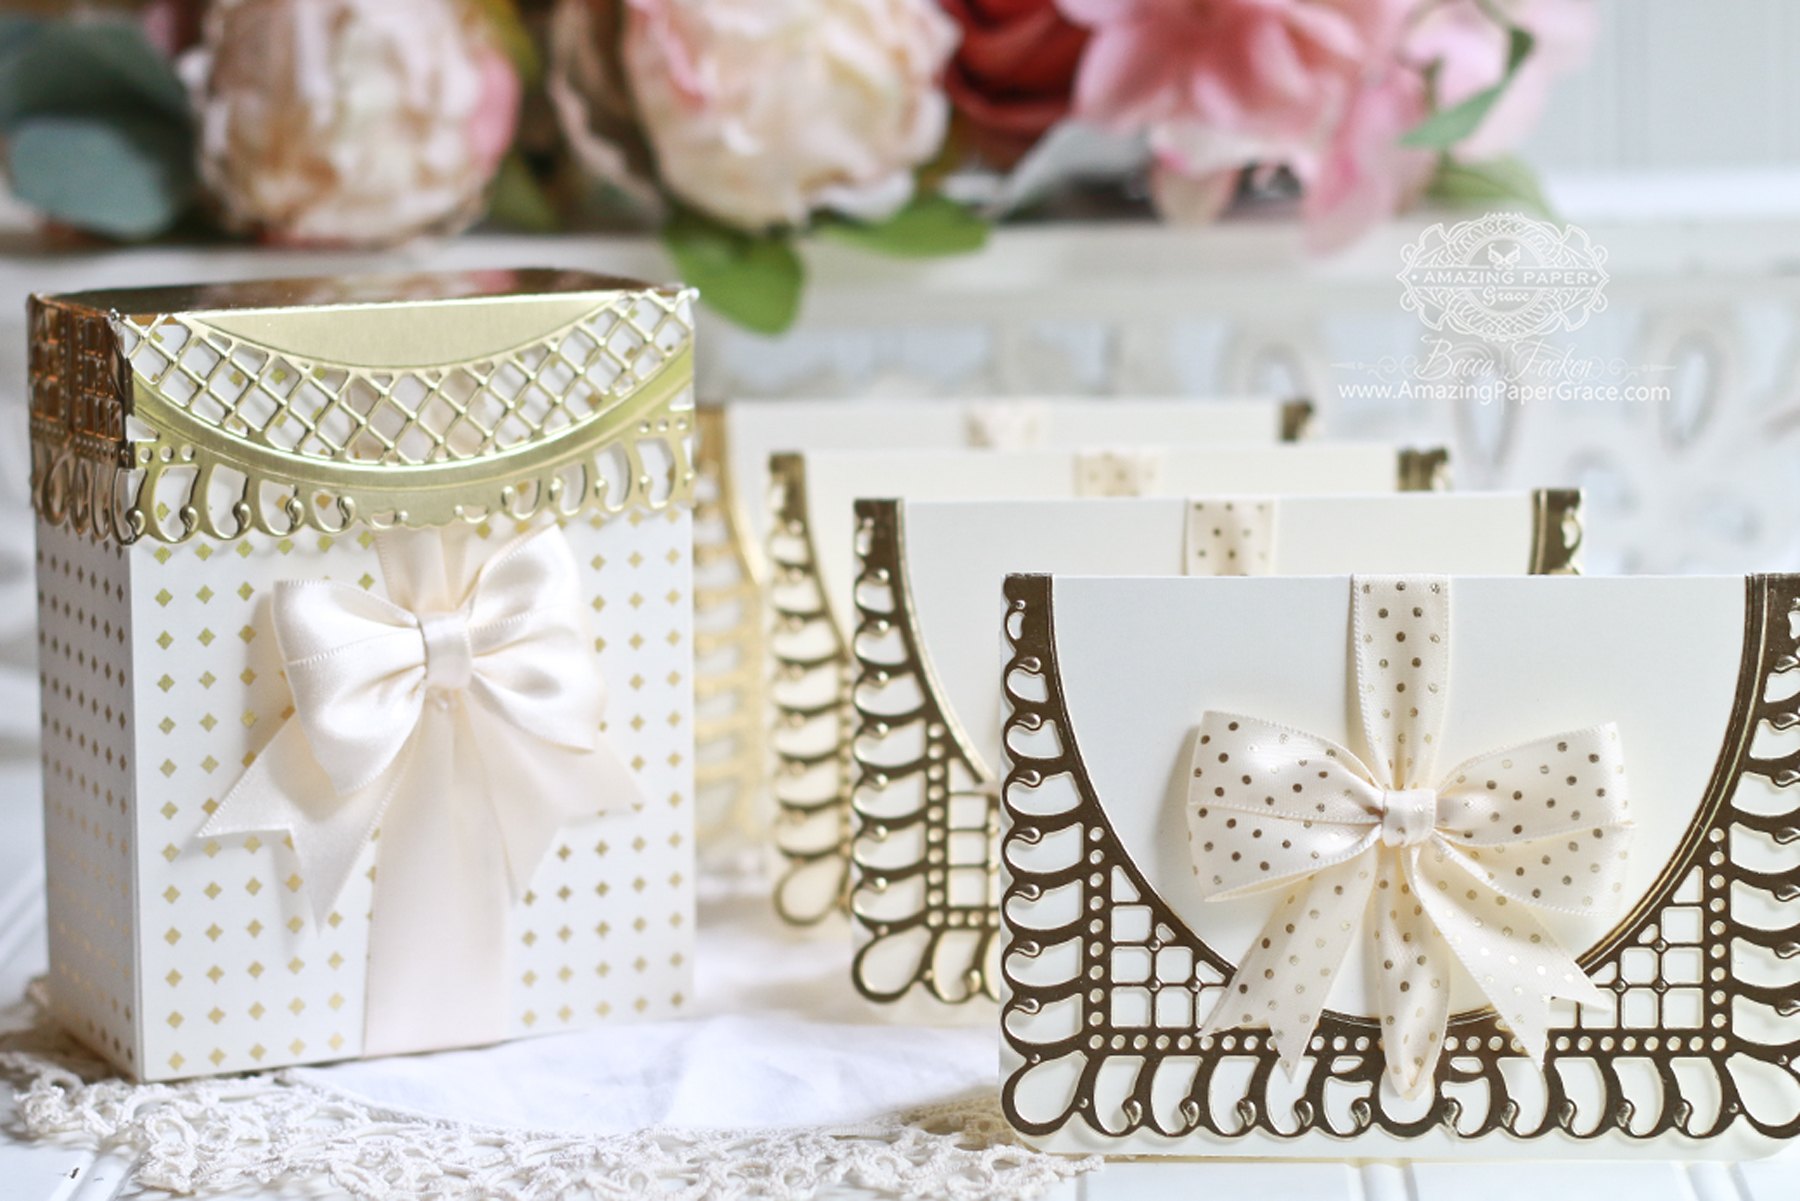
One of my favorite things to do when I first get to play with a card front die is to make it into a box and card ensemble.  Voila, everything matches!  I've done this many times over the years and to my delight, it was quite easy to make a top, box and card for a gift ensemble set out of a new card front die from my Chantilly Paper Lace Collection.  Hi there, I'm Becca Feeken with Amazing Paper Grace and  today I'm so tickled to be using new dies from my Chantilly Paper Lace Collection.  I'm going to get you thinking outside of the box here on the blog today and when we are finished, I'll meet you on my blog -- the Amazing Paper Grace Blog -  where the Creative Team is showing each new die in detail for a Blog Hop and Giveaway. Becca Feeken of amazingpapergrace.com - Gift Card Ensemble made with a card front die called Bella Rose Lattice Layering Die

Card Front Die Design Details:

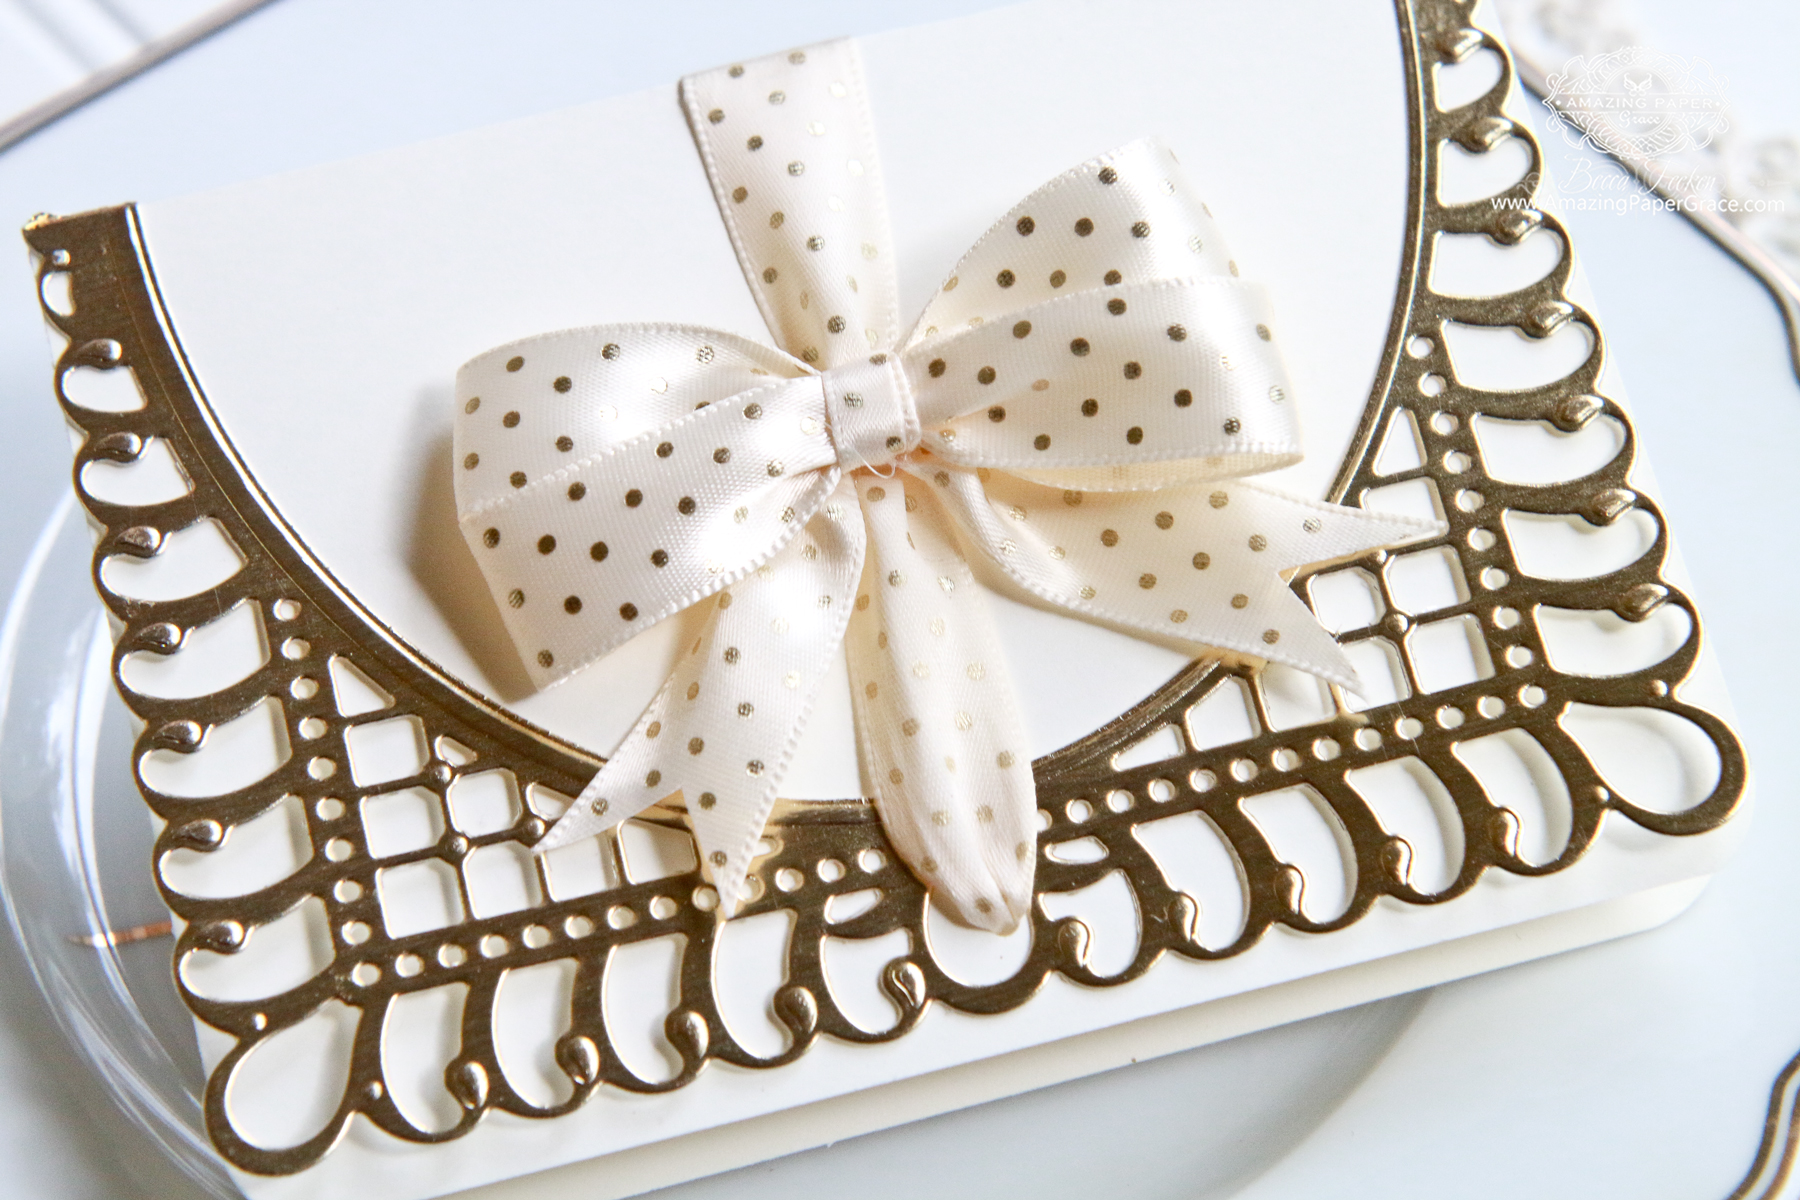
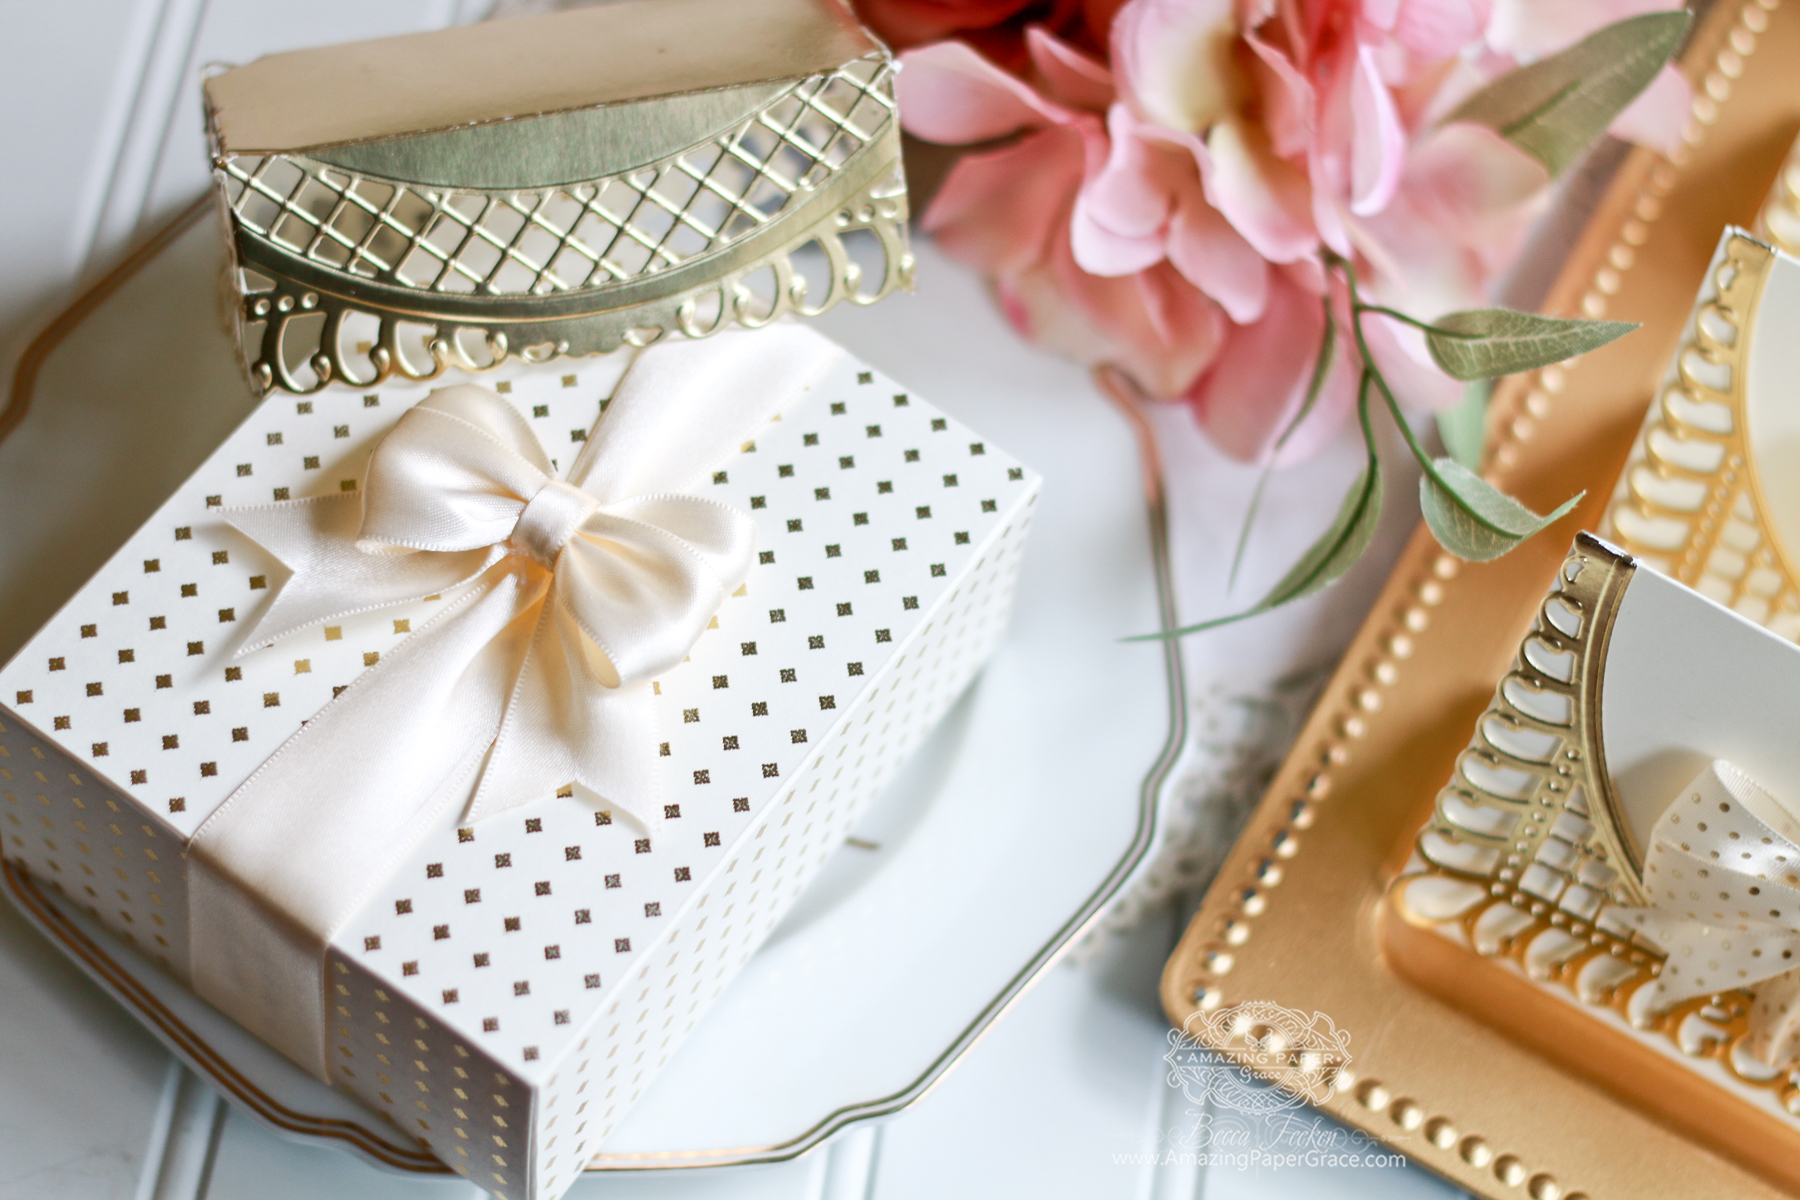
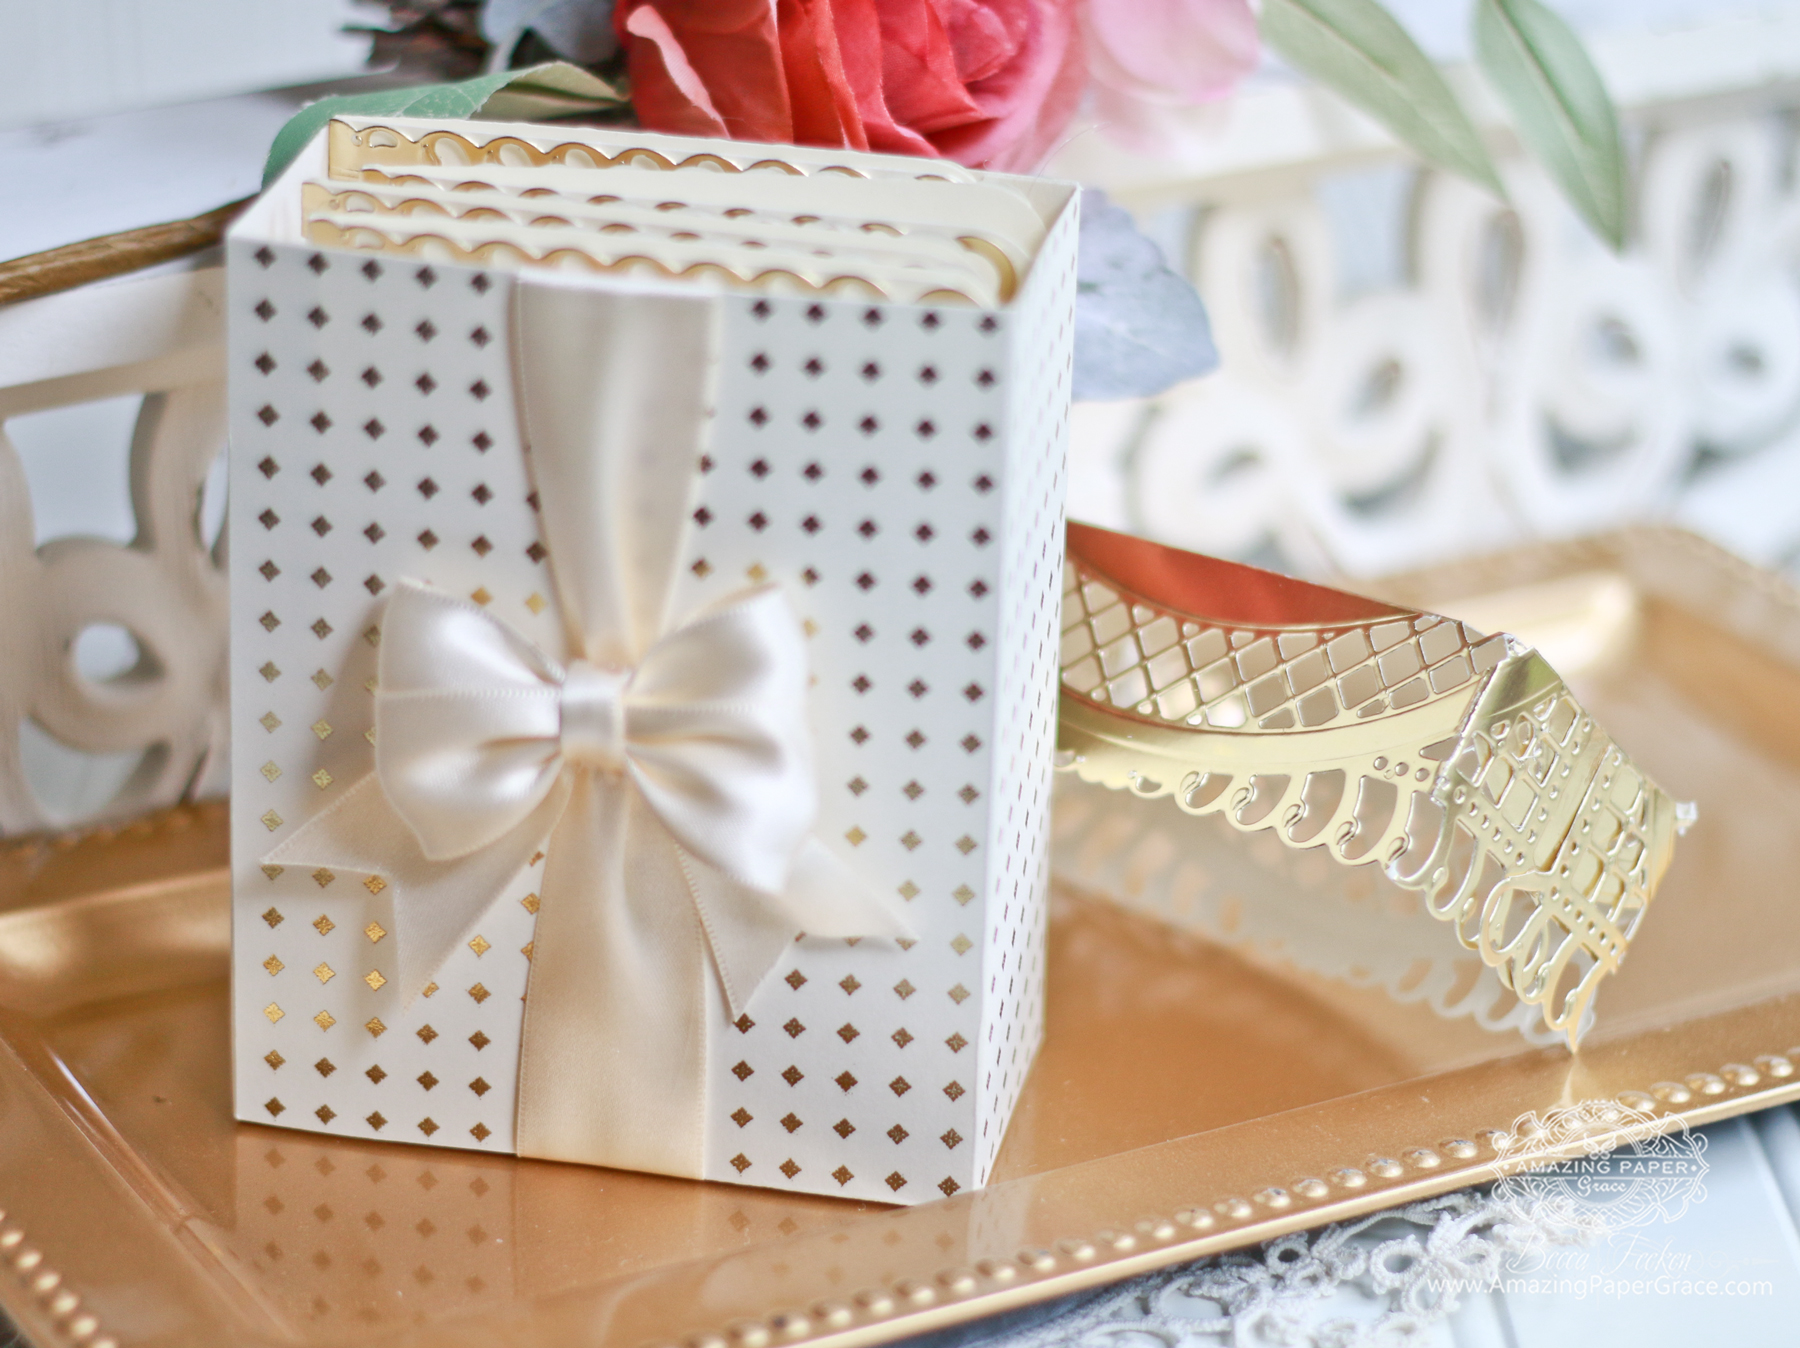
One of the new dies being introduced, and what I am using today, is Bella Rose Lattice Layering Die.  It's a big die with lots of options and you won't be surprised if it is one of my favorites.  The formula is basically the same every time I do this however sometimes the features of the die dictate where lines fall.   Speaking of options, Bella Rose Lattice has many pieces - two are elegant arches that fit in an oval template.  A new set of borders called Lunette Arched Borders also fit into the Bella Rose Lattice template so, I've chosen to use the lattice borders from Lunette Arched Borders to make the top to my box. I will show you all then parts of the ensemble, then I'll  take you through how I put it together  step by step. Becca Feeken of amazingpapergrace.com - Gift Card Ensemble made with a card front die called Bella Rose Lattice Layering Die The cards are so simple which makes it so  easy to make a batch or two in one sitting.  In addition, they can be personalized later with a sweet tag or just left blank! Becca Feeken of amazingpapergrace.com - Gift Card Ensemble made with a card front die called Bella Rose Lattice Layering Die Need a larger real estate area for a large sentiment?  Place the bow at the bottom or the ribbon removed altogether.  These sweet little cards are 3-1/2" tall by 5" wide. Becca Feeken of amazingpapergrace.com - Gift Card Ensemble made with a card front die called Bella Rose Lattice Layering Die The top of the box is created by cutting a decorative card front die and it sits snuggly on top of the box to protect the cards within. Becca Feeken of amazingpapergrace.com - Gift Card Ensemble made with a card front die called Bella Rose Lattice Layering Die The box is 4" wide, 2" deep and 5" tall and  comfortably holds 4 bow adorned cards. Becca Feeken of amazingpapergrace.com - Gift Card Ensemble made with a card front die called Bella Rose Lattice Layering Die Bella Rose Lattice Die accepts additional arching borders like the ones in Lunette Arched Borders.  Here I made an additional box top using another set of inserts.  And now, I'll show you how it goes together.

Instructions:

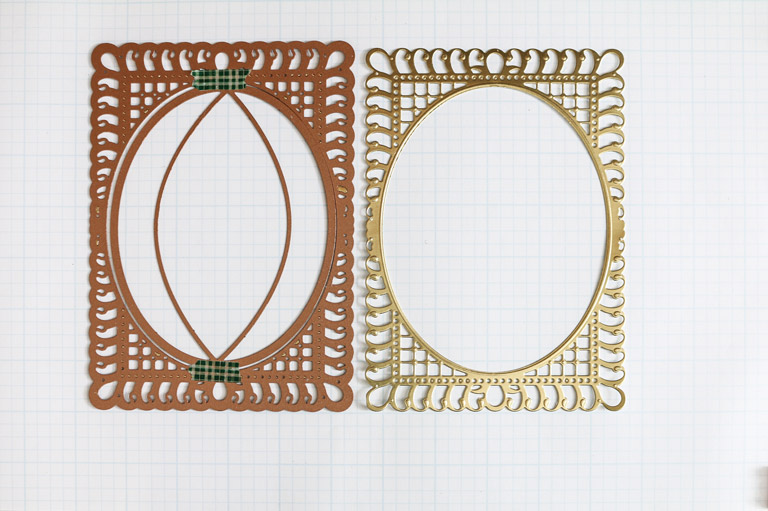
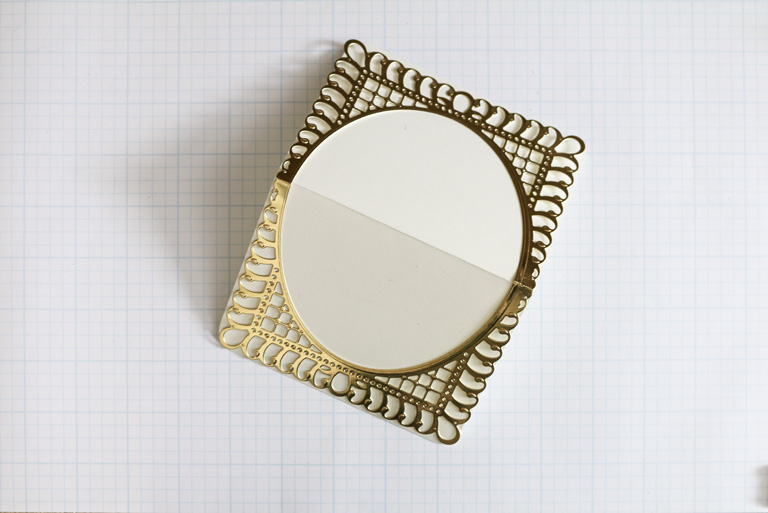
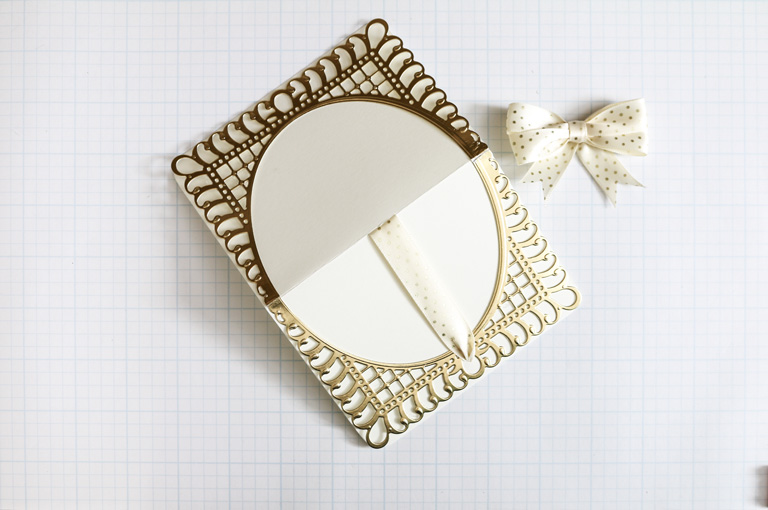
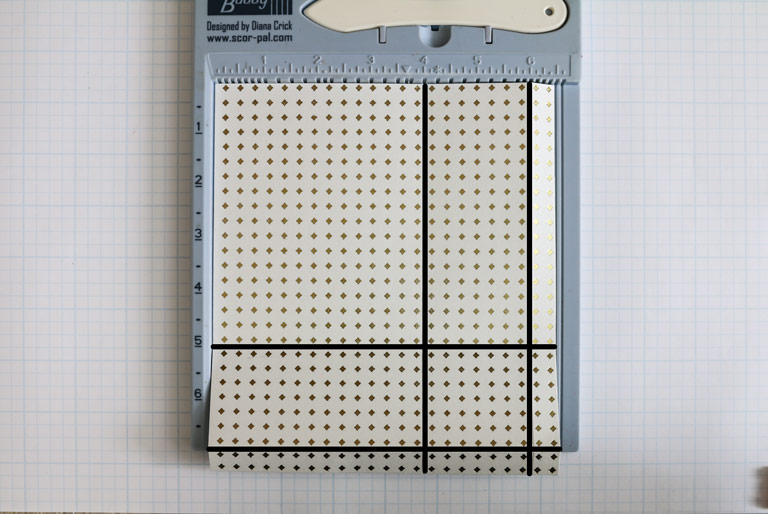
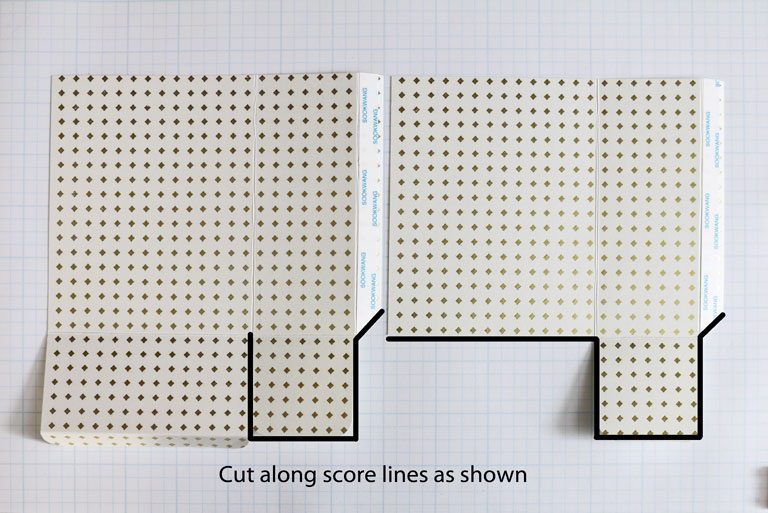
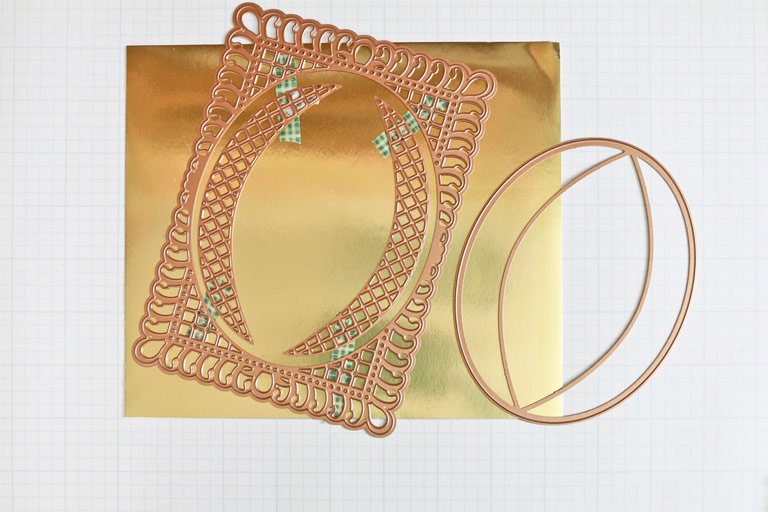
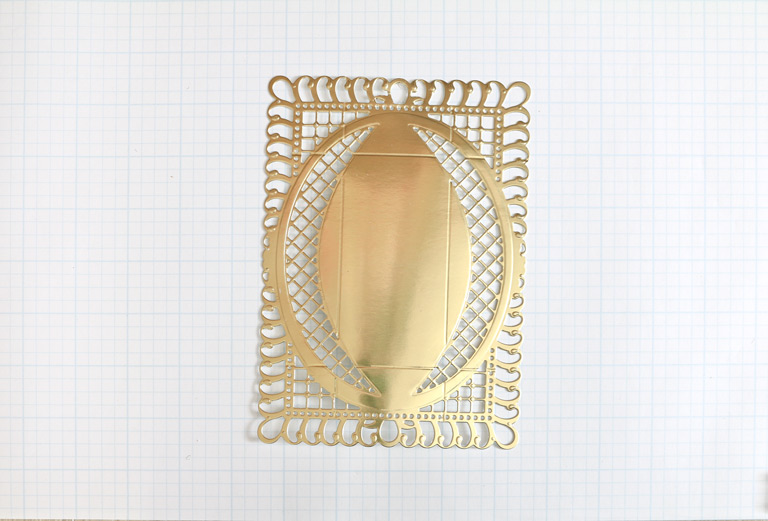
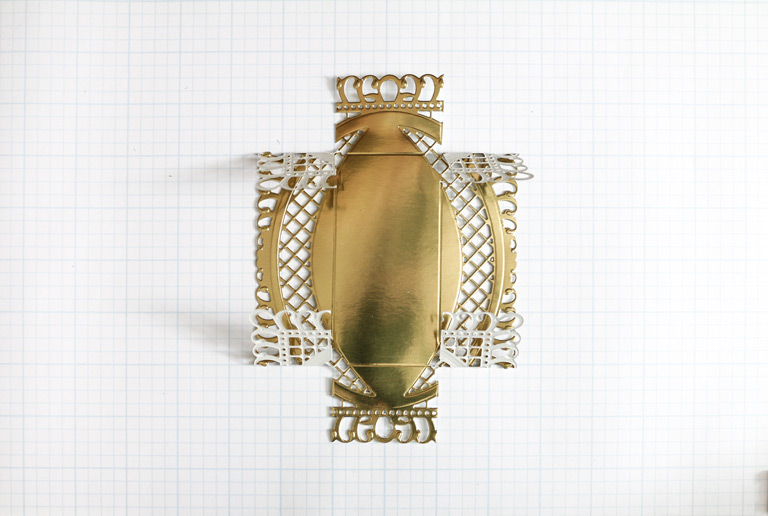
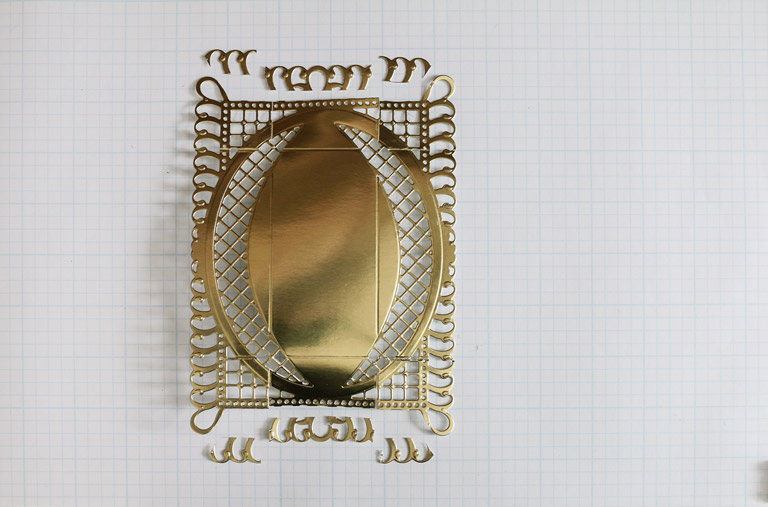
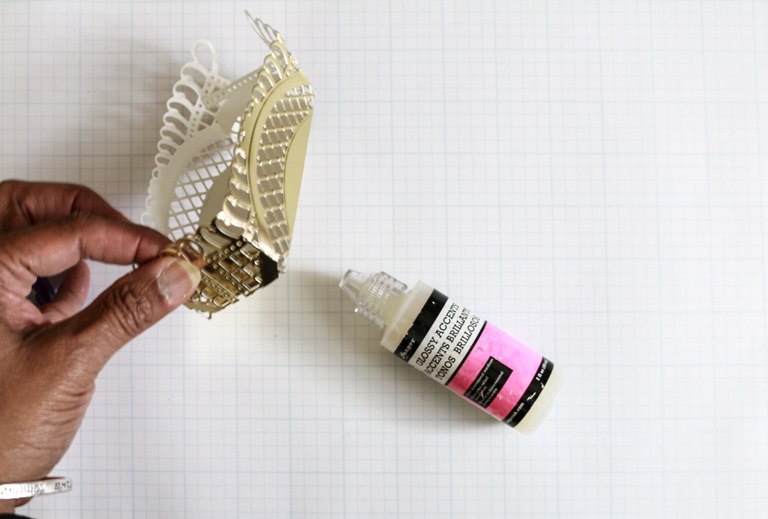
Making the Card (repeat four times) 1.  Cut small card 7" tall by 5" wide; score in half to make a 3-1/2" x 5" landscape card, round corners on bottom two corners. Becca Feeken - Card Ensemble Tutorial Step 01 with Bella Rose Lattice Layering Die 2.  Cut/emboss Bella Rose Lattice Layering Die including the large oval die. Becca Feeken - Card Ensemble Tutorial Step 02 with Bella Rose Lattice Layering Die 3.  Hand fold the Bella Rose die cut in half and glue to card base. Becca Feeken - Card Ensemble Tutorial Step 03 with Bella Rose Lattice Layering Die 4.  Make a 1" slit along the middle of the fold card base at the fold line.  Then punch a hole in the large loop on the bottom of the card and thread ribbon up through hole and down through slit.  Secure ribbon with tape.  Add a pre-tied bow to ribbon at bottom, center of card. Making the Box Bottom 1.  Cut two pieces of sturdy card stock to 6-1/2" x 7-1/2" Becca Feeken - Card Ensemble Tutorial Step 04 with Bella Rose Lattice Layering Die 2.  With the 6-1/2" edge at the top of a scoreboard, score at 4" and 6" then with the 7-1/2" edge at the top of a scoreboard, score at 5" and 7" Becca Feeken - Card Ensemble Tutorial Step 05 with Bella Rose Lattice Layering Die 3.  Cut as shown, round corners and add ScorTape to right side flaps. 4.  Remove tape liners and lift right piece onto left flap to make one piece.  Fold right flap under then fold entire piece in center (wrong sides together) to engage the remaining flap.  Pop up box from flat to dimensional and close bottom tabs. Making the Box Top Becca Feeken - Card Ensemble Tutorial Step 06 with Bella Rose Lattice Layering Die 1.  Cut/emboss Bella Rose Lattice Layering Die, excluding the large oval die but including the arched inserts from Lunette Borders. Tip:  Placing the border pieces is easy if you use the large oval as a guide but then remove so as to not cut out the oval. Becca Feeken - Card Ensemble Tutorial Step 07 with Bella Rose Lattice Layering Die 2.  Score 1-1/2" from each edge turning 90 degrees for each score and as a result, that will give you a total of four score lines. Becca Feeken - Card Ensemble Tutorial Step 08 with Bella Rose Lattice Layering Die 3.  Cut as shown above. Becca Feeken - Card Ensemble Tutorial Step 09 with Bella Rose Lattice Layering Die 4.  Trim loops from each end as shown above. Becca Feeken - Card Ensemble Tutorial Step 10 with Bella Rose Lattice Layering Die 5.  Flex all score lines, bend flaps around end of top and glue sparingly. So there you have it, a card box and cards that match from a card front die.  By switching the arched borders you could have one of three different top options for your gift giving!   Sending hugs! Becca Feeken – www.amazingpapergrace.com

Spellbinders Supplies:

Other Supplies: Neenah Classic Crest Natural White 80lb Smooth Card Stock, The Fine Touch Metallic Poster Board, Gold/Cream Design Paper, Offray 5/8" Satin Ribbon, 3M Foam Tape, Corner Rounder, ScorTape

Read more

Card Front Dies Make a Lovely Gift Box and Card Ensemble

Card Front Dies Make a Lovely Gift Box and Card Ensemble

One of my favorite things to do when I first get to play with a card front die is to make it into a box and card ensemble.  Voila, everything matches!  I've done this many times over the years and to my delight, it was quite easy to make a top, box and card for a gift ensemble set out of a new card front die from my Chantilly Paper Lace Collection.  Hi there, I'm Becca Feeken with Amazing Paper Grace and  today I'm so tickled to be using new dies from my Chantilly Paper Lace Collection.  I'm going to get you thinking outside of the box here on the blog today and when we are finished, I'll meet you on my blog -- the Amazing Paper Grace Blog -  where the Creative Team is showing each new die in detail for a Blog Hop and Giveaway. Becca Feeken of amazingpapergrace.com - Gift Card Ensemble made with a card front die called Bella Rose Lattice Layering Die

Card Front Die Design Details:

One of the new dies being introduced, and what I am using today, is Bella Rose Lattice Layering Die.  It's a big die with lots of options and you won't be surprised if it is one of my favorites.  The formula is basically the same every time I do this however sometimes the features of the die dictate where lines fall.   Speaking of options, Bella Rose Lattice has many pieces - two are elegant arches that fit in an oval template.  A new set of borders called Lunette Arched Borders also fit into the Bella Rose Lattice template so, I've chosen to use the lattice borders from Lunette Arched Borders to make the top to my box. I will show you all then parts of the ensemble, then I'll  take you through how I put it together  step by step. Becca Feeken of amazingpapergrace.com - Gift Card Ensemble made with a card front die called Bella Rose Lattice Layering Die The cards are so simple which makes it so  easy to make a batch or two in one sitting.  In addition, they can be personalized later with a sweet tag or just left blank! Becca Feeken of amazingpapergrace.com - Gift Card Ensemble made with a card front die called Bella Rose Lattice Layering Die Need a larger real estate area for a large sentiment?  Place the bow at the bottom or the ribbon removed altogether.  These sweet little cards are 3-1/2" tall by 5" wide. Becca Feeken of amazingpapergrace.com - Gift Card Ensemble made with a card front die called Bella Rose Lattice Layering Die The top of the box is created by cutting a decorative card front die and it sits snuggly on top of the box to protect the cards within. Becca Feeken of amazingpapergrace.com - Gift Card Ensemble made with a card front die called Bella Rose Lattice Layering Die The box is 4" wide, 2" deep and 5" tall and  comfortably holds 4 bow adorned cards. Becca Feeken of amazingpapergrace.com - Gift Card Ensemble made with a card front die called Bella Rose Lattice Layering Die Bella Rose Lattice Die accepts additional arching borders like the ones in Lunette Arched Borders.  Here I made an additional box top using another set of inserts.  And now, I'll show you how it goes together.

Instructions:

Making the Card (repeat four times) 1.  Cut small card 7" tall by 5" wide; score in half to make a 3-1/2" x 5" landscape card, round corners on bottom two corners. Becca Feeken - Card Ensemble Tutorial Step 01 with Bella Rose Lattice Layering Die 2.  Cut/emboss Bella Rose Lattice Layering Die including the large oval die. Becca Feeken - Card Ensemble Tutorial Step 02 with Bella Rose Lattice Layering Die 3.  Hand fold the Bella Rose die cut in half and glue to card base. Becca Feeken - Card Ensemble Tutorial Step 03 with Bella Rose Lattice Layering Die 4.  Make a 1" slit along the middle of the fold card base at the fold line.  Then punch a hole in the large loop on the bottom of the card and thread ribbon up through hole and down through slit.  Secure ribbon with tape.  Add a pre-tied bow to ribbon at bottom, center of card. Making the Box Bottom 1.  Cut two pieces of sturdy card stock to 6-1/2" x 7-1/2" Becca Feeken - Card Ensemble Tutorial Step 04 with Bella Rose Lattice Layering Die 2.  With the 6-1/2" edge at the top of a scoreboard, score at 4" and 6" then with the 7-1/2" edge at the top of a scoreboard, score at 5" and 7" Becca Feeken - Card Ensemble Tutorial Step 05 with Bella Rose Lattice Layering Die 3.  Cut as shown, round corners and add ScorTape to right side flaps. 4.  Remove tape liners and lift right piece onto left flap to make one piece.  Fold right flap under then fold entire piece in center (wrong sides together) to engage the remaining flap.  Pop up box from flat to dimensional and close bottom tabs. Making the Box Top Becca Feeken - Card Ensemble Tutorial Step 06 with Bella Rose Lattice Layering Die 1.  Cut/emboss Bella Rose Lattice Layering Die, excluding the large oval die but including the arched inserts from Lunette Borders. Tip:  Placing the border pieces is easy if you use the large oval as a guide but then remove so as to not cut out the oval. Becca Feeken - Card Ensemble Tutorial Step 07 with Bella Rose Lattice Layering Die 2.  Score 1-1/2" from each edge turning 90 degrees for each score and as a result, that will give you a total of four score lines. Becca Feeken - Card Ensemble Tutorial Step 08 with Bella Rose Lattice Layering Die 3.  Cut as shown above. Becca Feeken - Card Ensemble Tutorial Step 09 with Bella Rose Lattice Layering Die 4.  Trim loops from each end as shown above. Becca Feeken - Card Ensemble Tutorial Step 10 with Bella Rose Lattice Layering Die 5.  Flex all score lines, bend flaps around end of top and glue sparingly. So there you have it, a card box and cards that match from a card front die.  By switching the arched borders you could have one of three different top options for your gift giving!   Sending hugs! Becca Feeken – www.amazingpapergrace.com

Spellbinders Supplies:

Other Supplies: Neenah Classic Crest Natural White 80lb Smooth Card Stock, The Fine Touch Metallic Poster Board, Gold/Cream Design Paper, Offray 5/8" Satin Ribbon, 3M Foam Tape, Corner Rounder, ScorTape

Read more