☃️ Banner logo ☃️ Up to 50% Off ☃️

Spellbinders Blog

Card Making Challenge! Take One - Tammy Tutterow

Card Making Challenge! Take One - Tammy Tutterow

Hello Spellbinders' fans! Thank you so much for joining us this week as we host our first Card Making Challenge! We asked a few of our designers and spellbloggers to share their take on one of our cards kits - December 2016 Card Kit of the Month and we are excited to show you what they all made!

Join us today and during the next few days as we share projects from Tammy Tutterow, Stephanie Low, Sharyn Sowell, Debi Adams and Jennifer Snyder.

First up we have a lovely mini book from Tammy Tutterow!

Card Making Challenge! Take One - Tammy Tutterow

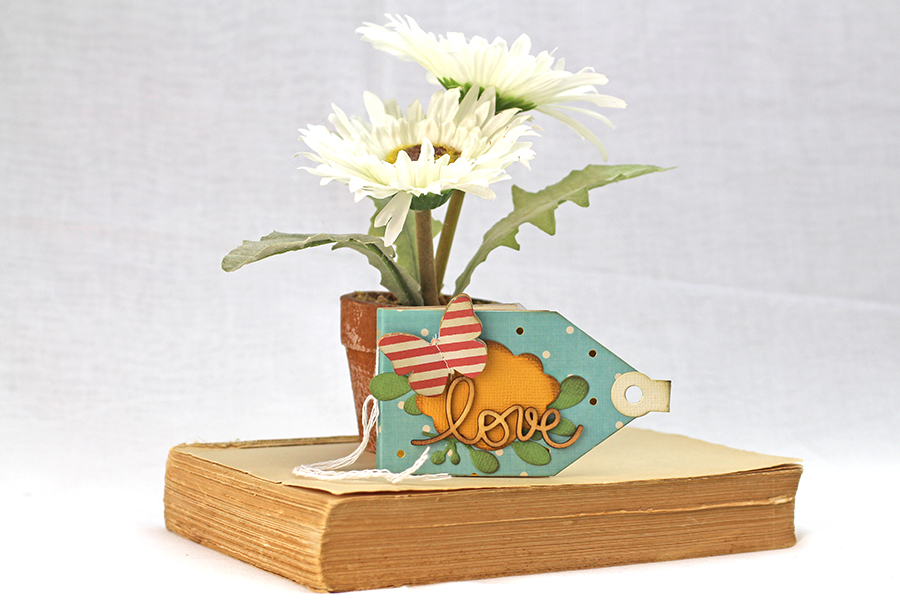
I love quick and easy little projects that I can assemble in minutes that make use of scraps and left over embellishments.  My Mini Tag Book Die is perfect for both!  It is easy to assemble and is perfect for using up little bits and pieces left over from scraps and kits.  I used the Spellbinders December 2016 Card Kit of the Month along with the Mini Tag Book die to create this cute mini book.

Instructions:

Card Making Challenge! Take One - Tammy Tutterow

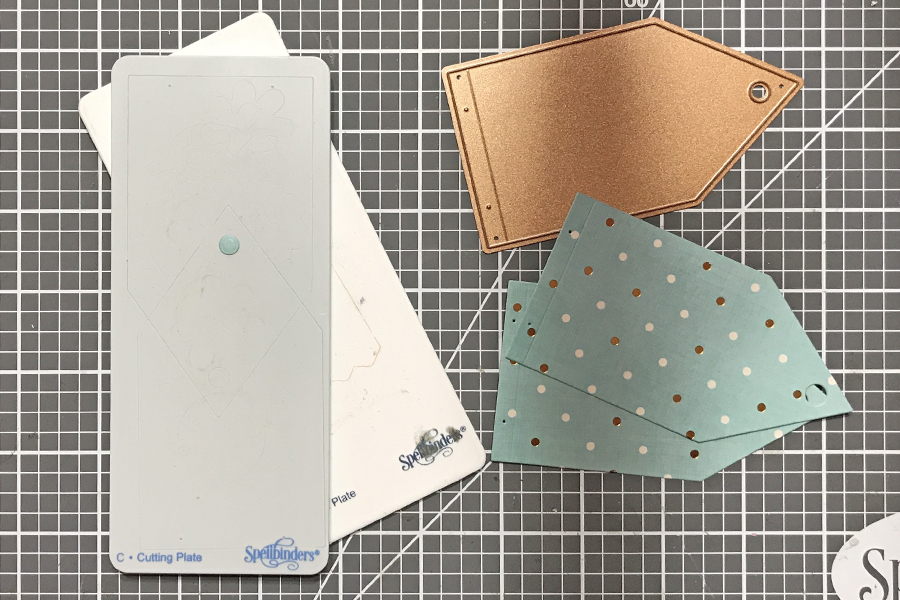
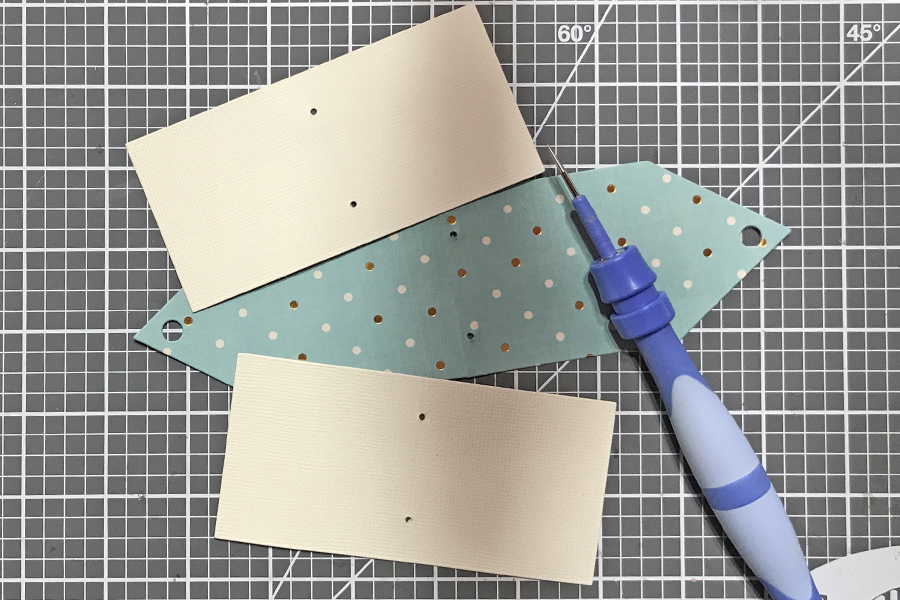
Die cut two cover pieces from pattern paper with the Mini Tag Book die set. Note - All the pieces from the Mini Tag Book die set fit in the Prizm machine!

Card Making Challenge! Take One - Tammy Tutterow

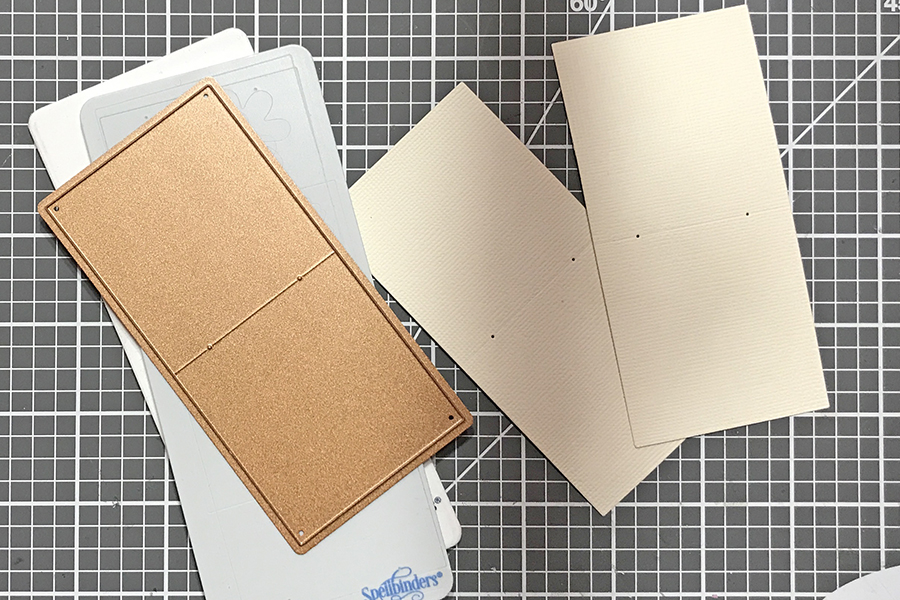
Die cut two pages from cardstock.

Card Making Challenge! Take One - Tammy Tutterow

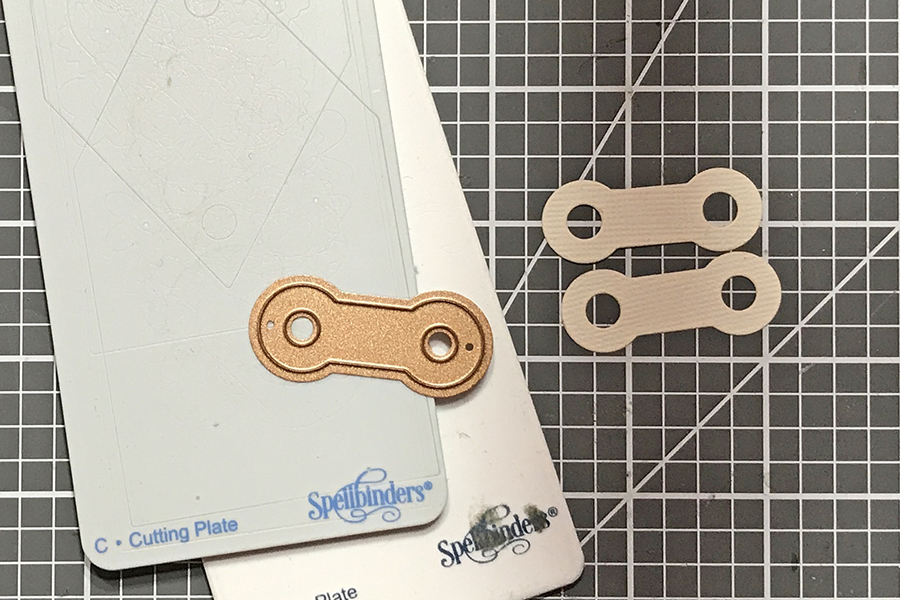
Die cut two reinforcers from cardstock.

Card Making Challenge! Take One - Tammy Tutterow

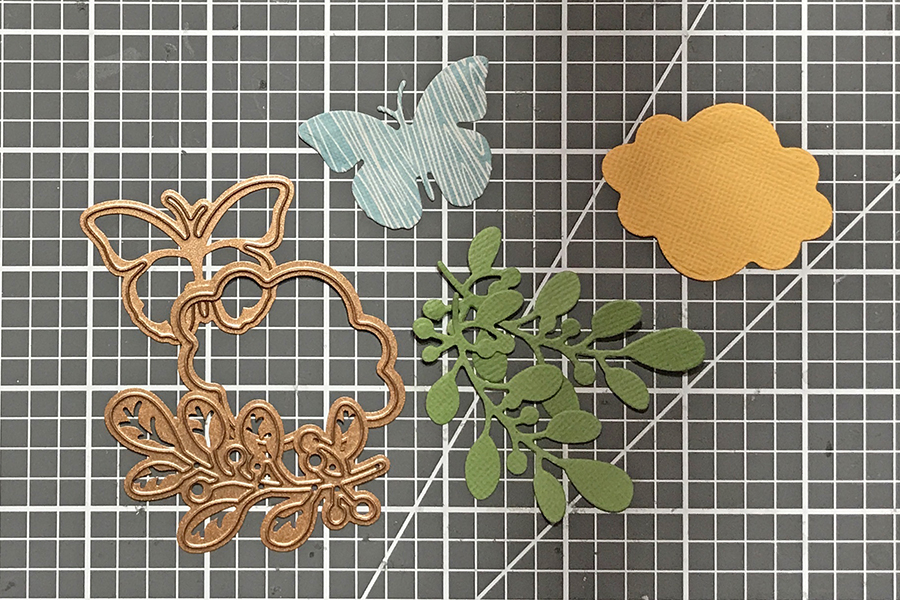
Die cut embellishments from pattern paper and cardstock using dies from the monthly kit.

Card Making Challenge! Take One - Tammy Tutterow

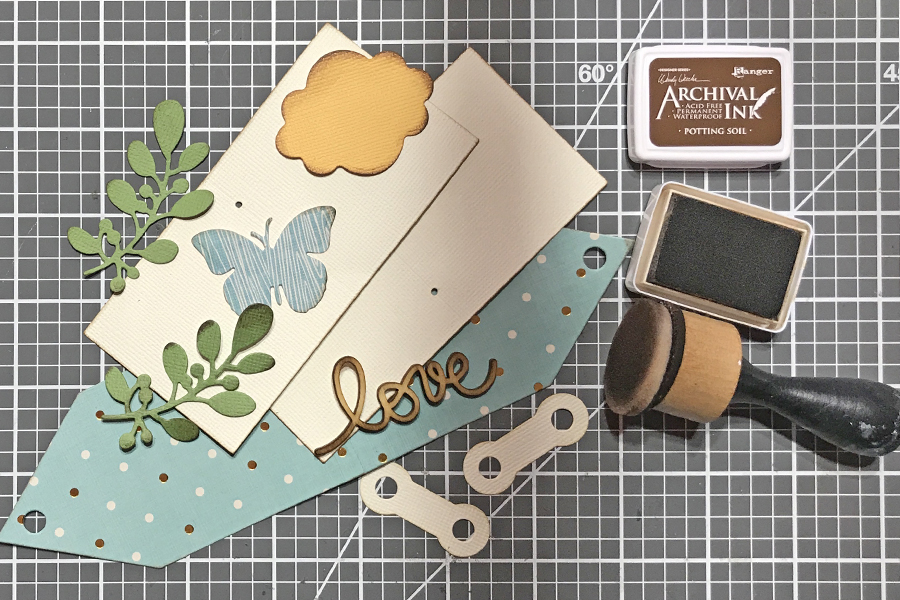
Brush the edges of each piece with brown ink using an ink blending tool.

Card Making Challenge! Take One - Tammy Tutterow

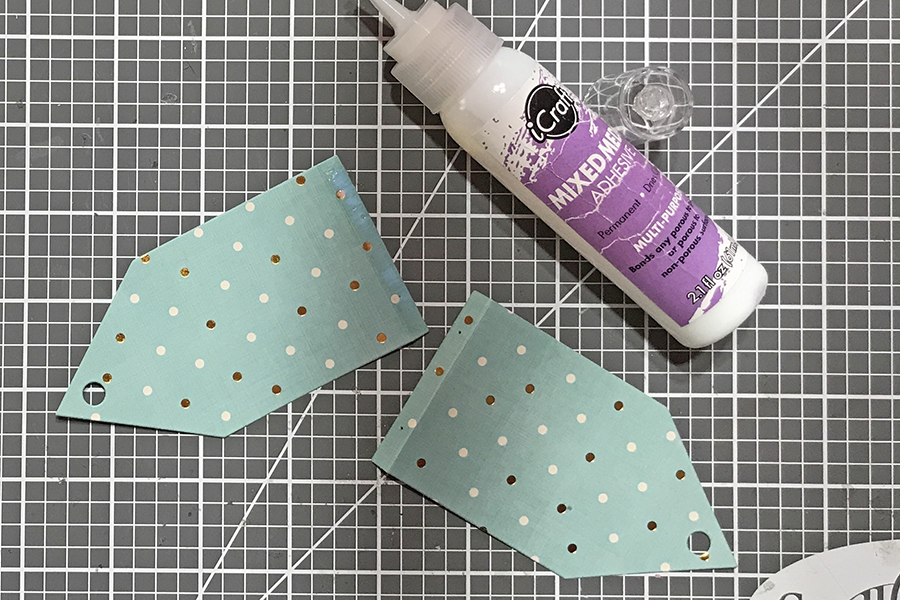
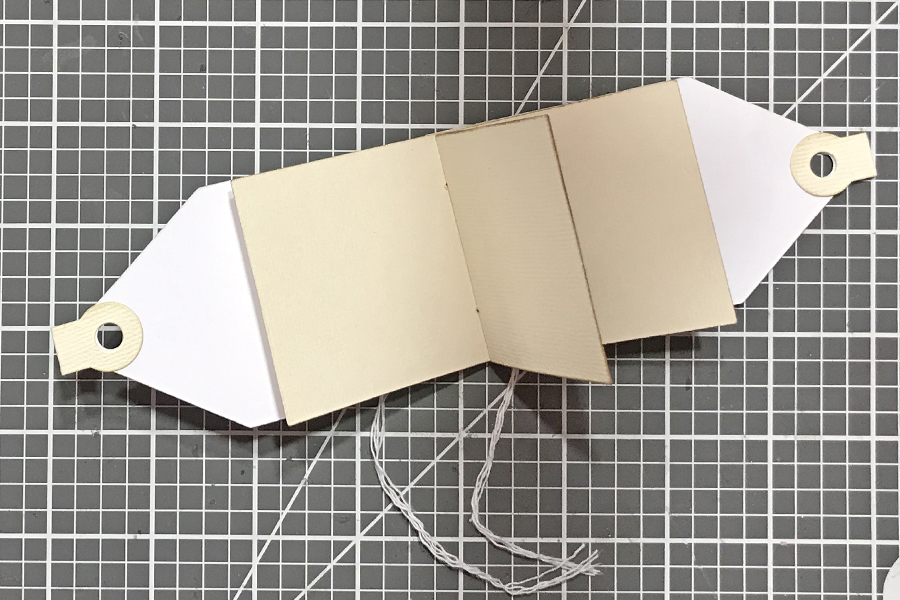
Fold the two cover pieces along the score line.  Add a thin line of adhesive to one of the covers in the space between the edge and the fold (the space with the two small holes).

Card Making Challenge! Take One - Tammy Tutterow

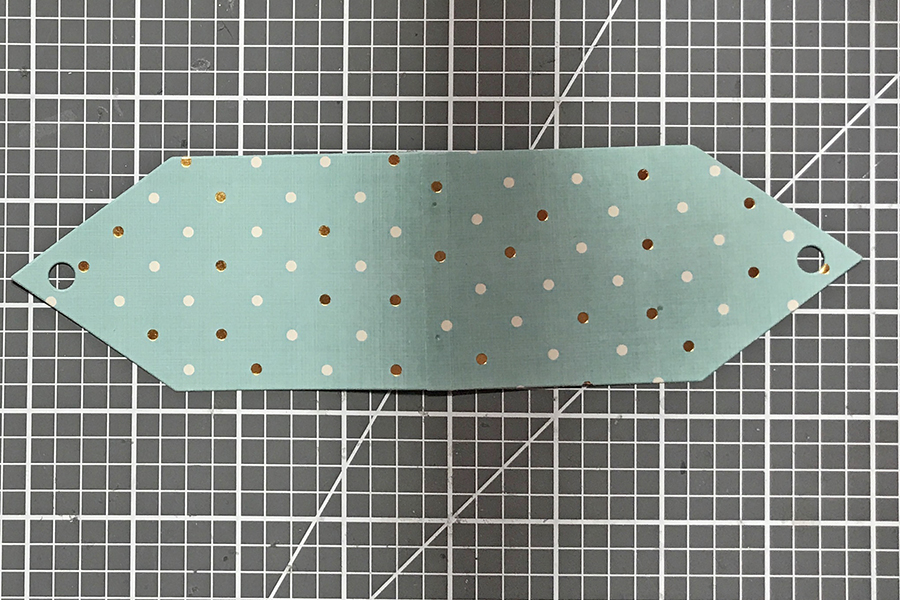
Match the two small pin holes on one cover with the pin holes on the cover with the adhesive.  The two overlapped sections create the spine of the book.

Card Making Challenge! Take One - Tammy Tutterow

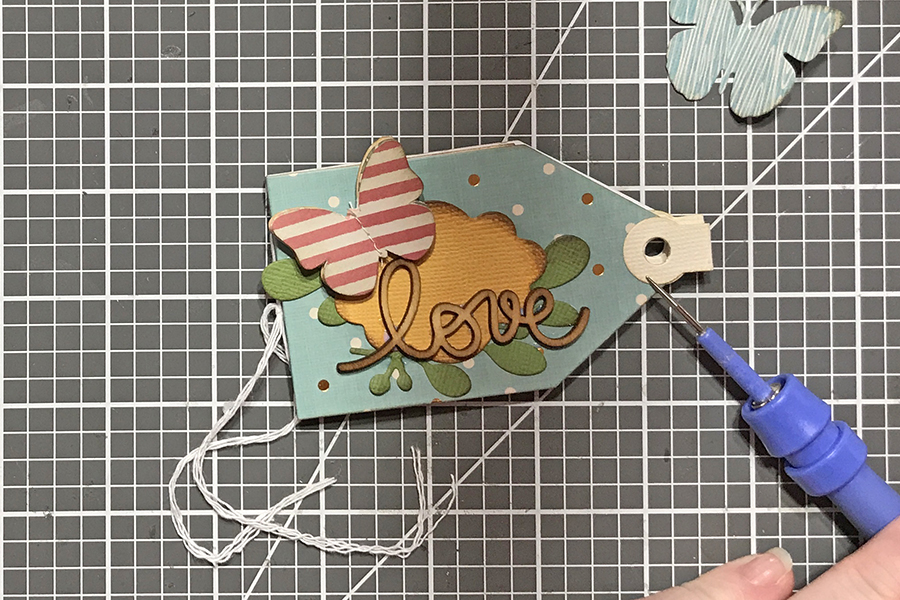
Use a Tool ’n One to pierce through the holes in the center of the two pages and the spine of the book.

Card Making Challenge! Take One - Tammy Tutterow

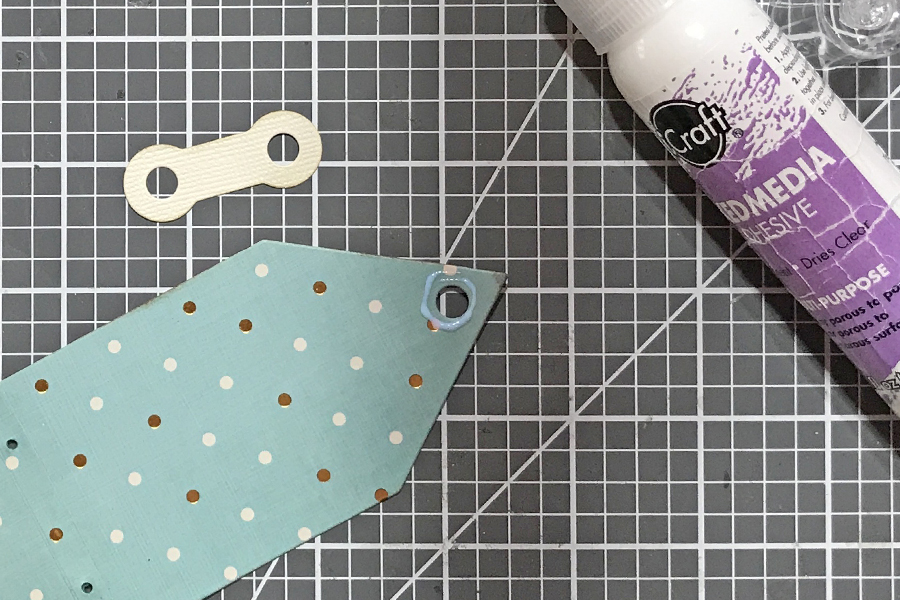
Place a thin line of adhesive around the large hole on the cover.

Card Making Challenge! Take One - Tammy Tutterow

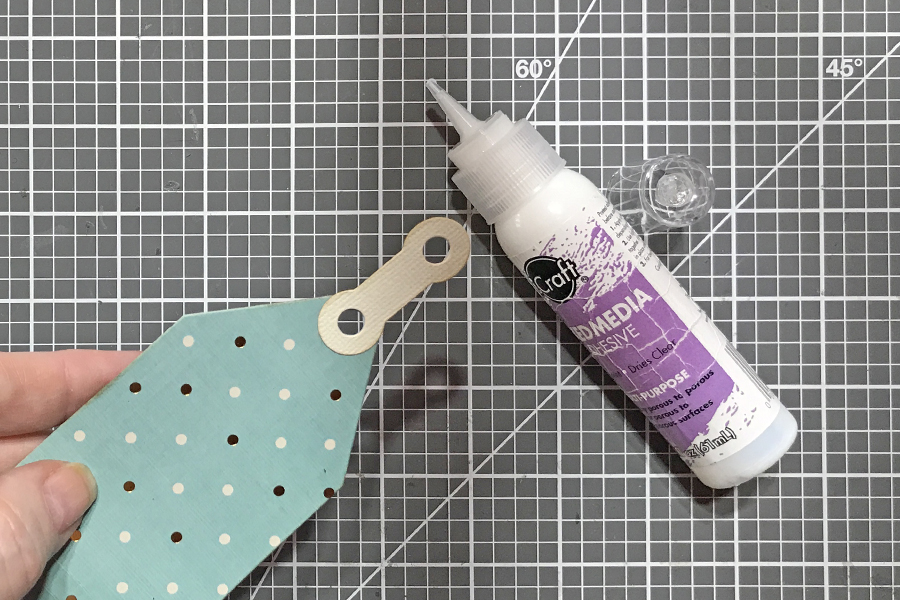
Place one of the reinforcers over the hole.

Card Making Challenge! Take One - Tammy Tutterow

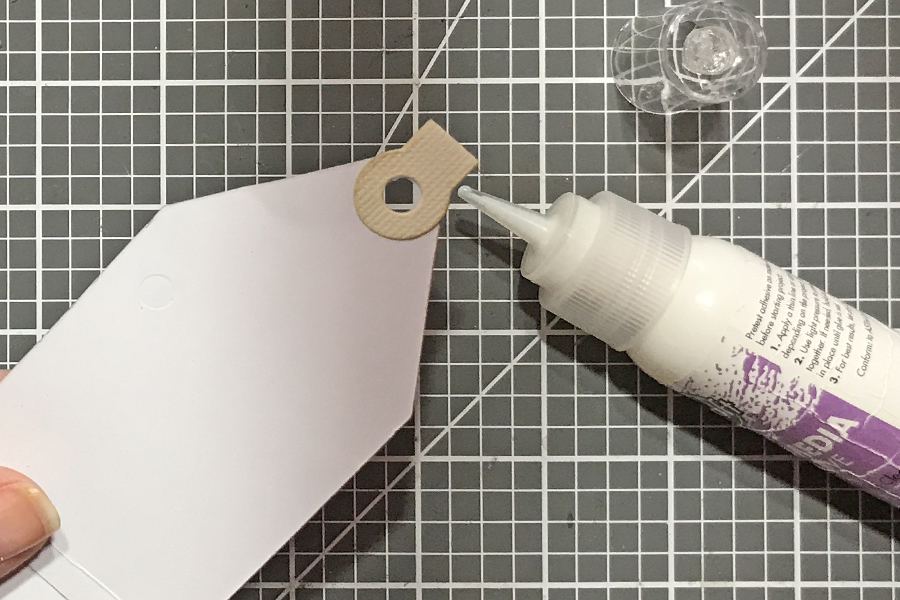
When the adhesive is set, fold the reinforcer over to the back side of the cover.  Adhere in place.  Repeat the same process for the other hole on the back cover.

Card Making Challenge! Take One - Tammy Tutterow

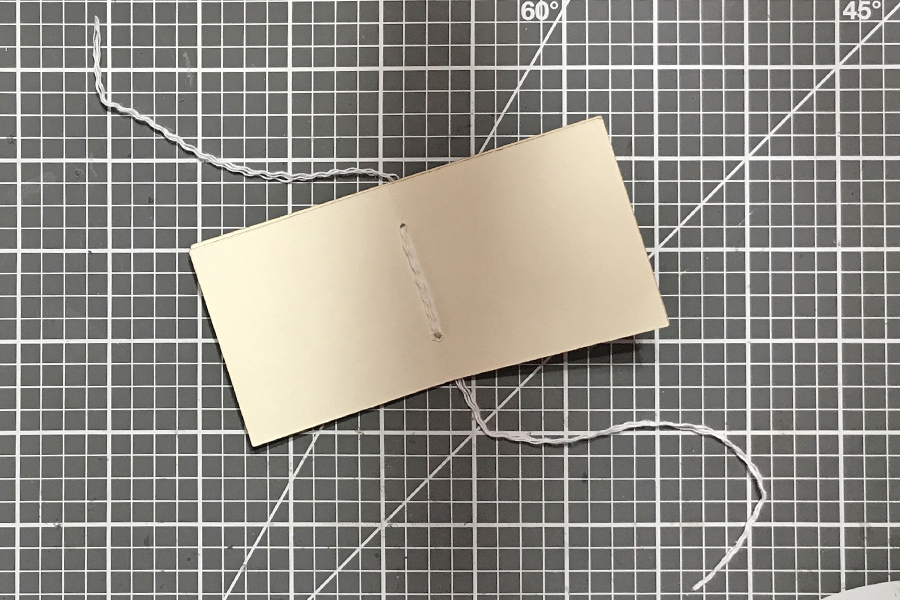
Stack the two pages together.  Feed fiber through the two sets of holes.

Card Making Challenge! Take One - Tammy Tutterow

Feed the ends of the fiber through the holes in the spine on the inside of the book.

Card Making Challenge! Take One - Tammy Tutterow

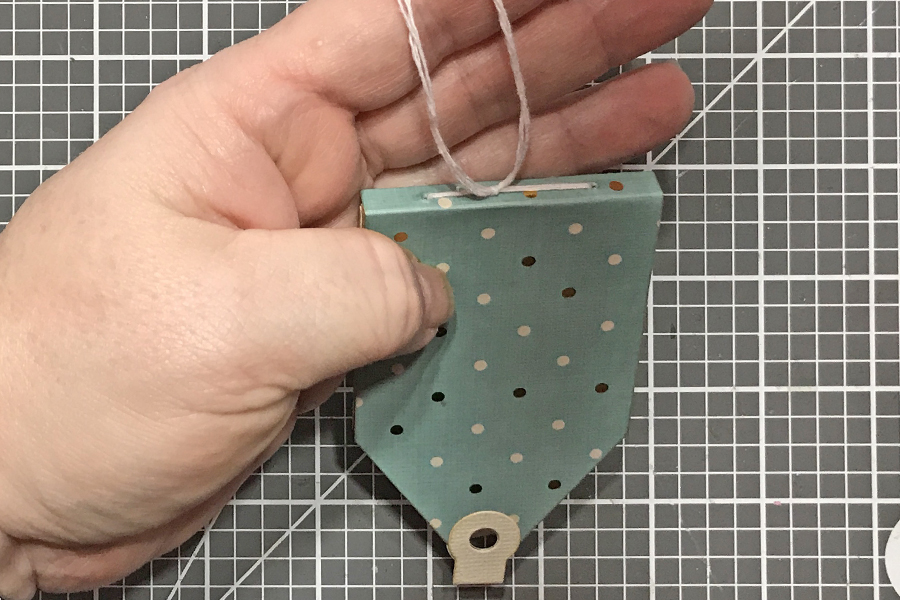
Pull the fiber to the outside of the book.  Tie it firmly against the spine of the book.

Card Making Challenge! Take One - Tammy Tutterow

You can embellish the inside with small insta prints, itty bits of ephemera, and favorite tiny quotes!

Card Making Challenge! Take One - Tammy Tutterow

Layer your die cut embellishments and other bits from the kit on the cover.

Card Making Challenge! Take One - Tammy Tutterow

How cute is that mini book?  So cute!  And even better, a mini book cut from scraps and assembled in under 30 minutes!

Spellbinders Supplies:

Other supplies: ink; ink blending tool; adhesive. Tammy

Read more

Card Making Challenge! Take One - Tammy Tutterow

Card Making Challenge! Take One - Tammy Tutterow

Hello Spellbinders' fans! Thank you so much for joining us this week as we host our first Card Making Challenge! We asked a few of our designers and spellbloggers to share their take on one of our cards kits - December 2016 Card Kit of the Month and we are excited to show you what they all made!

Join us today and during the next few days as we share projects from Tammy Tutterow, Stephanie Low, Sharyn Sowell, Debi Adams and Jennifer Snyder.

First up we have a lovely mini book from Tammy Tutterow!

Card Making Challenge! Take One - Tammy Tutterow

I love quick and easy little projects that I can assemble in minutes that make use of scraps and left over embellishments.  My Mini Tag Book Die is perfect for both!  It is easy to assemble and is perfect for using up little bits and pieces left over from scraps and kits.  I used the Spellbinders December 2016 Card Kit of the Month along with the Mini Tag Book die to create this cute mini book.

Instructions:

Card Making Challenge! Take One - Tammy Tutterow

Die cut two cover pieces from pattern paper with the Mini Tag Book die set. Note - All the pieces from the Mini Tag Book die set fit in the Prizm machine!

Card Making Challenge! Take One - Tammy Tutterow

Die cut two pages from cardstock.

Card Making Challenge! Take One - Tammy Tutterow

Die cut two reinforcers from cardstock.

Card Making Challenge! Take One - Tammy Tutterow

Die cut embellishments from pattern paper and cardstock using dies from the monthly kit.

Card Making Challenge! Take One - Tammy Tutterow

Brush the edges of each piece with brown ink using an ink blending tool.

Card Making Challenge! Take One - Tammy Tutterow

Fold the two cover pieces along the score line.  Add a thin line of adhesive to one of the covers in the space between the edge and the fold (the space with the two small holes).

Card Making Challenge! Take One - Tammy Tutterow

Match the two small pin holes on one cover with the pin holes on the cover with the adhesive.  The two overlapped sections create the spine of the book.

Card Making Challenge! Take One - Tammy Tutterow

Use a Tool ’n One to pierce through the holes in the center of the two pages and the spine of the book.

Card Making Challenge! Take One - Tammy Tutterow

Place a thin line of adhesive around the large hole on the cover.

Card Making Challenge! Take One - Tammy Tutterow

Place one of the reinforcers over the hole.

Card Making Challenge! Take One - Tammy Tutterow

When the adhesive is set, fold the reinforcer over to the back side of the cover.  Adhere in place.  Repeat the same process for the other hole on the back cover.

Card Making Challenge! Take One - Tammy Tutterow

Stack the two pages together.  Feed fiber through the two sets of holes.

Card Making Challenge! Take One - Tammy Tutterow

Feed the ends of the fiber through the holes in the spine on the inside of the book.

Card Making Challenge! Take One - Tammy Tutterow

Pull the fiber to the outside of the book.  Tie it firmly against the spine of the book.

Card Making Challenge! Take One - Tammy Tutterow

You can embellish the inside with small insta prints, itty bits of ephemera, and favorite tiny quotes!

Card Making Challenge! Take One - Tammy Tutterow

Layer your die cut embellishments and other bits from the kit on the cover.

Card Making Challenge! Take One - Tammy Tutterow

How cute is that mini book?  So cute!  And even better, a mini book cut from scraps and assembled in under 30 minutes!

Spellbinders Supplies:

Other supplies: ink; ink blending tool; adhesive. Tammy

Read more

One Die 5 Ways - What's The Point Steel Rule Die

One Die 5 Ways - What's The Point Steel Rule Die

There's a number of creative ways each of our die designs can be used. Today we have a fun blog post sharing 5 projects all created with the help of one die - What's The Point Steel Rule Die.

One Die 5 Ways - What's The Point Steel Rule Die

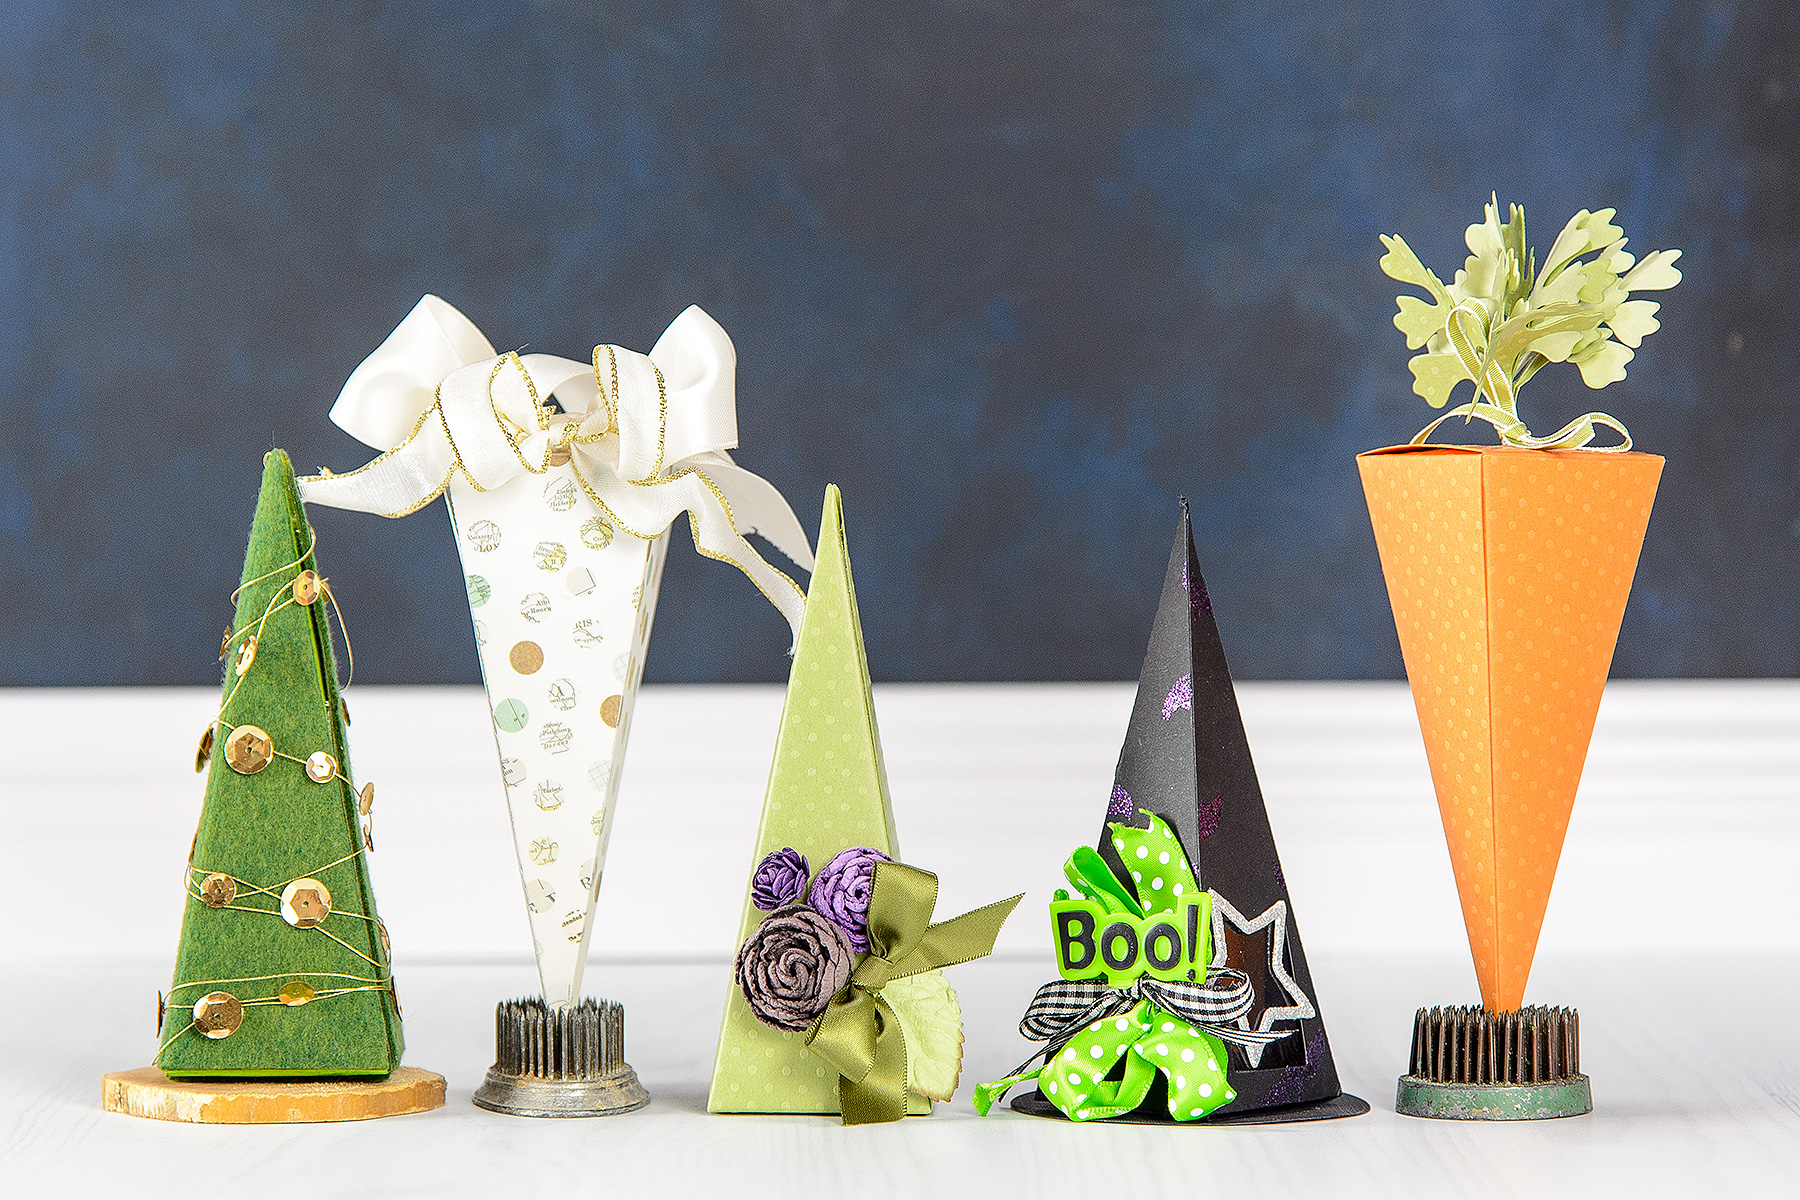
From fabric Christmas Trees, to easy paper gift boxes, to Halloween Hats and fun to make Easter carrots - we got you covered! There are so many different ways one die can be used - these are just a few of the projects you can make using our What's The Point Steel Rule Die. Let's take a closer look at each one of those projects below! But before we do, watch our video tutorial to learn how to use this die!

Video Tutorial:

Watch video below or on our Youtube channel.

Gift Box Idea #1

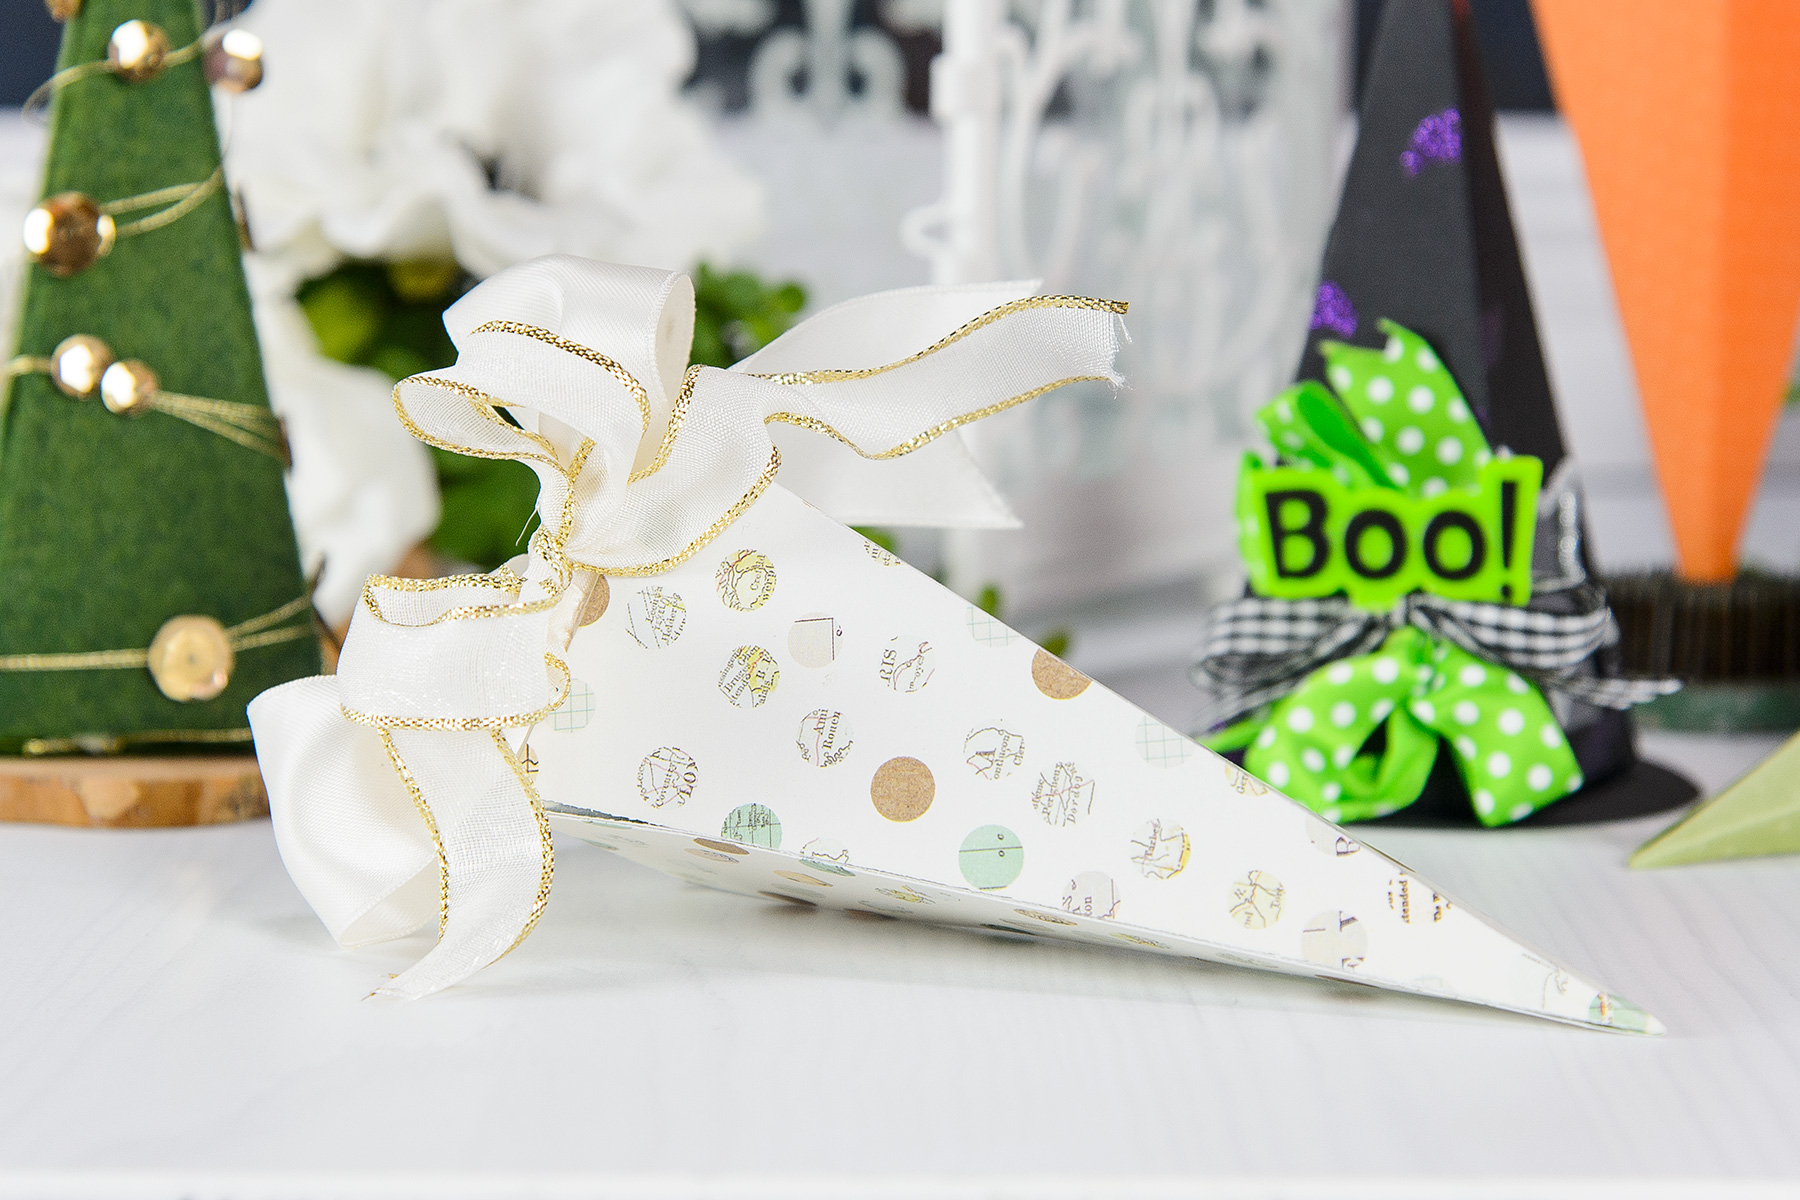
We simply adore this little gift box made by our Art Director, Beth Reames. Pick some pretty paper, add a bit of ribbon and you have a fabulous little gift box for your next party! The best part? You can die-cut up to 6 sheets of paper in a single pass with our Contour dies, so if you are making a bunch for your next party you'll have them ready in the nick of time.

One Die 5 Ways - What's The Point Steel Rule Die

Gift Box Idea #2

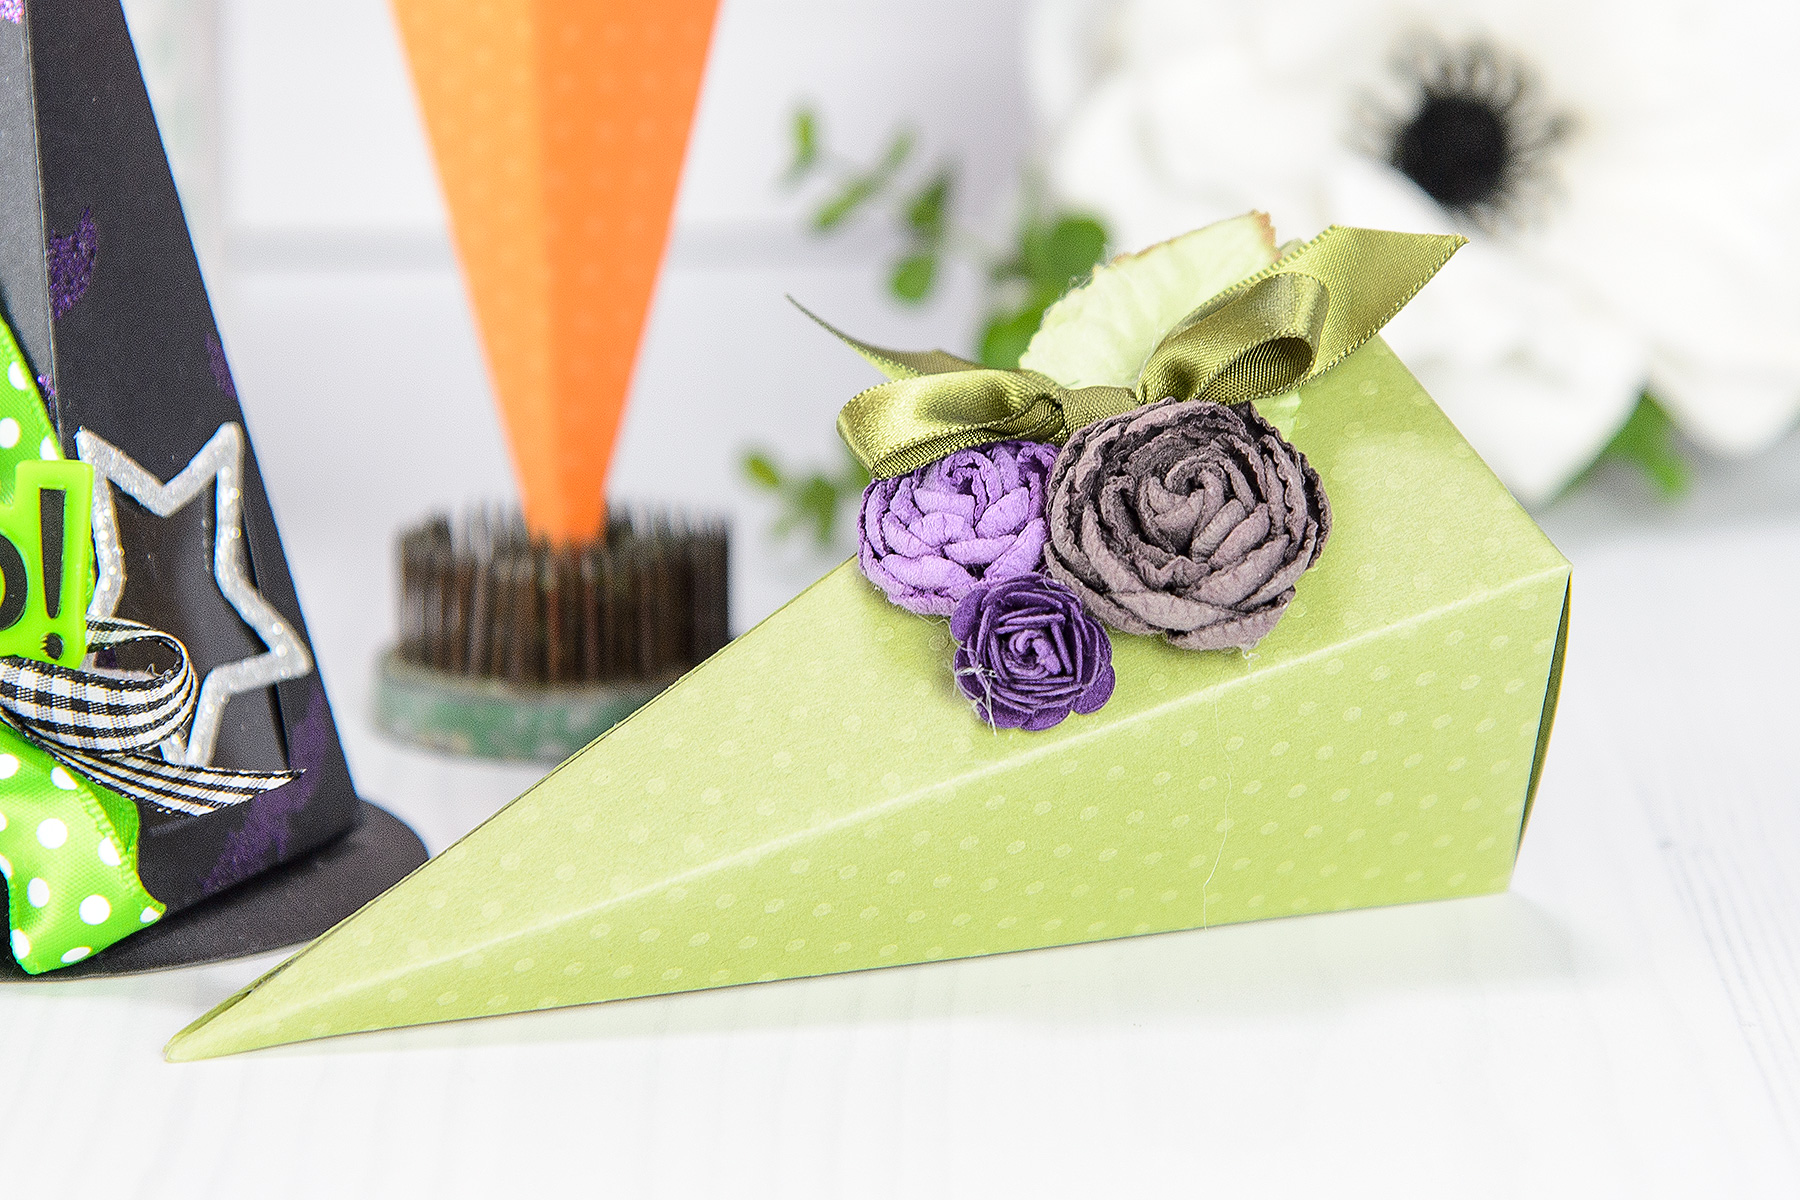
You can also use colored cardstock to create gift boxes using this die and embellish them using pretty paper florals. This project was created using Yana Smakula.

One Die 5 Ways - What's The Point Steel Rule Die

Hat's Off For Halloween

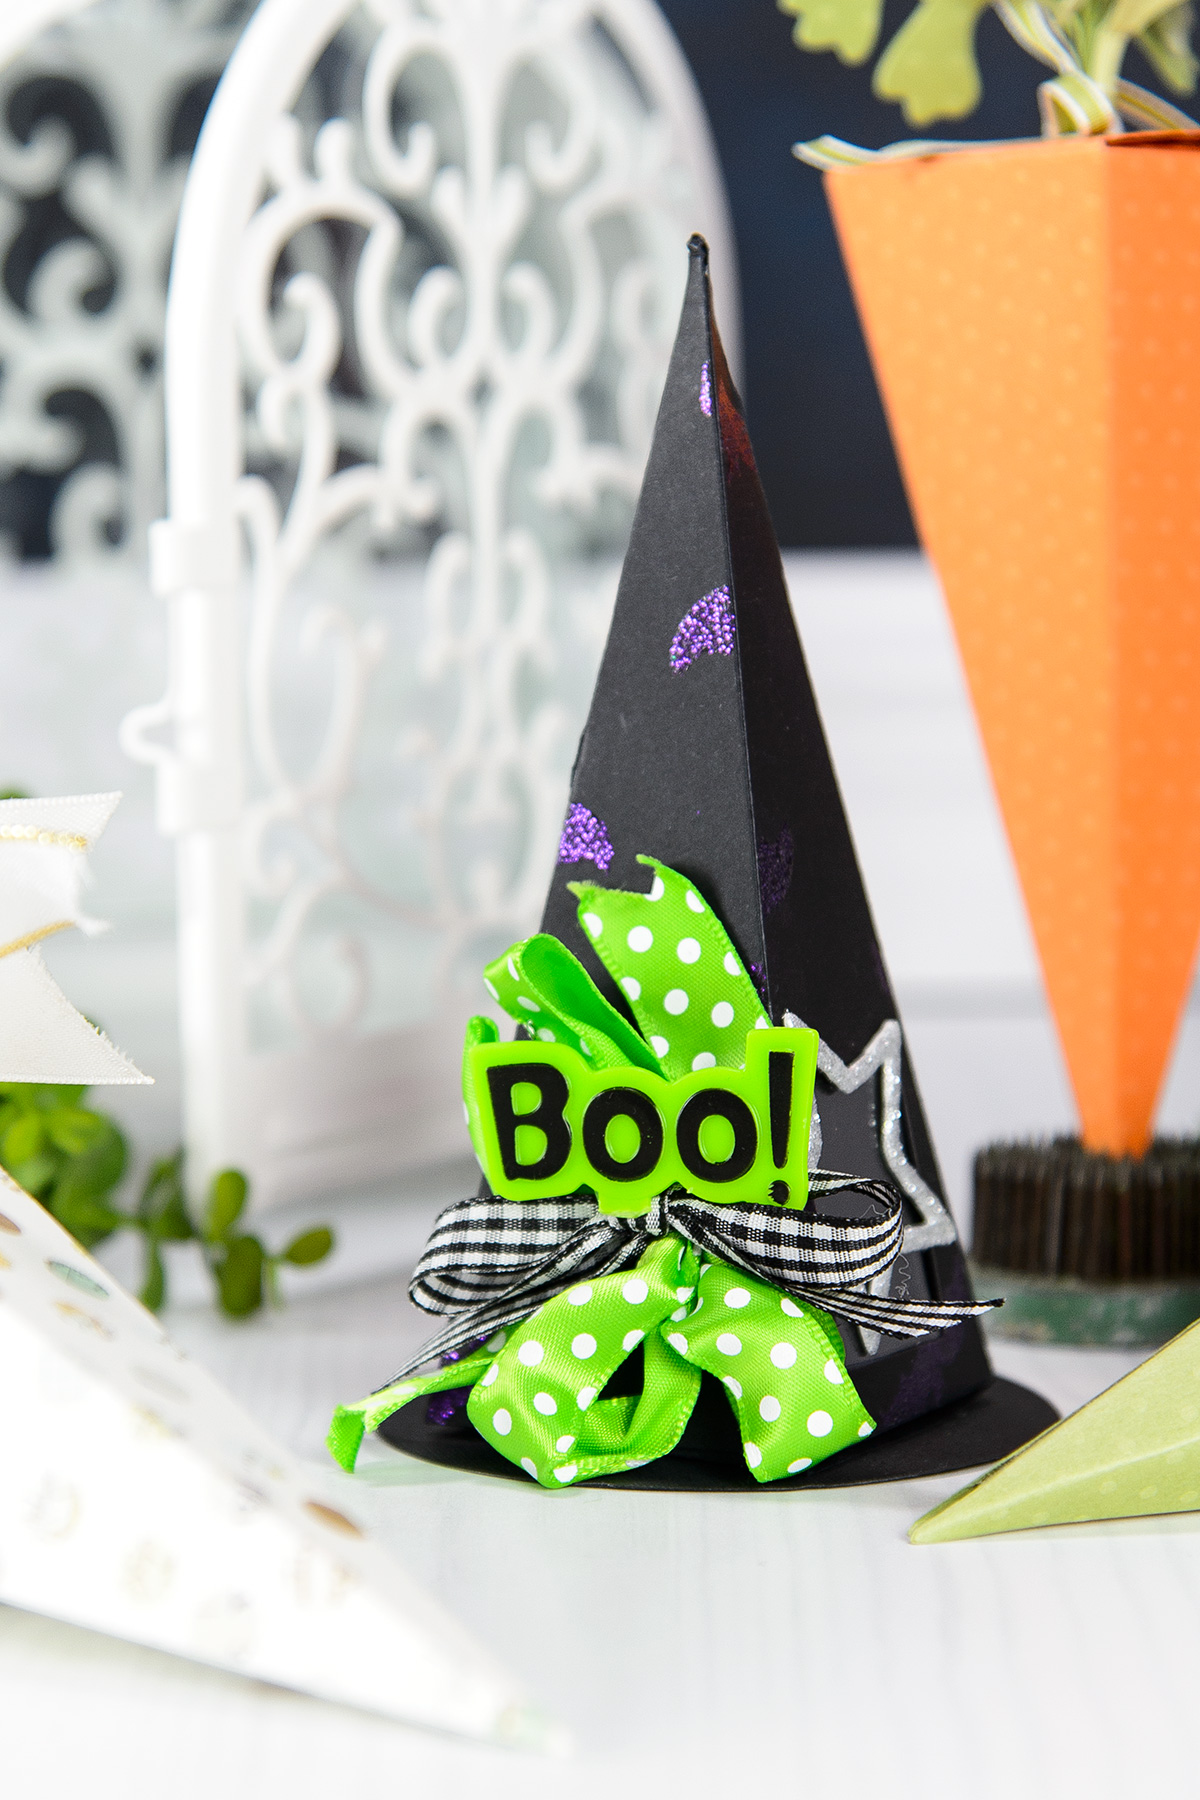
Believe it or not, Debi Adams was inspired by a piece of packaging she saw and created this witches hat as a cool party favor! You can find detailed instructions for this project on our blog here.

One Die 5 Ways - What's The Point Steel Rule Die

Easter Carrot

What else can you use a triangle shaped box for? An Easter carrot! Add a bit of greenery at the flat end and you have yourself a unique carrot shaped box!

One Die 5 Ways - What's The Point Steel Rule Die

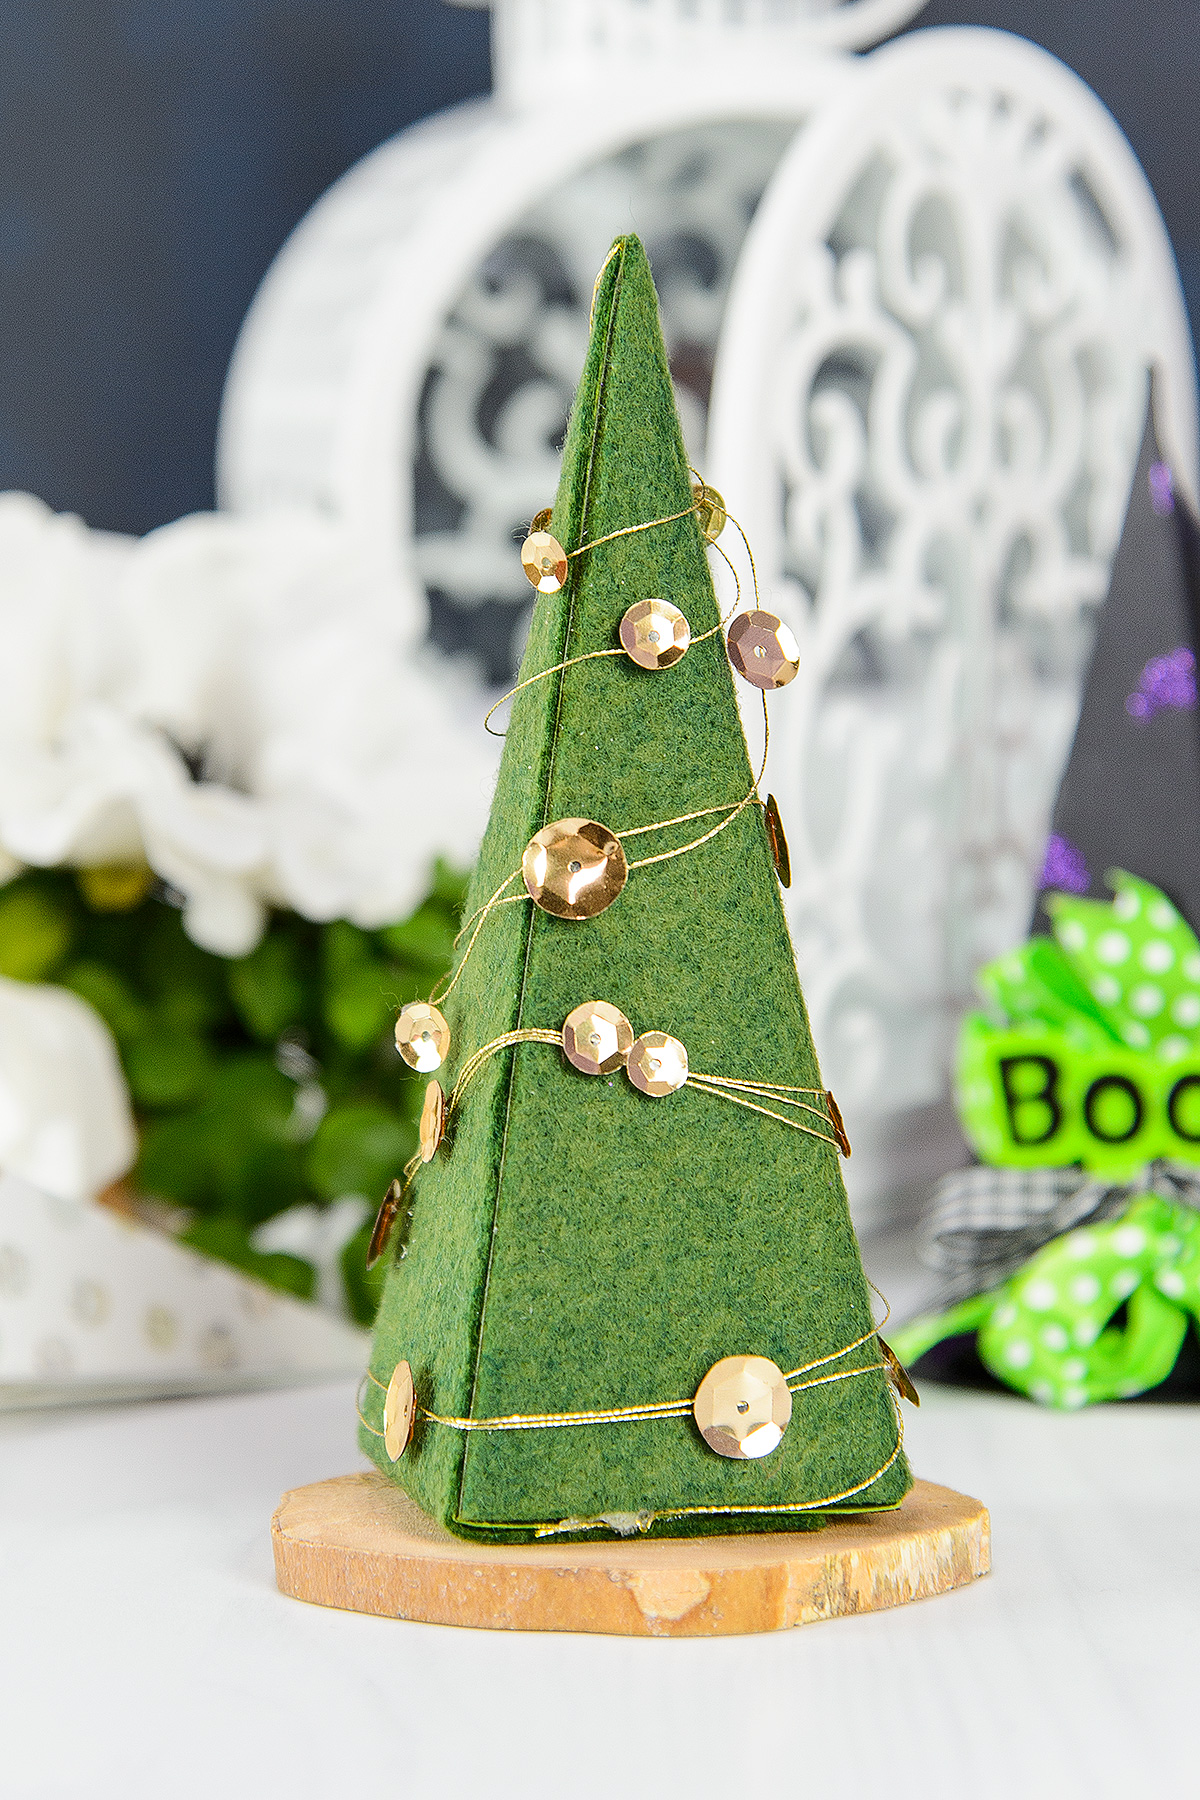
Christmas Tree

And of course our post wouldn't be complete without a Christmas tree made using the What's The Point die. Yana Smakula has a detailed video tutorial here on our blog showing you how to make these from start to finish!

One Die 5 Ways - What's The Point Steel Rule Die

We hope you enjoyed these fun DIY ideas using out What's The Point die.  What else would you use this die for? Comment below and as always, have fun die cutting!

Read more