Hi Friends!
It’s always fun to decorate for a party or a shower and this Ella-Fant die from my latest collection, “My Little Red Wagon” makes it quick and easy. There are very few supplies required and the assembly is a breeze. So let’s get started making.
1. Die-cut all the Ella-Fant pieces from gray cardstock. Emboss the head to add the details.

2. While paper is still inside of headpiece die, embellish eye with black pen. Remove all paper from dies.

3. Add cheeks to Ella-Fant using a chalk applicator or q-tip and chalk.

4. Add shadows to Ella-Fant’s ears and body using black chalk and applicator.
5. Assemble Ella-Fant using adhesive and foam dots.
6. Die-cut Umbrella and water spout from patterned paper.
7. Attach Umbrella and water spout to Ella-Fant’s trunk.

8. Adhere toothpick to Ella-Fant with hot glue.

Optional: To add water drops, apply Clear Nuvo onto Umbrella and allow to dry.
*Tip- Remember there are two Ella-Fant heads in the set that work with the same body. It’s all about assembly, creativity and variety
 You will need the following materials:
Platinum 6™ Machine-PE-100
Ella-Fant Dies-S4-782
Rise ‘n Shine Dies-S4-784
You will need the following materials:
Platinum 6™ Machine-PE-100
Ella-Fant Dies-S4-782
Rise ‘n Shine Dies-S4-784
Gray Cardstock
Patterned Paper of Your Choice
Adhesive of Your Choice
Black Permanent Fine Tip Pen
Chalk Applicator
Foam Dots
Hot Glue Gun and Glue
Nuvo Crystal Drops
Pink and Black Chalk
Q-Tip-(optional)
Toothpick
Read more


 />
/>

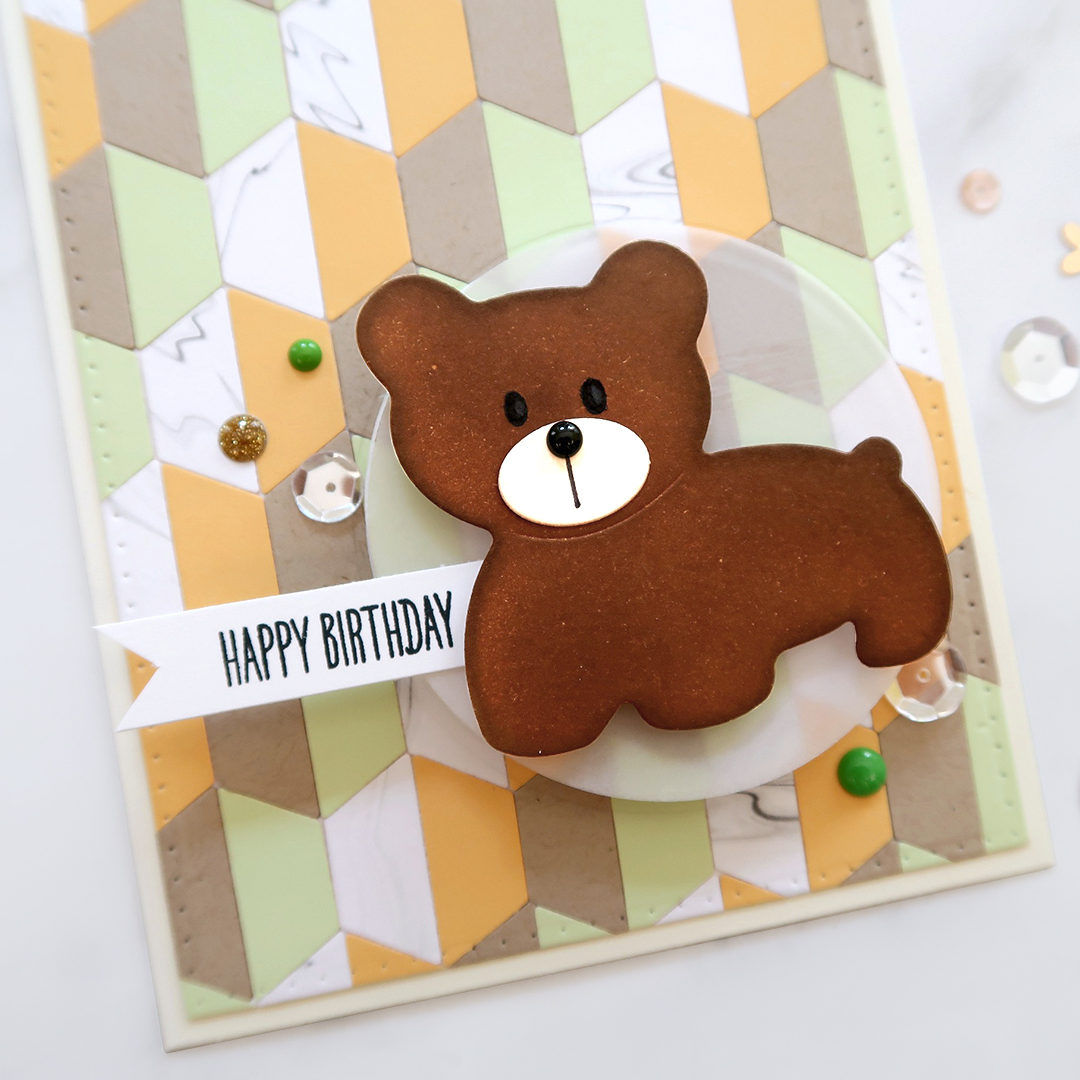 Next it was time to add some cuteness to this card! I used Bear Scout Etched Die from the My Little Red Wagon Collection by Debi Adams. I simply die cut the image out of white card stock and added my color with Vintage Photo Distress Ink. However, you could just die cut it out of some brown card stock instead! For the bear's snout I colored some card stock with an E30 Copic Sketch Marker. To add some more details to this bear, I used a fine black pen and the die cut as a stencil for the bear and snout.
To add more dimension I die cut a circle out of the quilted patterned paper using Standard Circles SM Etched Dies set. I die cut the same circle three more times out of Fun Foam. Then I adhered those pieces together and stuck a vellum circle on top. This tones down that patterned and makes the bear pop! Finally I finished off this card with a stamped sentiment banner, enamel dots and some clear sequins.
That's it for my first post here on the Spellbinders blog. Thank you for joining me and I'll see you soon. I can't wait to hear your thoughts on this card and video! :)
Spellbinders supplies:
Next it was time to add some cuteness to this card! I used Bear Scout Etched Die from the My Little Red Wagon Collection by Debi Adams. I simply die cut the image out of white card stock and added my color with Vintage Photo Distress Ink. However, you could just die cut it out of some brown card stock instead! For the bear's snout I colored some card stock with an E30 Copic Sketch Marker. To add some more details to this bear, I used a fine black pen and the die cut as a stencil for the bear and snout.
To add more dimension I die cut a circle out of the quilted patterned paper using Standard Circles SM Etched Dies set. I die cut the same circle three more times out of Fun Foam. Then I adhered those pieces together and stuck a vellum circle on top. This tones down that patterned and makes the bear pop! Finally I finished off this card with a stamped sentiment banner, enamel dots and some clear sequins.
That's it for my first post here on the Spellbinders blog. Thank you for joining me and I'll see you soon. I can't wait to hear your thoughts on this card and video! :)
Spellbinders supplies:


