Hi friends! So glad you've stopped by. I'm so excited to show you what I've been working on! If you remember last year I launched my first collection called "Quite Contrary", a floral die line consisting of contour dies. It's been a while since I have made a project with them so I thought today I would show you what I've been creating.
I absolutely love flower arranging. And these flowers, they aren't temperamental. They do well in the heat or the cold. The best part is they are rather simple to make. I am going to walk you through it step by step so you can make the flowers and the arrangement too! Grab your favorite drink, a pair of scissors, hot glue gun and let's get going.
1. Hot glue small black pom-pom ball to tip of wire.

2. Cut a 1” by 2 ½” strip of black tissue or crepe paper. Cut “lashes” into shorter edge of crepe paper, being careful to stop ¼” from the bottom. Snip entire edge.
3. Using hot glue, wrap the black crepe paper strip around based of pom-pom ball, tearing off any excess.

4. Die-cut 5 to 6 petals from Simple Anemones die, making sure to line the petals up with the vertical grain of crepe paper. It is best to do this by cutting the paper into rectangles and placing them correctly on the die then cutting them. Remember, you can cut at least 5 sheets of crepe paper at a time so layer them up! In other words, you can probably cut the entire flower in one die-cut roll! There are several petals of varying sizes on the die so you can make different size flowers or you can vary how big your flower gets by using all of them together.
5. Stretch upper edge of petal slightly to form a ruffle. Pinch bottom edge to form small tucks. Adhere petal to bottom of pom-pom ball using hot glue. Although you can attach the petal with floral tape, it is easiest to use hot glue. Attach all petals in the same manner but overlap each one a bit.

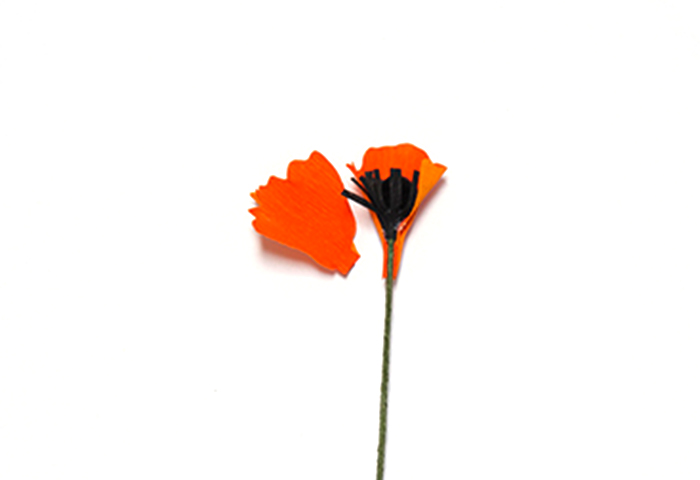
6. Adhere floral tape to completed flower, stretching the tape and twisting as you go all the way down the stem. It should stick together.

7. Make a total of three flowers, each one having less petals than the other, with the one being a bud. You can make your flower look bigger by carefully stretching the crepe paper.
8. Die-cut two or three long leaves using Pleasing Pom from green crepe paper and several thin leaves (just thin strips of paper) using green cardstock. For a variation and this is optional, hand-cut one leaf that tapers thin at both ends (1/2") and gets wide in the middle (about 1 1/4" wide) and is about 10" long. This would replace one of your Pleasing Pom Leaves.
9. Crease the two Pleasing Pom Leaves vertically.
10. Attach a small piece of dry floral oasis or green foam to the wooden base.
11. Hot glue the two long leaves into the oasis.
12. Trim lengths of flowers to stagger. The smallest bud will have the longest stem. The largest flower is located at the bottom with the shortest stem. Place the medium-sized flower half way in between the two.
13. Hot glue the flowers into base, again with the smallest flower at top, mid-size in the middle and the fullest flower at the bottom.
14. Adhere moss around base to hide any glue and oasis.
15. Attach wood branch to front of Flowers, hiding oasis and any glue.
16. Adhere thin wood slice to wood base, behind tall leaves.
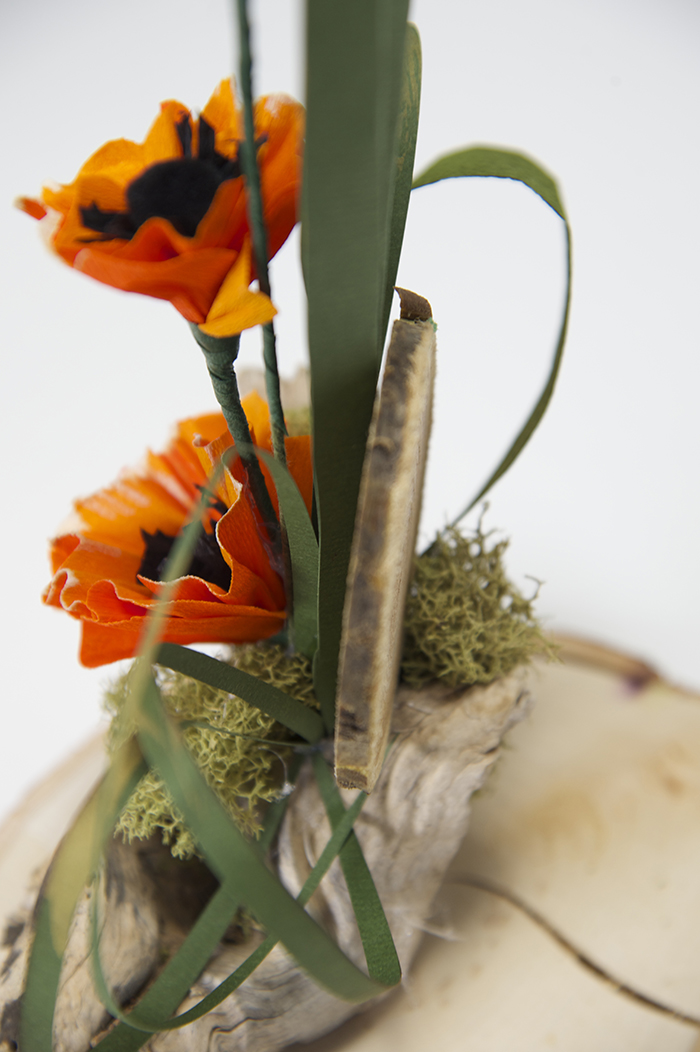
17. Slightly Curl the 4 thin, straight leaves with scissor blades and adhere in place.
18. Round the widest leaf in half, being careful not to crease it, and adhere both ends into base.

19. Adhere small wood slices to wood slice base.
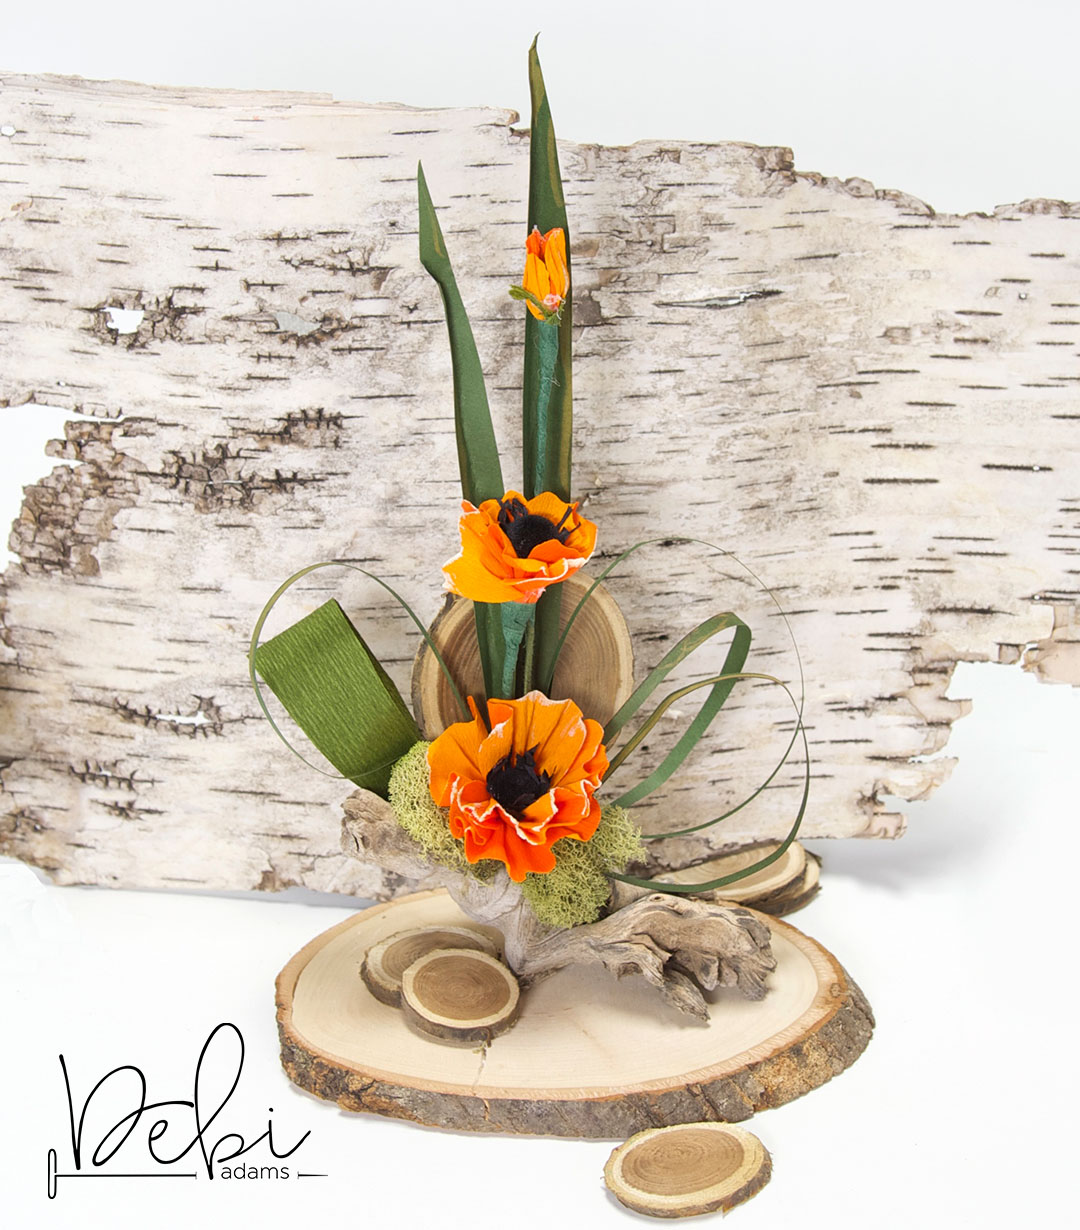
* Tip: To give a “natural” appearance to the flowers and leaves, make up a solution of a tablespoon of bleach and ¼ cup of water. Paint just the edges of the flowers and across the cardstock leaves. See the up-close picture, second from the bottom on the instructions.
And there you have your finished arrangement!
Wouldn't this make a great gift? I think it could look cool with a big dome over the top of it. Any which way, I'm sure you can make something fabulous. Hope these instructions find you wanting to create.
XO,
Debi
Supplies:
 PL-001 Platinum Die Cutting and Embossing Machine - 8.5" Platform
SR-037 Contour Quite Contrary Debi Adams Simple Anemones Steel Rule Dies
SR-041 Contour Quite Contrary Debi Adams Pleasing Pom Steel Rule Dies
PL-001 Platinum Die Cutting and Embossing Machine - 8.5" Platform
SR-037 Contour Quite Contrary Debi Adams Simple Anemones Steel Rule Dies
SR-041 Contour Quite Contrary Debi Adams Pleasing Pom Steel Rule Dies
22 Gauge Floral Wire-Wrapped
Cardstock-Deep Green
Crepe Paper- Deep Green, Duo-colored Crepe Paper-Tangerine, Orange, Black- I love German Crepe Paper best because it has the most elasticity.
Green Floral Tape
Hot Glue Gun and Glue
Moss
Pom-pom Balls-Black
Scissors or 5 Bladed Scissors
Dry Floral Oasis or Green Foam-Small Piece
Twisted Wood
Wood Slices- One Large, 3 smaller
Pattern for Flowers and Leaves
Optional: Bleach, Water and Paint brush or Q-tip
Read more


 />
/>
 Let’s start with how I made the watermelon and slice.
1. Die-cut the core of the watermelon and slice from solid cardstock.
2. Die-cut the rind from aqua green cardstock and gold poster board.
3. Die-cut the watermelon seeds from gold poster board.
Let’s start with how I made the watermelon and slice.
1. Die-cut the core of the watermelon and slice from solid cardstock.
2. Die-cut the rind from aqua green cardstock and gold poster board.
3. Die-cut the watermelon seeds from gold poster board.
 4. Attach aqua-green rind to pink core.
5. Adhere gold rind to underneath side of rind so that the gold barely shows.
6. Adhere watermelon seeds to core.
4. Attach aqua-green rind to pink core.
5. Adhere gold rind to underneath side of rind so that the gold barely shows.
6. Adhere watermelon seeds to core.
 7. Do the same steps for the slice.
“Sweet” Birthday Card
7. Do the same steps for the slice.
“Sweet” Birthday Card
 I love watercoloring and this card is as basic as it gets.
1. Cut a mat of hot pink cardstock 5” x 3 ¾” and a piece of watercolor paper that is 4 ½” x 3 ¼”.
I love watercoloring and this card is as basic as it gets.
1. Cut a mat of hot pink cardstock 5” x 3 ¾” and a piece of watercolor paper that is 4 ½” x 3 ¼”.
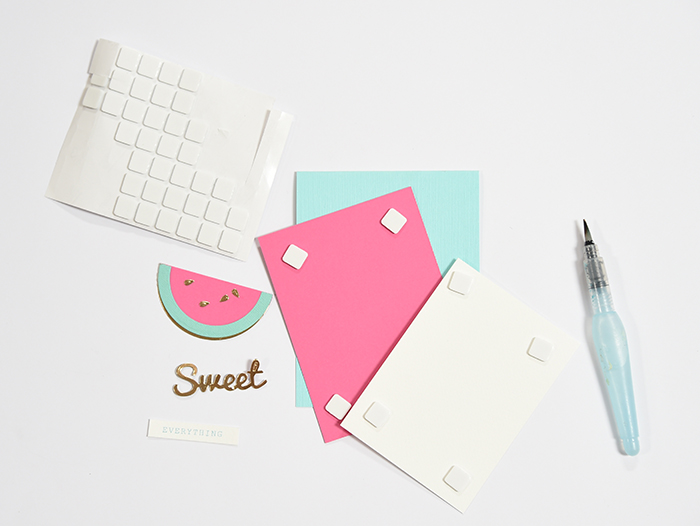 2. Assemble the card by matting the watercolor paper on top of the hot pink paper using foam dots and then place the hot pink paper on top of the aqua-green card base. The size of my aqua-green card base is 4 ¼” X 5 ½”.
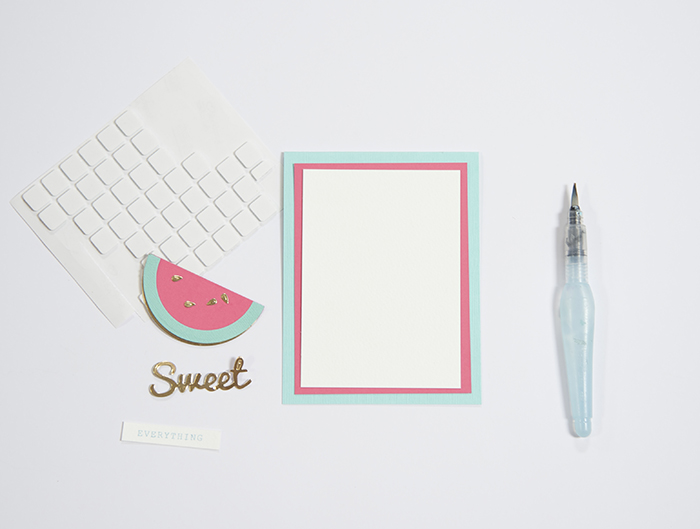 3. Dip a water brush into the aqua paint and lightly brush color onto paper. Allow to dry.
 4. Die-cut the sentiment “Sweet” from gold paper and adhere to card.
5. Stamp sentiment in aqua ink onto watercolor paper. Trim and adhere to card using foam dots.
4. Die-cut the sentiment “Sweet” from gold paper and adhere to card.
5. Stamp sentiment in aqua ink onto watercolor paper. Trim and adhere to card using foam dots.
 6. Adhere embellished watermelon and slice.
 Watermelon Bag
 1. Die-cut two bags from pink cardstock and a small strip for handle.
 2. Adhere bags together at side as shown. Fold where indicated.
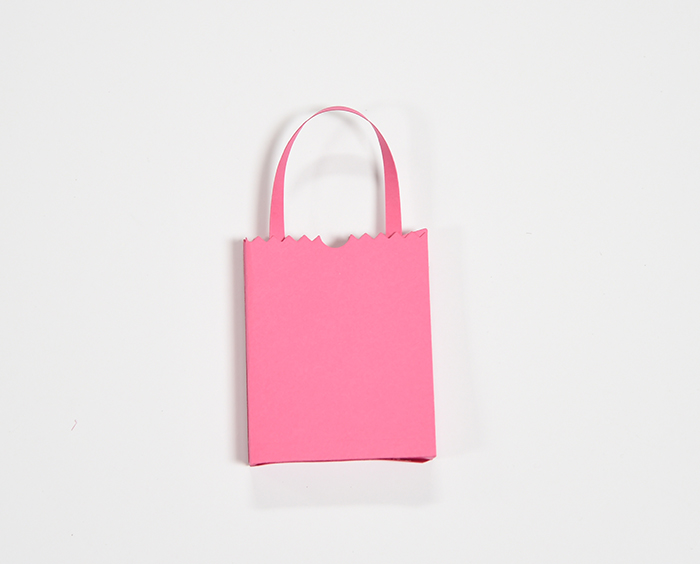 3. Attach handle to inside of bag with adhesive.
4. Stamp a sentiment.
5. Attach watermelon to bag with adhesive.
6. Attach sentiment onto bag with clothespin.
3. Attach handle to inside of bag with adhesive.
4. Stamp a sentiment.
5. Attach watermelon to bag with adhesive.
6. Attach sentiment onto bag with clothespin.
 Pillow Box
 1. Die-cut two pillow boxes from cardstock and sentiment from gold paper.
 2. Adhere together at sides.
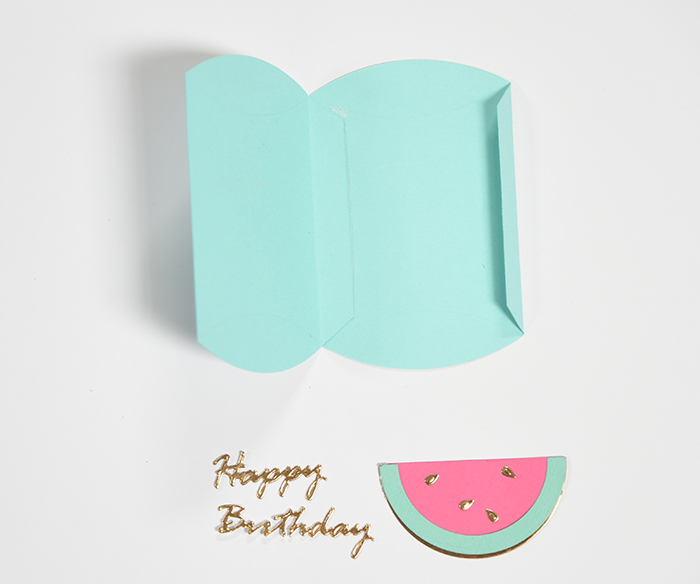 3. Fold up as indicated.
 4. Attach watermelon to top of box and adhere sentiment to bottom of box.
 Cupcake Topper
 1. Adhere gold pom-pom to toothpick.
 2. Attach watermelon slice to toothpick.
 3. Insert into cupcake.
***If you really want to make it all DIY, create a banner by die-cutting various sizes of circles from gold poster board and adhering them to a long piece of twine. Sups cute!***
3. Insert into cupcake.
***If you really want to make it all DIY, create a banner by die-cutting various sizes of circles from gold poster board and adhering them to a long piece of twine. Sups cute!***
 Supplies for All Projects:
PL-001 Platinum Die Cutting and Embossing Machine or PE-100 Platinum 6 Machine
Spellbinder Dies:
S4-721 Market Fresh I’ll Have a Slice Etched Dies
S4-563 Shapeabilities Simply Said Phrase Set One Etched Dies
S4-114 Nestabilities Standard Circles Lg Etched Dies
SR-009 Contour Pillow Box Steel Rule Die
S4-728 Shapeabilities Market Fresh Bag n Tag It Etched Dies
Cardstock of Your Choice
Gold Poster Board
Adhesive of Your Choice
Foam Dots
Gold Pom-Pom Ball
Hot Glue and Glue Gun
Ink-Aqua
Mini Clothespin
Stamp Sentiment-Small
Toothpick
Water Brush
Watercolor Paint-Aqua
Watercolor Paper-140 lb. Cold Press
Thanks for joining me for this new series. Hope you will stop by again next month when I feature a baby shower theme!
XO,
Debi
Supplies for All Projects:
PL-001 Platinum Die Cutting and Embossing Machine or PE-100 Platinum 6 Machine
Spellbinder Dies:
S4-721 Market Fresh I’ll Have a Slice Etched Dies
S4-563 Shapeabilities Simply Said Phrase Set One Etched Dies
S4-114 Nestabilities Standard Circles Lg Etched Dies
SR-009 Contour Pillow Box Steel Rule Die
S4-728 Shapeabilities Market Fresh Bag n Tag It Etched Dies
Cardstock of Your Choice
Gold Poster Board
Adhesive of Your Choice
Foam Dots
Gold Pom-Pom Ball
Hot Glue and Glue Gun
Ink-Aqua
Mini Clothespin
Stamp Sentiment-Small
Toothpick
Water Brush
Watercolor Paint-Aqua
Watercolor Paper-140 lb. Cold Press
Thanks for joining me for this new series. Hope you will stop by again next month when I feature a baby shower theme!
XO,
Debi


