Right now I’m smitten with copper. The rosy hue is cheerful and elegant. It shines so brightly that it seems to belong in the garden. In the summer when the garden is growing well on its own, I turn to garden art projects for my garden therapy. I like to add ornaments for interest to areas that are not blooming and these copper garden art flowers are just the right thing.
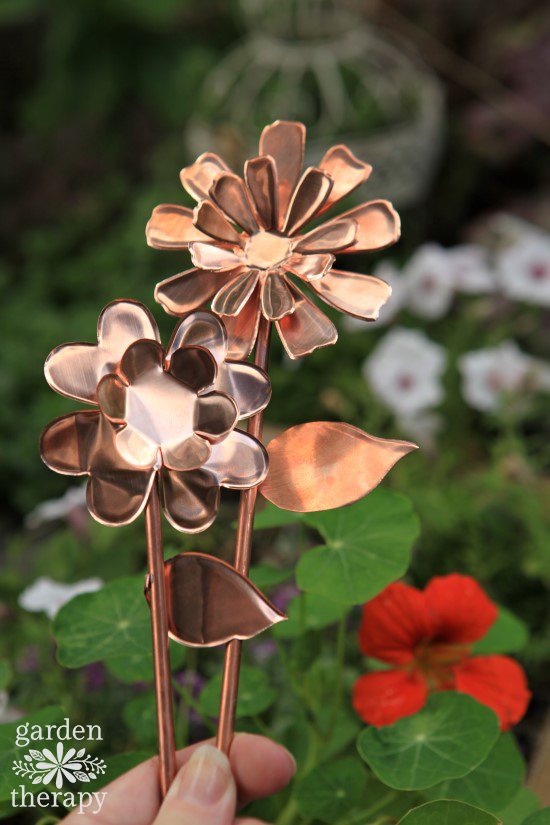
How to Make Copper Garden Art Flowers
These copper garden art flowers started when I got a delivery from Spellbinders in the mail. I opened a Spellbinders Platinum 6* and had absolutely no idea what to do with it. I haven’t scrapbooked or made paper crafts before and I didn’t know there were die-cutting machines that could make quick work of cutting pretty patterns. I set up the Platinum 6 and created a “steel cut die sandwich” as recommended in the instructions. I cut some paper. Then some felt. Then fabric, wood veneer, and aluminum cans. Almost every material I fed through the machine cut perfectly. The Platinum 6 is very powerful; much more powerful than its elegant looks suggest.
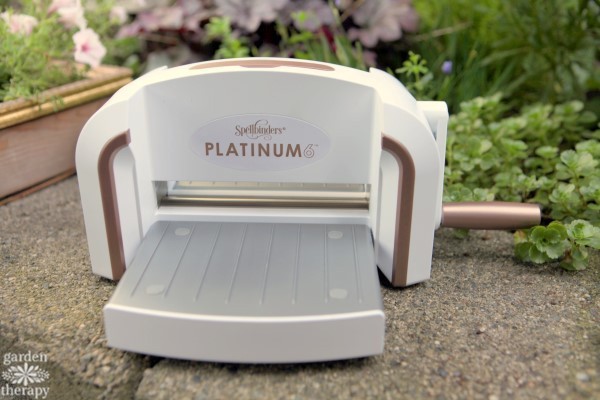
When I cut the aluminum cans into a daisy, I liked the look and ability to mold the metal. But aluminum just doesn’t have the shine that I was hoping for. I set out to hunt for sheets of copper to make garden art flowers. I found 5 mil (36 gauge) copper sold by the sheet that cut like butter and looks brilliant in the garden beds.
Want to make your own? Here is how to do it:
Materials
12” x 12” 5 mil copper sheet
Spellbinders Platinum 6 Die Cutting Machine
Steel Rule Die: Contour Quite Contrary Debi Adams Oopsy Daisy
Steel Rule Die: Contour Tammy Tutterow Floweret Posies
Steel Rule Die: Contour Quite Contrary Debi Adams Positively Peony
36” copper rod
Hand saw
Metal file
Metal adhesive
Make it!
Copper is very expensive, so “measure twice and cut once” to avoid wasting any of this precious metal. Measure the cut pattern on the die, then measure the copper and mark your cuts. Cut the copper to fit the width of the die with little extra to waste.

Make a die cut sandwich with a clear cutting plate, the die facing up, the copper sheet, and a second clear cutting plate. The clear cutting plates are included with the machine; the steel rule dies need to be purchased separately.

Note: don’t worry like I did when you make your first cut and it leaves an impression on the clear cutting plate. I thought I was cracking the plates, but it’s perfectly normal for the steel rule dies to make an impression on the acrylic. After you use the machine a bunch of times, it does end up getting quite marked up.
Feed the sandwich through the Platinum 6 by holding it with one hand and turning the crank with the other. Once the machine “catches” the sandwich, move a hand to the top of the machine and hold firmly while you turn the crank with the other. This is a powerful cutting machine but it is not difficult to use. Mostly, you provide stability to the machine and let it do the hard work.
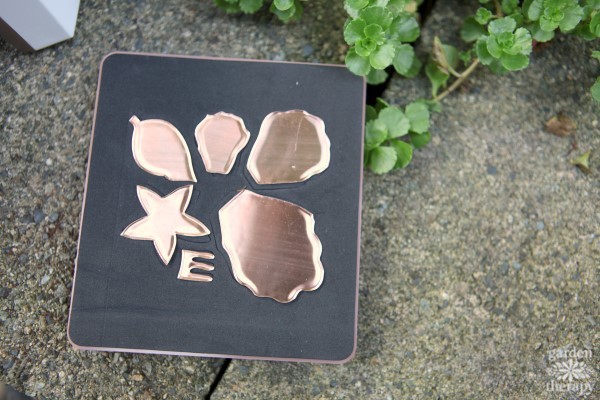
Take apart the sandwich and remove the copper pieces. I used a few different steel rule dies to make the copper garden art flowers collection. Oopsy Daisy was the easiest to work with as you simply attach the smaller copper flower to the larger one and in one cut you also get a leaf. I used Floweret Posies and Positively Peony to get some more varied shapes.
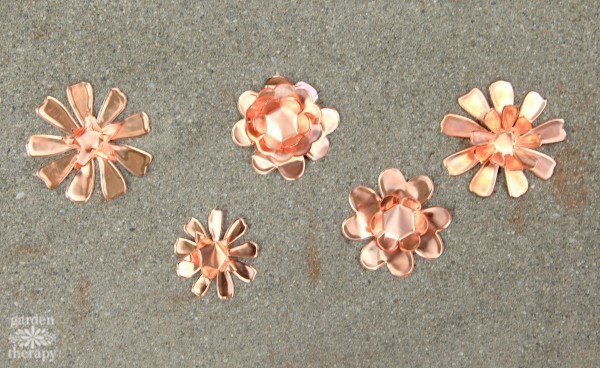
After all of the pieces were cut, I laid the flowers out and molded the shapes until I got a look that I liked. I was able to make these five flowers from one 12×12 sheet of copper.

Cut five lengths of copper rod to differing lengths which will act as flower stems. I cut mine fairly short (6” to 10”), but you could get as many feet of copper that you need to make the flowers taller. The easiest way to cut the copper is to use a handsaw. Then, use a metal file to remove any burrs or sharp edges.

I used a metal adhesive for outdoor use to glue the flowers together. This glue requires mixing two substances together and then working within 5 minutes. Use proper safety protection like gloves and a mask when working with chemicals like this.
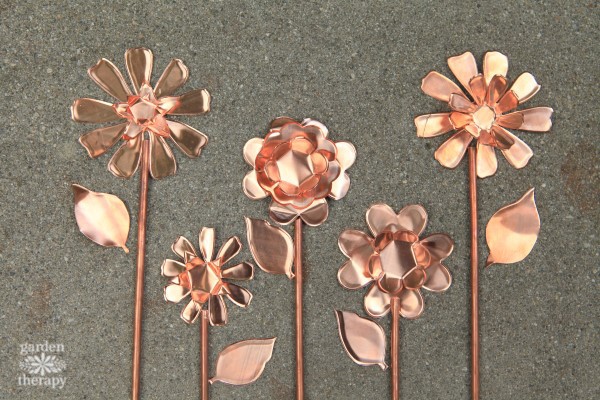
Lay out the flowers as you plan to glue them in place. Mix the glue and get busy attaching the pieces together. Allow to dry for 24 hours before setting out in the garden.
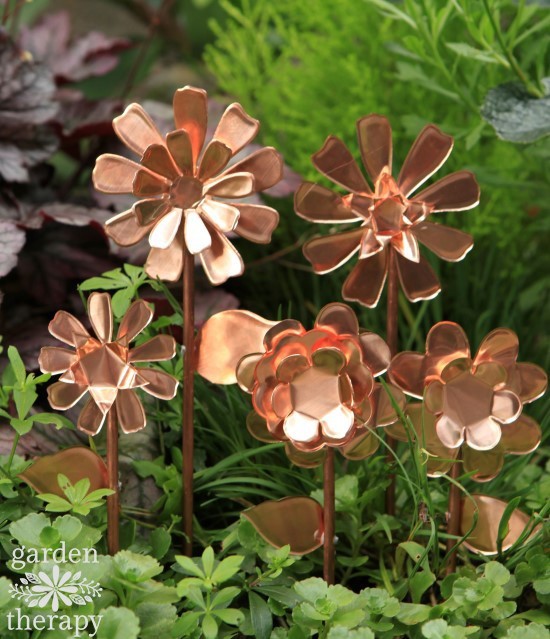
These copper garden art flowers will bloom all year round and I hope that the copper will patina into a lovely green color as they weather outdoors.
- Stephanie Rose, Garden Therapy
 Pre-Order your now to reserve your machine and to get this die for FREE!
Read more


 />
/>
 As I grew and continued to find myself sitting in art classes, and then advanced art classes, and I found that I was often or always dissatisfied with the results of my work. I was told they were of exceptional quality by my teachers and my family, but they were never right to me. I did all sorts of random media, and yet I always felt frustration. I remember feeling that I was supposed to be able to create in a certain way. That I should be able to create painstakingly detailed pencil shaded portraits of people from memory. Or come up with goofy characters for an eventual best selling comic strip. I wanted to badly to be the kind of artist I thought I should be. But I wasn’t and that made me want to quit. So I did.
I did however fall in love with memory keeping and scrap booking which I think carried my creative energy and helped me feel that I was still creative. This was an outlet that was creative for me but more importantly it was family bonding. I would get together with my sisters or mother or other friends and family and we would scrapbook together.
It wasn’t until about 2012 that I accepted my deep need to draw again. My husband was a medical student (which means I was a single parent!) and we lived very far from our family and friends and I was without my preferred method of creation for over a decade at this point. I was lonely and medical school was difficult on our young family and I needed to start giving myself something meaningful.
I would pick up my pencil and put it to paper and feel no impulse or direction. It was then that I stumbled upon “zentagling” and began to doodle in this style. It is a forgiving style. Mistakes can be forgiven by transforming them into something good. Shapes and patterns and simple linework were easy for my mind to unravel. After weeks of this and feeling more happiness than I had felt in a long while, I wanted to start creating something of my own. Over time I was creating one of a kind zen doodled feathers. I was beyond happy!
After some time and more and more experimentation I began posting photos of my new found happiness on social media. Soon I was getting people saying they would love to have them as tattoos. I decided to experimentally open an Etsy shop in October 2013. I create custom illustrations for them for tattoos, home decor, business logos and I have even teamed up with a novelist.
As I grew and continued to find myself sitting in art classes, and then advanced art classes, and I found that I was often or always dissatisfied with the results of my work. I was told they were of exceptional quality by my teachers and my family, but they were never right to me. I did all sorts of random media, and yet I always felt frustration. I remember feeling that I was supposed to be able to create in a certain way. That I should be able to create painstakingly detailed pencil shaded portraits of people from memory. Or come up with goofy characters for an eventual best selling comic strip. I wanted to badly to be the kind of artist I thought I should be. But I wasn’t and that made me want to quit. So I did.
I did however fall in love with memory keeping and scrap booking which I think carried my creative energy and helped me feel that I was still creative. This was an outlet that was creative for me but more importantly it was family bonding. I would get together with my sisters or mother or other friends and family and we would scrapbook together.
It wasn’t until about 2012 that I accepted my deep need to draw again. My husband was a medical student (which means I was a single parent!) and we lived very far from our family and friends and I was without my preferred method of creation for over a decade at this point. I was lonely and medical school was difficult on our young family and I needed to start giving myself something meaningful.
I would pick up my pencil and put it to paper and feel no impulse or direction. It was then that I stumbled upon “zentagling” and began to doodle in this style. It is a forgiving style. Mistakes can be forgiven by transforming them into something good. Shapes and patterns and simple linework were easy for my mind to unravel. After weeks of this and feeling more happiness than I had felt in a long while, I wanted to start creating something of my own. Over time I was creating one of a kind zen doodled feathers. I was beyond happy!
After some time and more and more experimentation I began posting photos of my new found happiness on social media. Soon I was getting people saying they would love to have them as tattoos. I decided to experimentally open an Etsy shop in October 2013. I create custom illustrations for them for tattoos, home decor, business logos and I have even teamed up with a novelist.
 In 2015 I chose to enter into the craft industry as an illustrator and designer. In the spring of 2016 I was contacted by Spellbinders about teaming up for a stamp line. I obviously jumped at the idea and I have since lent my illustrations to them for several different stamp collections. Each of my collections is influenced by my love of tattoos and I have tried to push the envelope just a little bit with each illustration.
My husband and I have three little children and we are stationed in Hawaii for the next two and a half years. My children get a kick out of what I do and often embarass me by proclaiming to stragers that their "mom is an artist!" Beach weekends and long hikes and sunsets all inspire creativity for me of course, but a blank piece of paper and a sharp pencil are even more powerful.
In 2015 I chose to enter into the craft industry as an illustrator and designer. In the spring of 2016 I was contacted by Spellbinders about teaming up for a stamp line. I obviously jumped at the idea and I have since lent my illustrations to them for several different stamp collections. Each of my collections is influenced by my love of tattoos and I have tried to push the envelope just a little bit with each illustration.
My husband and I have three little children and we are stationed in Hawaii for the next two and a half years. My children get a kick out of what I do and often embarass me by proclaiming to stragers that their "mom is an artist!" Beach weekends and long hikes and sunsets all inspire creativity for me of course, but a blank piece of paper and a sharp pencil are even more powerful.
 I am eager to grow as an artist. I want to spread the joy of creation to as many people as I can. I think creation is essential to happiness. Not only drawing or painting, but creating memories, blankets, dinners, make overs, sculptures, gardens, friendships, novels, clothing, budget spreadsheets, chemical reactions, poetry, jokes, music, harmony, peace, love, ART! It is all art. Art is all things beautiful and hopeful and lovely and worthy. Go make art. Make art everyday.
I hope you enjoy my new collection with Spellbinders, Earth Air Water that features detailed rubber stamps with coordinating dies using imagery of my favorite floras and faunas. All designs were hand drawn and brought to life by Spellbinders to bring you creative ways for card making, coloring and any other creative project you have in mind.
I am eager to grow as an artist. I want to spread the joy of creation to as many people as I can. I think creation is essential to happiness. Not only drawing or painting, but creating memories, blankets, dinners, make overs, sculptures, gardens, friendships, novels, clothing, budget spreadsheets, chemical reactions, poetry, jokes, music, harmony, peace, love, ART! It is all art. Art is all things beautiful and hopeful and lovely and worthy. Go make art. Make art everyday.
I hope you enjoy my new collection with Spellbinders, Earth Air Water that features detailed rubber stamps with coordinating dies using imagery of my favorite floras and faunas. All designs were hand drawn and brought to life by Spellbinders to bring you creative ways for card making, coloring and any other creative project you have in mind.


