☃️ Banner logo ☃️ Up to 50% Off ☃️

Spellbinders Blog

A Holiday Advent Calendar Using the Match Box Die by Debi Adams

A Holiday Advent Calendar Using the Match Box Die by Debi Adams

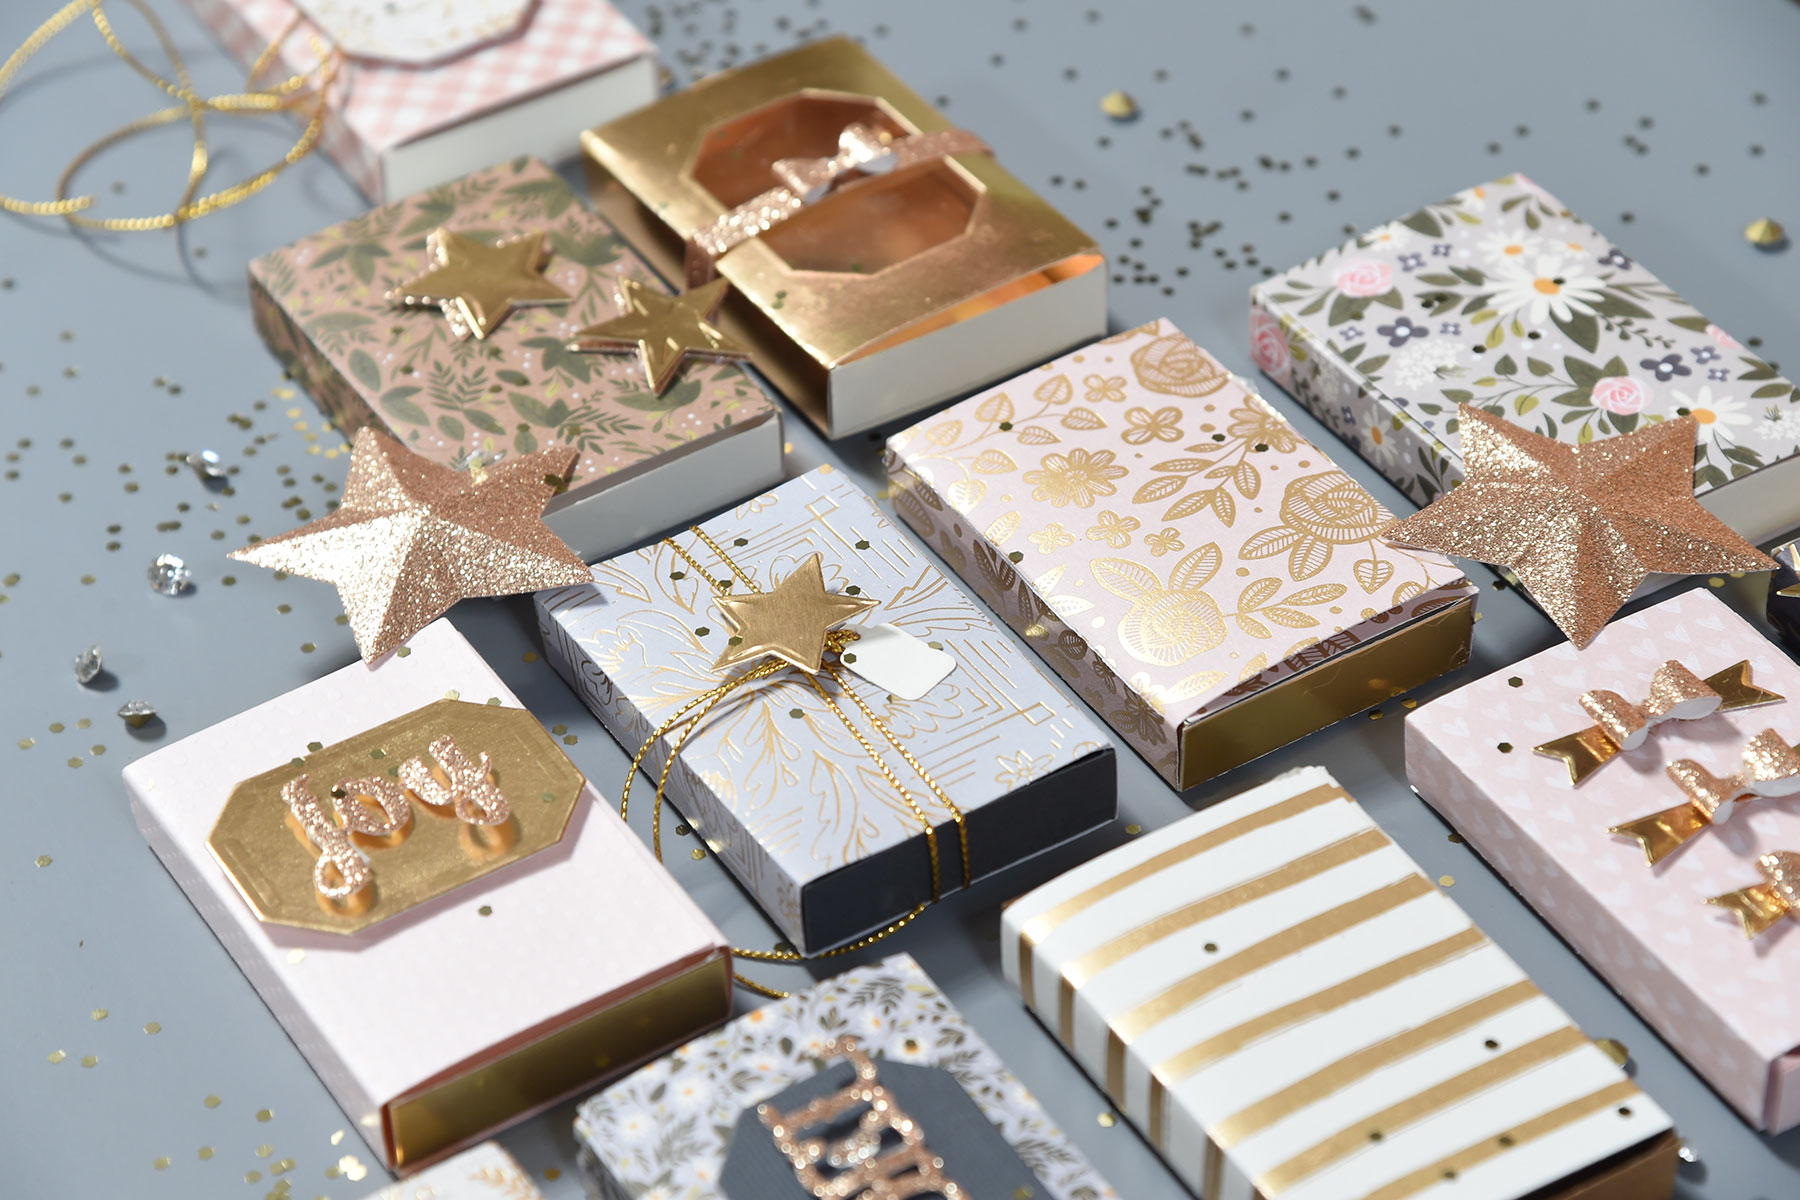
Well if you haven’t noticed, the holiday season is upon us and I thought it would be fun to do something a bit different for my Christmas home décor this year.  I’m Debi Adams and I love to decorate for any occasion and Christmas is no different but I only like breaking the “rules” when it comes to enhancing my home. Today for example, I am bringing you an advent calendar that is done in pink, champagne and gold set on a smokey-blue gray background. Ah, what a rebel, right?  I love the class and elegance of the colors. Anyway, it’s an easy project to create because who really has time to do anything extra with all the shopping and wrapping that a waits? I am using my Match Box die from my latest collection, “Love, Set, Match” and will show you several different ways to work the box. Btw, the box was made to fit gift cards as well as treats!

Spellbinders - A Holiday Advent Calendar using the Match Box Die by Debi Adams #spellbinders #adventcalendar #diecutting

Constructing the Box

Die-cut two box lids and one base for each box. Adhere the two lids together at the side so that they form a hollow box. Adhere the box at the sides. Slide the bottom box into the lid. To see visual, step-by-step photos, go here. You will need to cut thirteen boxes in various patterns and colors of  cardstock.

Variations to the Box

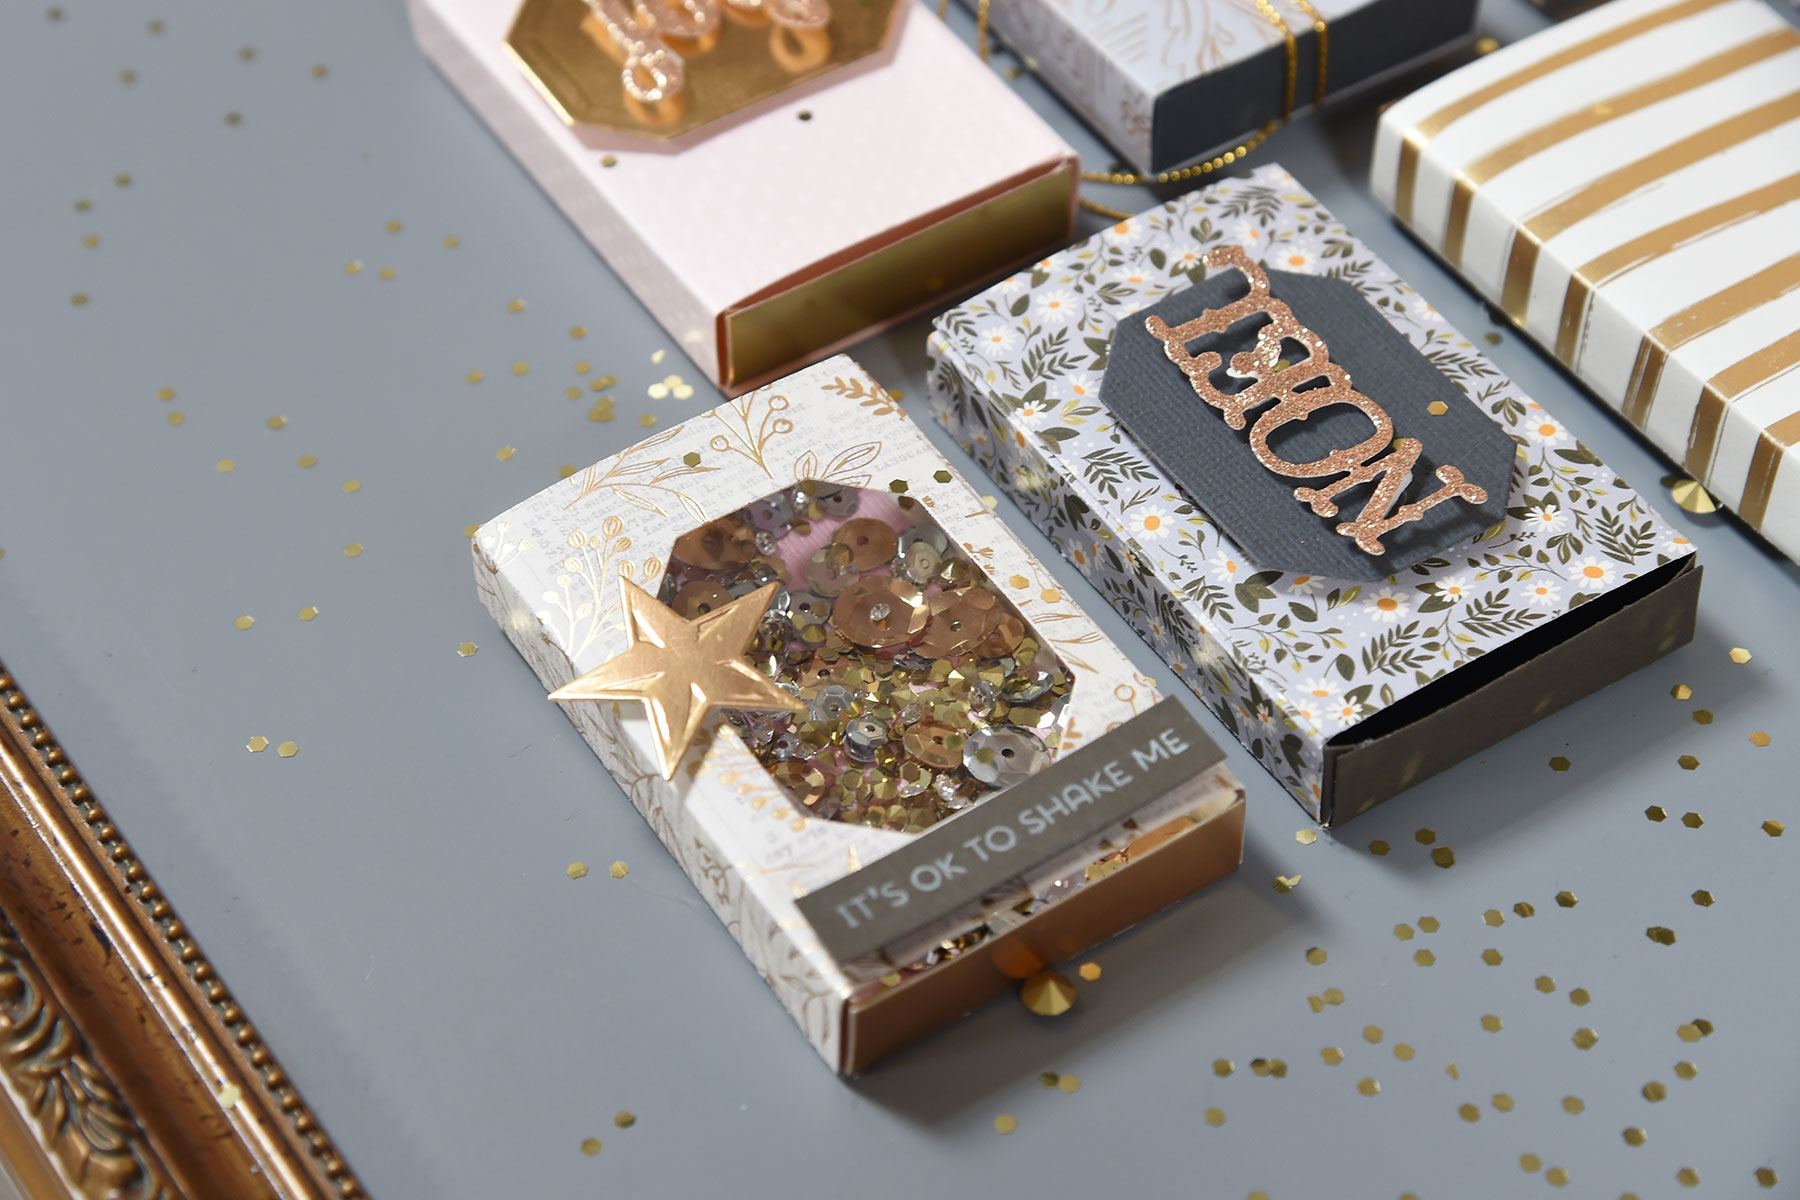
To create a different look to some of your boxes, cut a window using the tag that is included with the Match Box set before assembly.  Adhere clear acetate to the inside and then fold and adhere sides.

Spellbinders - A Holiday Advent Calendar using the Match Box Die by Debi Adams #spellbinders #adventcalendar #diecutting

Try wrapping the two lids around the bottom box by securing the tabs on the back of the bottom box as shown here. It looks like one closes over the other.

Spellbinders - A Holiday Advent Calendar using the Match Box Die by Debi Adams #spellbinders #adventcalendar #diecutting

When closed, it looks just like a covered box.

Spellbinders - A Holiday Advent Calendar using the Match Box Die by Debi Adams #spellbinders #adventcalendar #diecutting

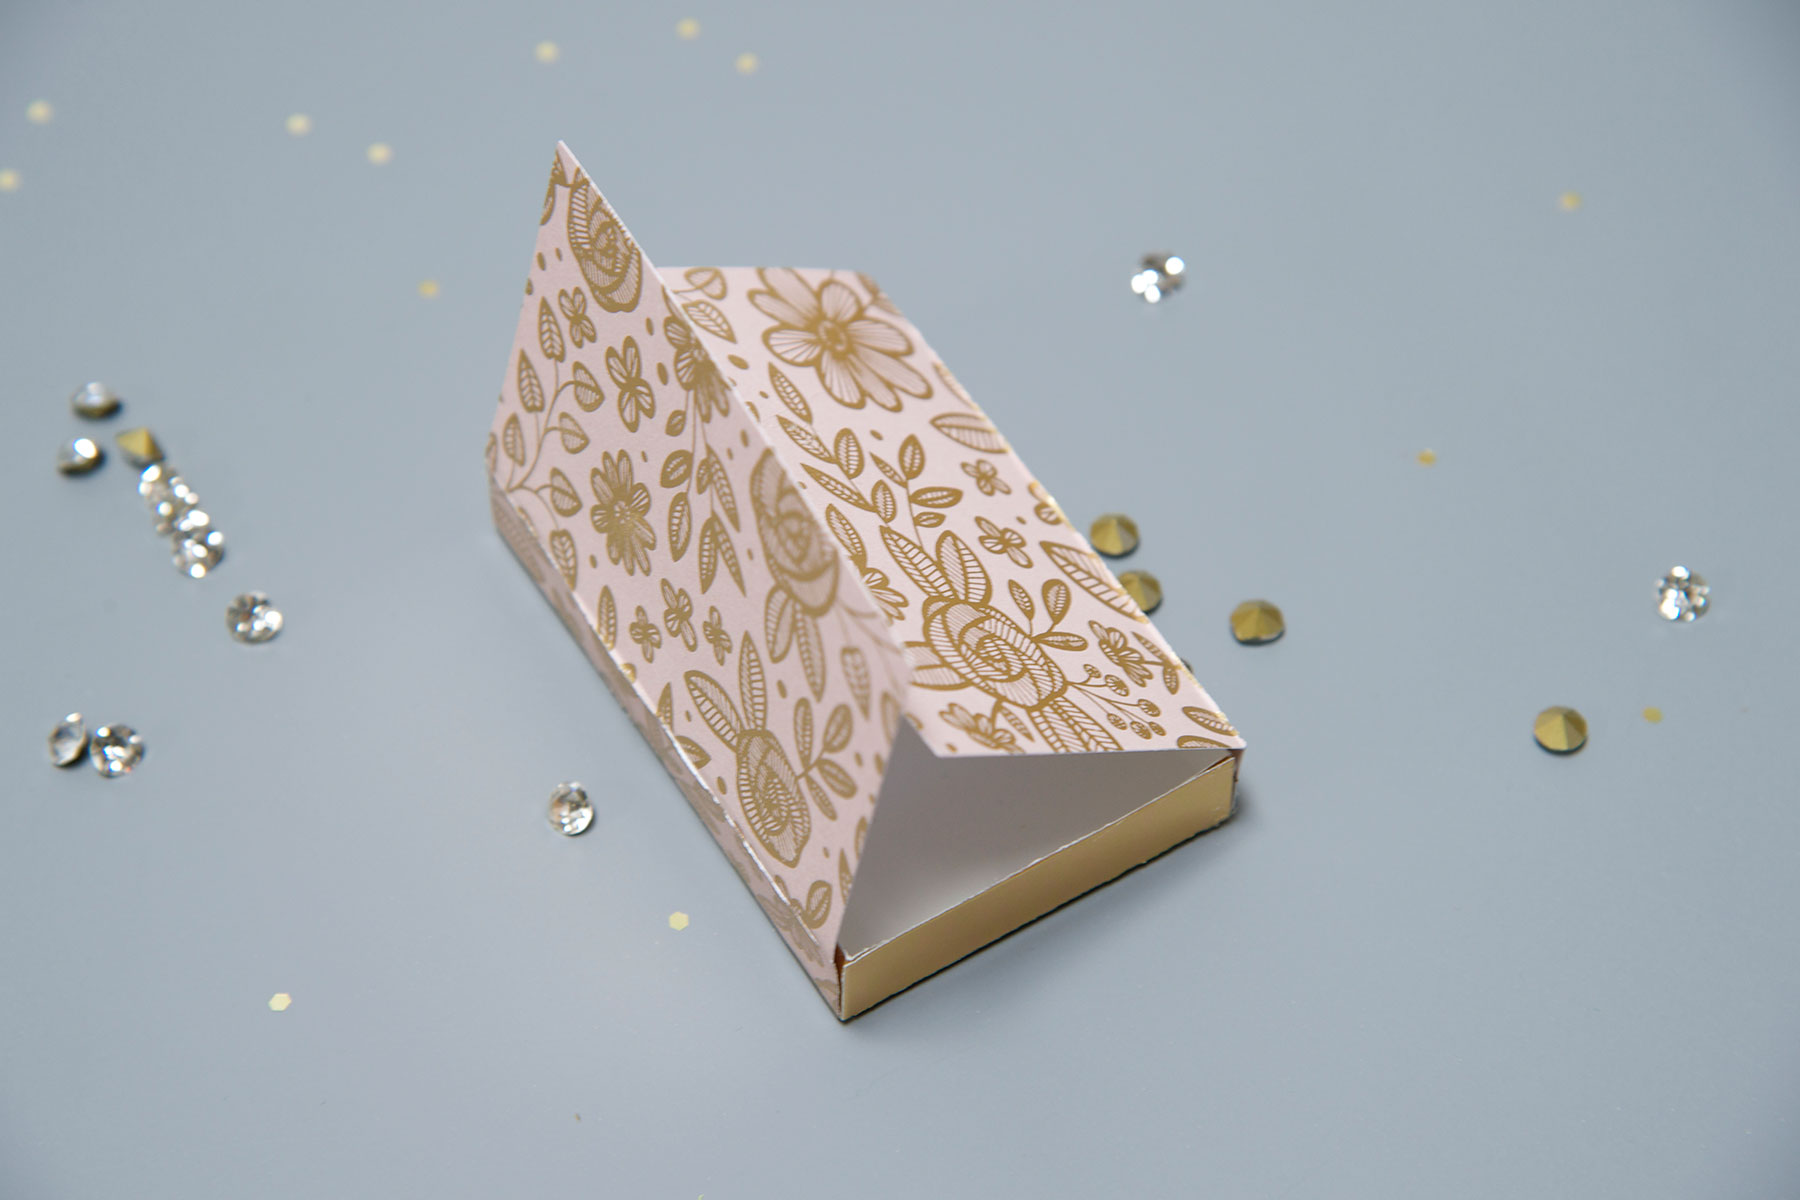
Another way to change the Match Box is to make it like a book. Assemble the box as instructed then add an additional lid (one side only) to one side of the box. When the lid is open, it can reveal a sentiment or photo.

Spellbinders - A Holiday Advent Calendar using the Match Box Die by Debi Adams #spellbinders #adventcalendar #diecutting

Spellbinders - A Holiday Advent Calendar using the Match Box Die by Debi Adams #spellbinders #adventcalendar #diecutting

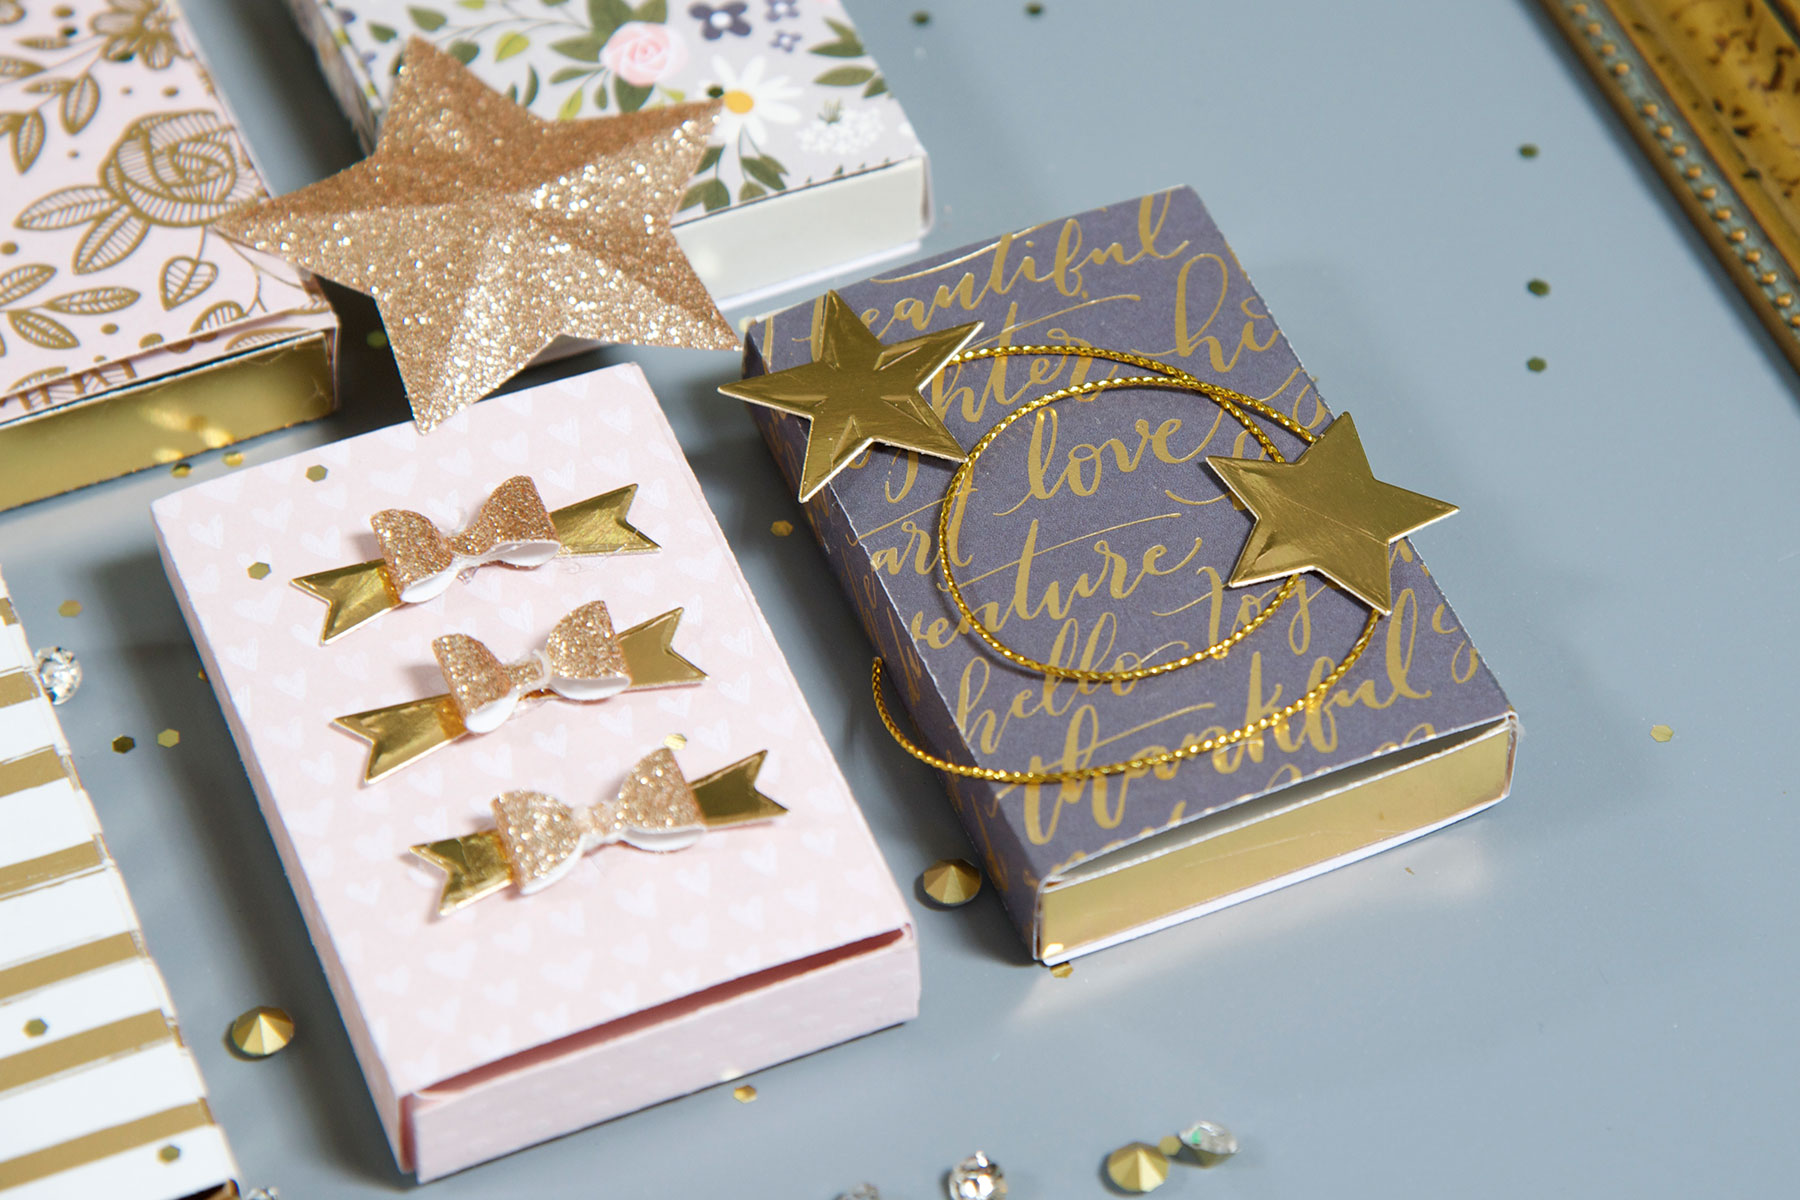
The Match Box comes with some tiny little bows. You can use them to embellish your box.

Spellbinders - A Holiday Advent Calendar using the Match Box Die by Debi Adams #spellbinders #adventcalendar #diecutting

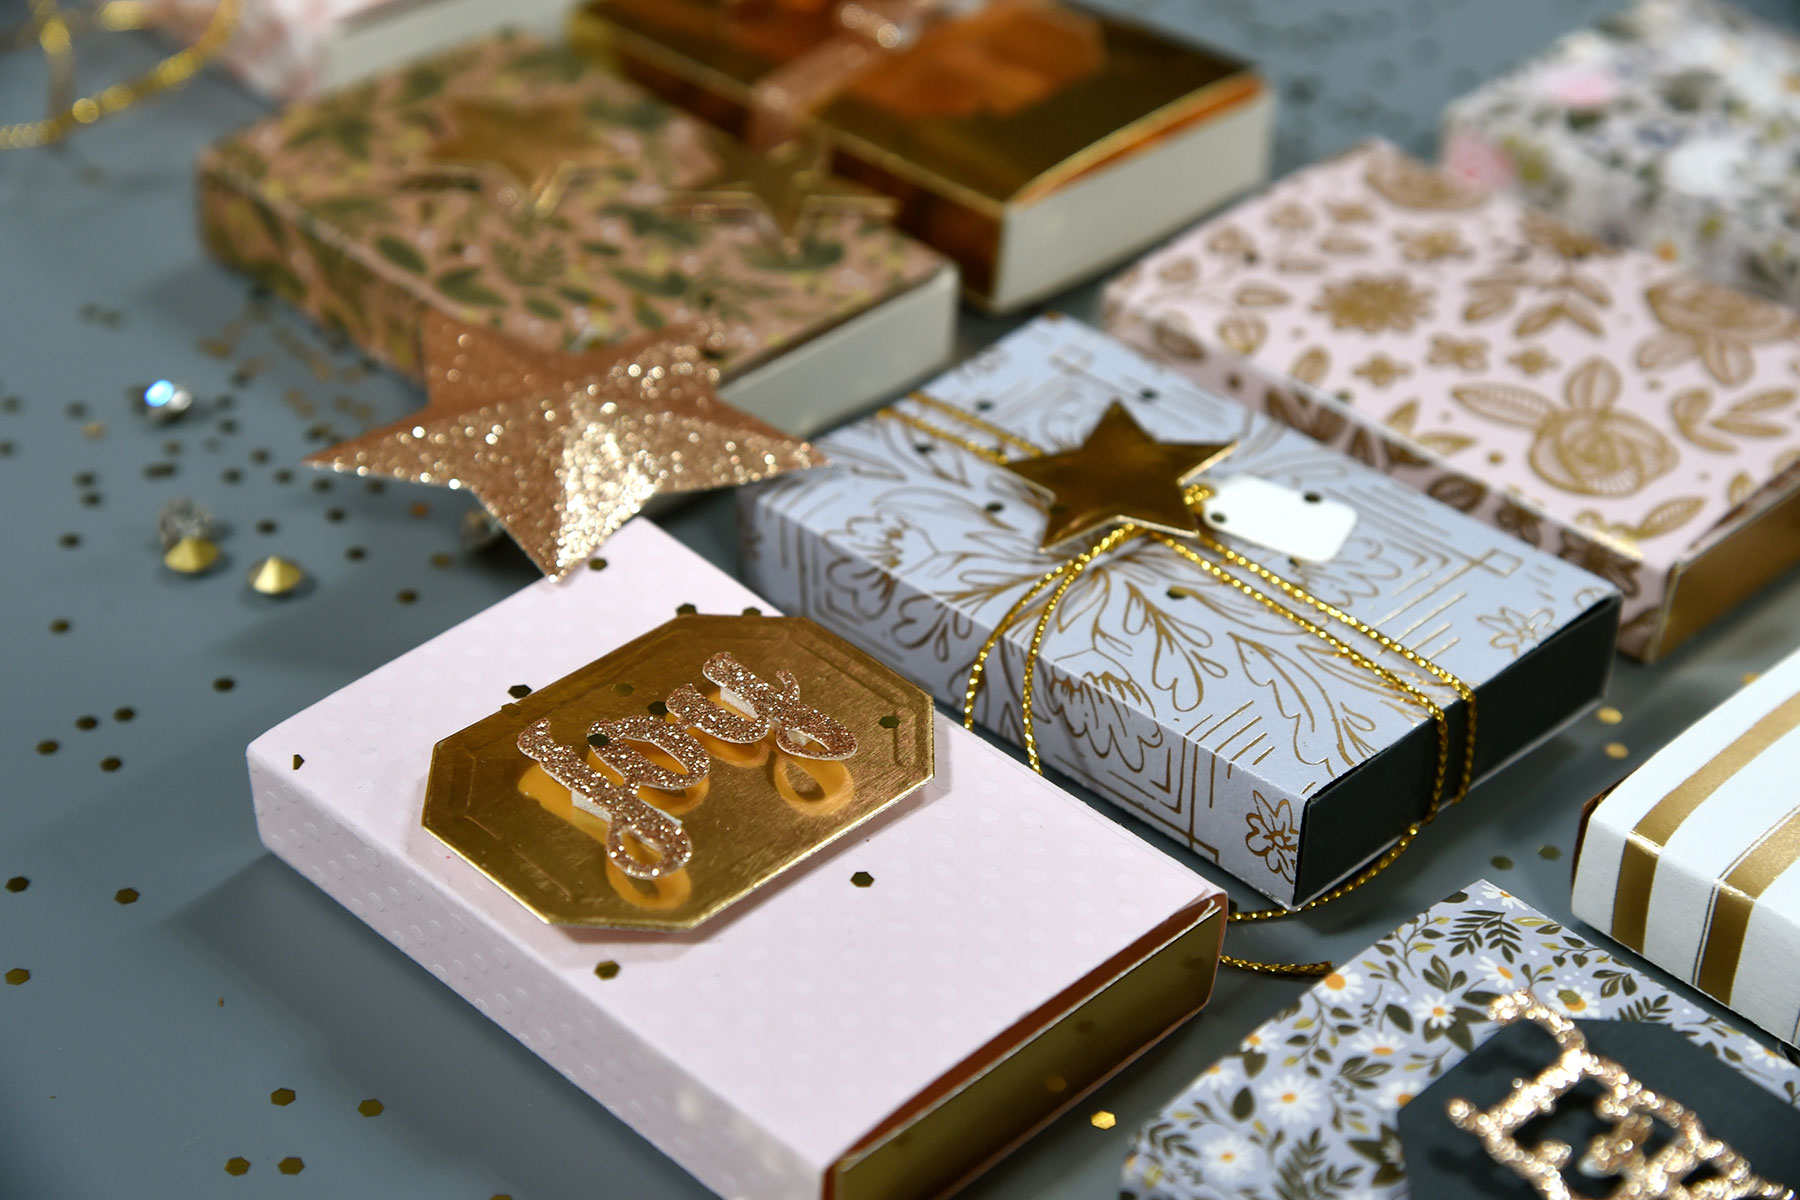
Tiny tags allow for personalization or for identifying the number in the advent.

Spellbinders - A Holiday Advent Calendar using the Match Box Die by Debi Adams #spellbinders #adventcalendar #diecutting

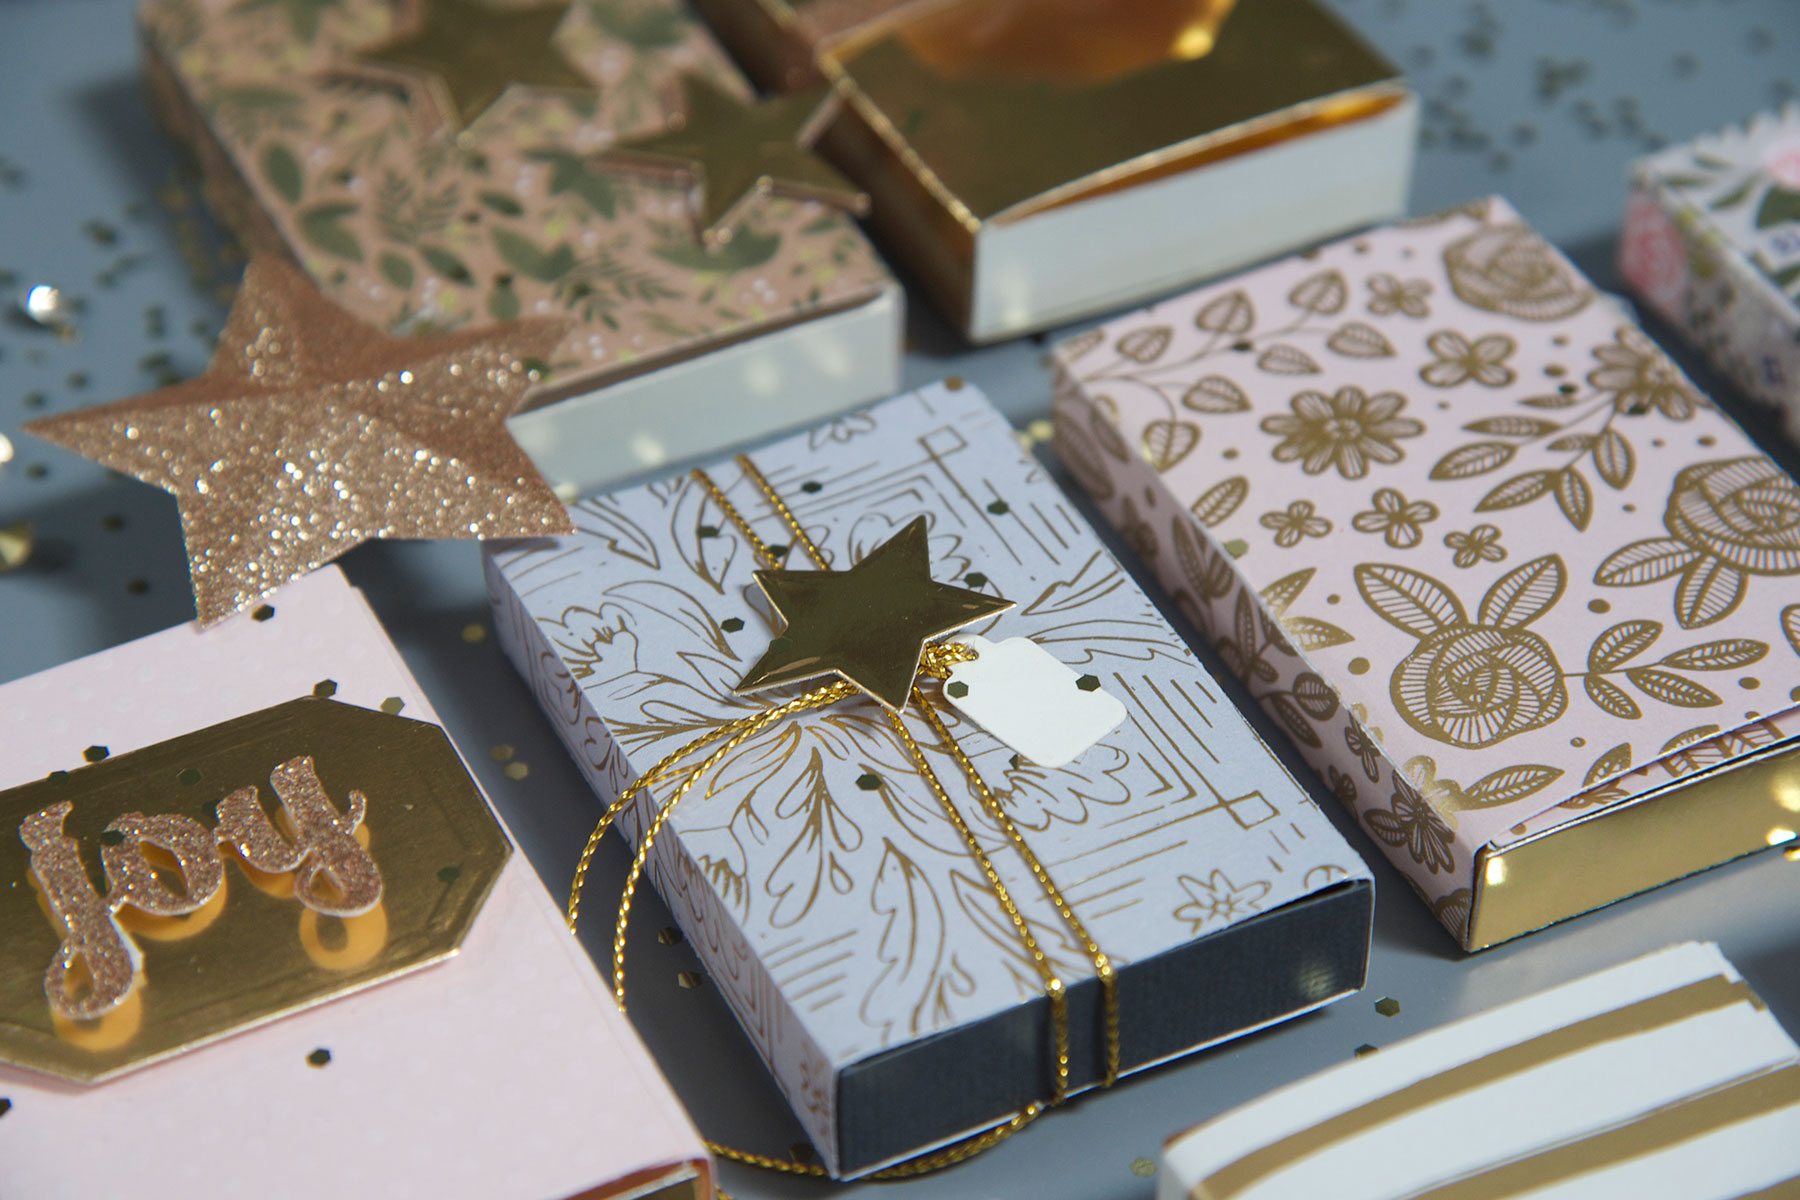
Touches of gold twine and gold stars add festivity to the gifts.

Spellbinders - A Holiday Advent Calendar using the Match Box Die by Debi Adams #spellbinders #adventcalendar #diecutting

And just a few sentiments here and there complete the look.

Spellbinders - A Holiday Advent Calendar using the Match Box Die by Debi Adams #spellbinders #adventcalendar #diecutting

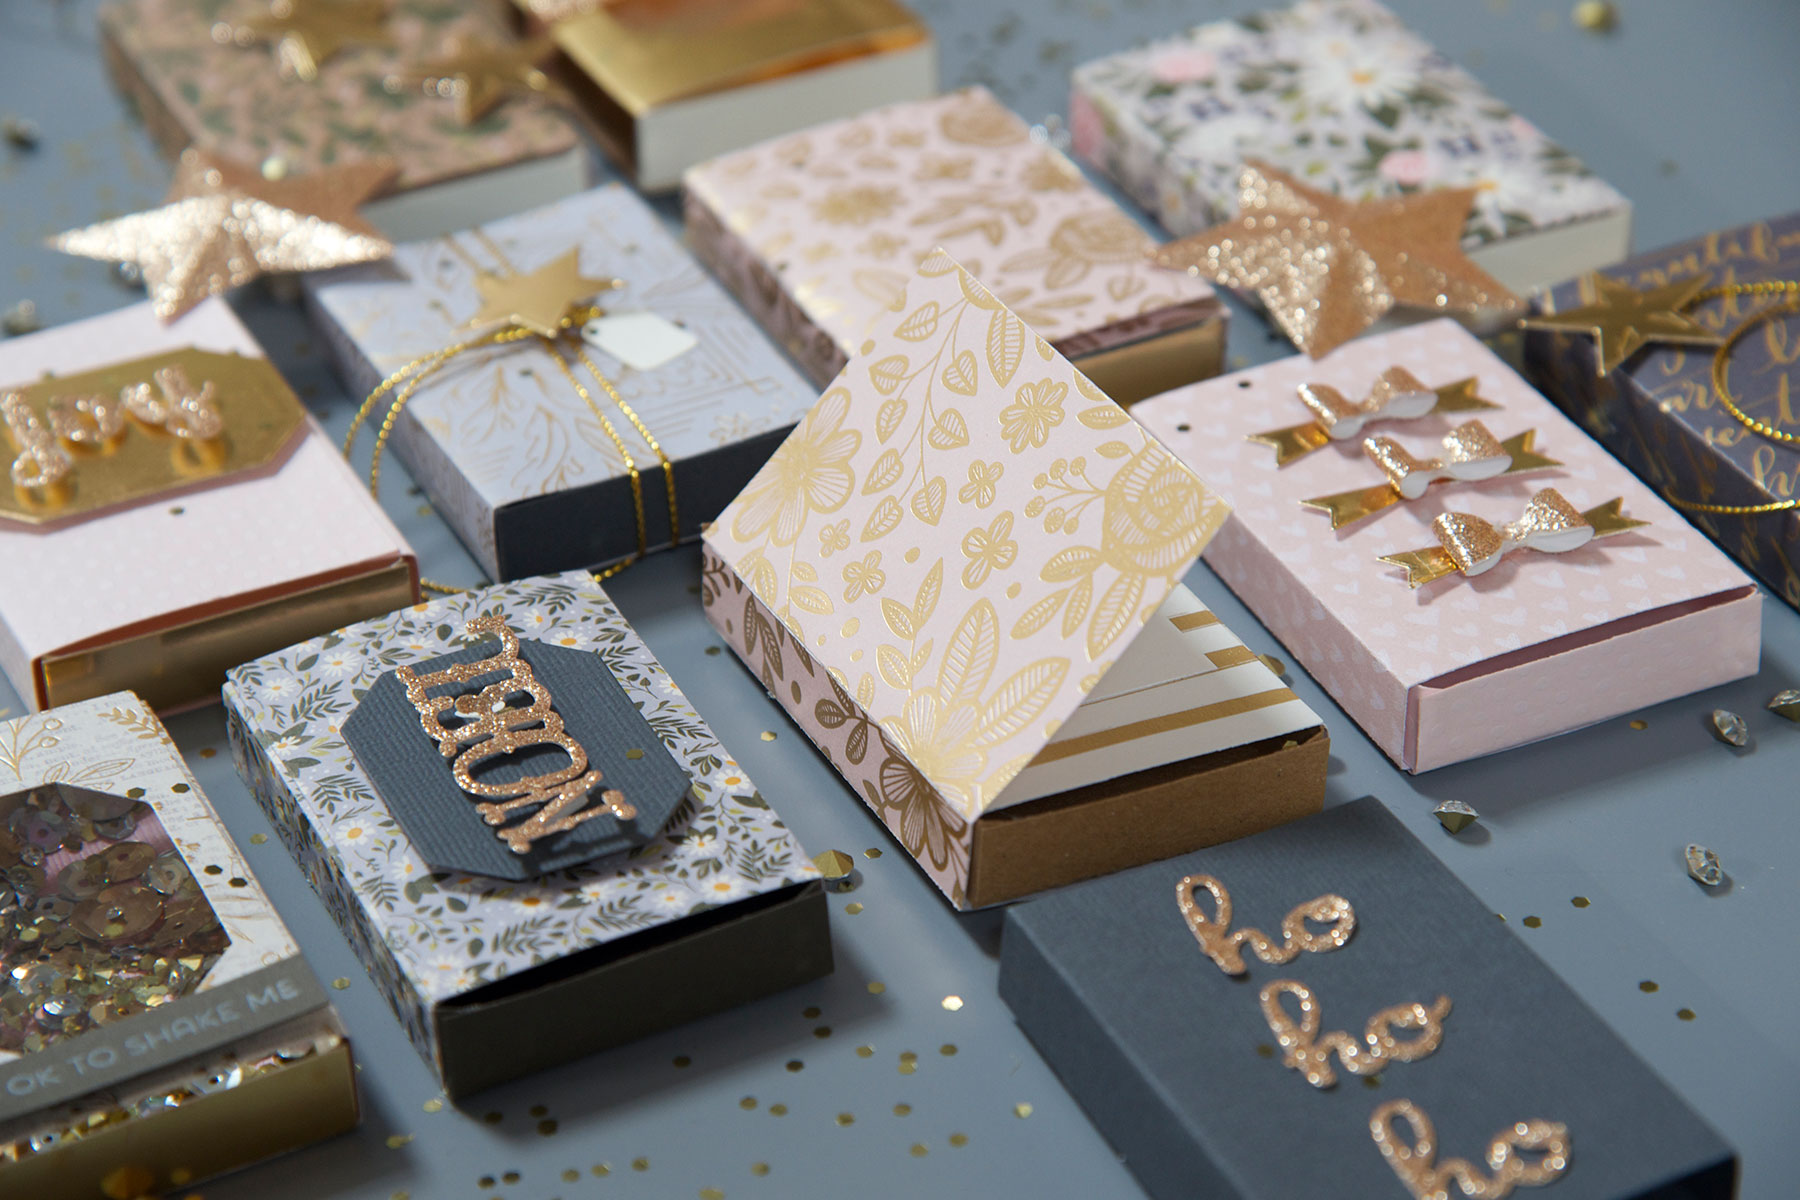
A conglomeration of many different styles.

Spellbinders - A Holiday Advent Calendar using the Match Box Die by Debi Adams #spellbinders #adventcalendar #diecutting

Arranging the Tree

Arrange your boxes onto a solid-colored foam board that has been adjusted to fit into your desired-size frame. I used a color that was in contrast to the boxes. Once I got the boxes where I wanted them, I secured them in place.
Since the purpose of the advent is to have little goodies tucked inside each one, securing the boxes to the board with Velcro would be ideal. The box can then be removed for retrieving the treat and then placed back onto the tree.
I felt like my tree needed a little bling and glitz so I added stars, sequins and some rhinestones. I think that writing some cool words with a gold marker around the tree would tie it all together too.

Spellbinders Supplies:

Other Supplies:

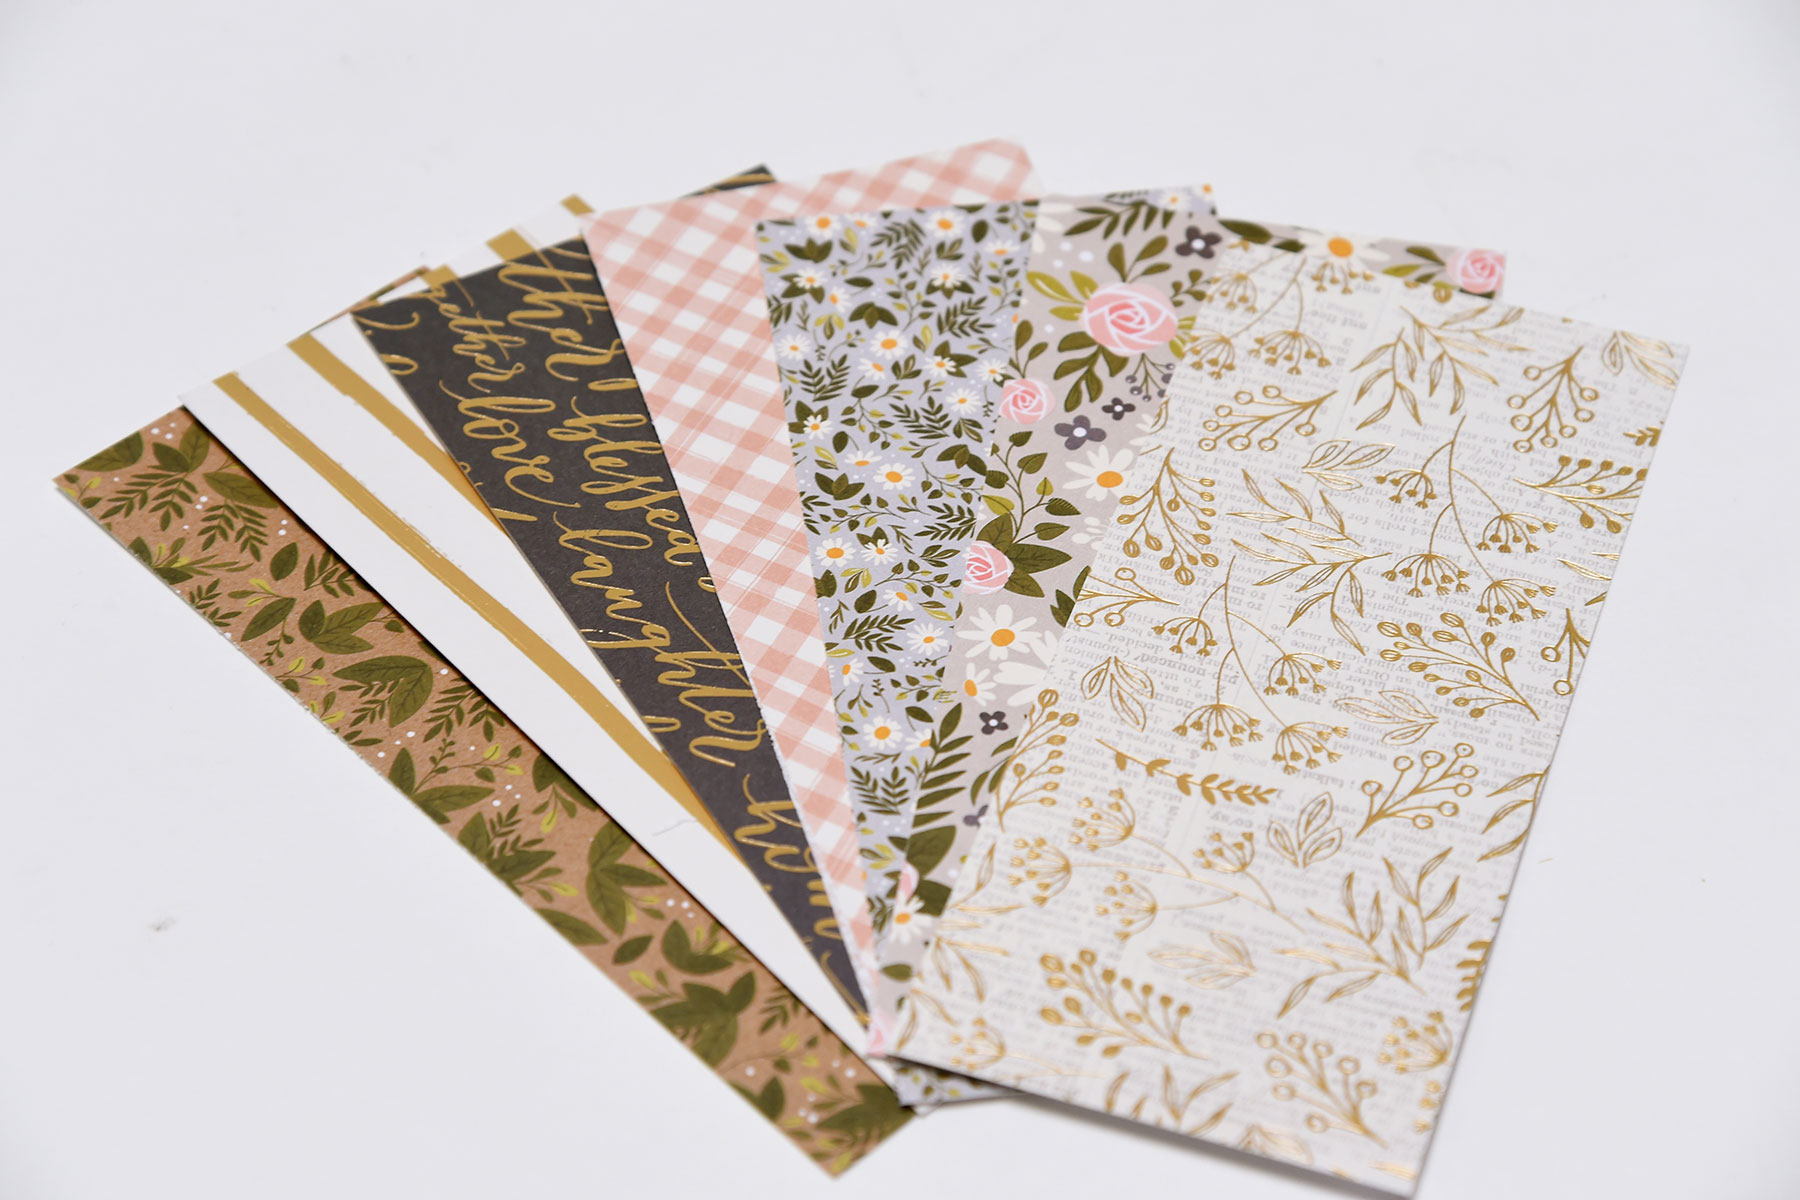
Patterned Paper (I used “Heart of Home” 6x6 paper pad by Jen Hadfield); Plain Cardstock of Your Choice; Glittered Cardstock of Your Choice; Gold Twine; Thin Acrylic or Plastic; Sequins; Rhinestones; Foam Dots; Adhesive; Frame; Foam Core Board or Similar; Velcro.

Spellbinders - A Holiday Advent Calendar using the Match Box Die by Debi Adams #spellbinders #adventcalendar #diecutting

Well that about “wraps” this up…Pun intended!  Whether you create an advent calendar or not, the box is an easy, convenient, and useful die to have around. Thanks for joining me today! XO, Debi Adams

Read more

Flowers and Lace by Marisa Job

Flowers and Lace by Marisa Job

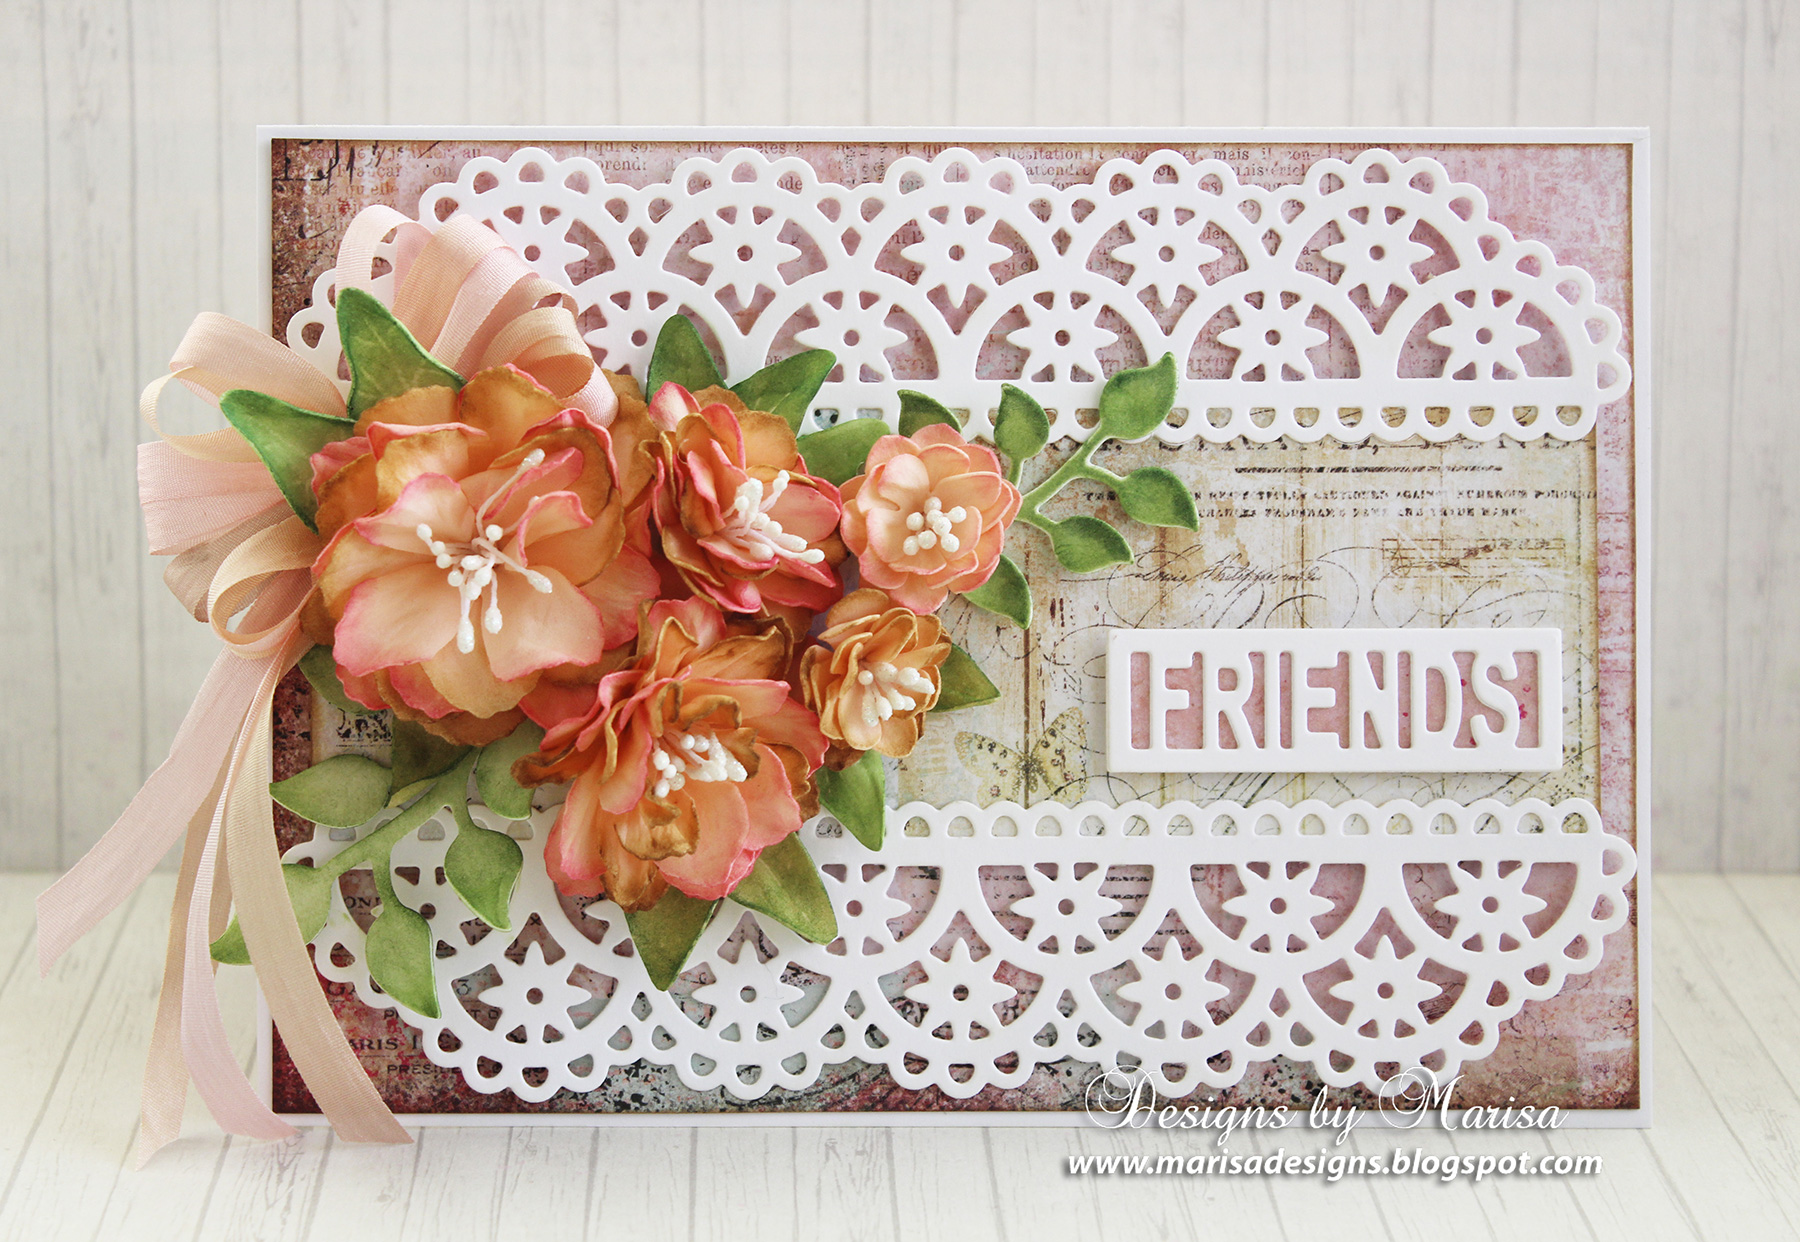
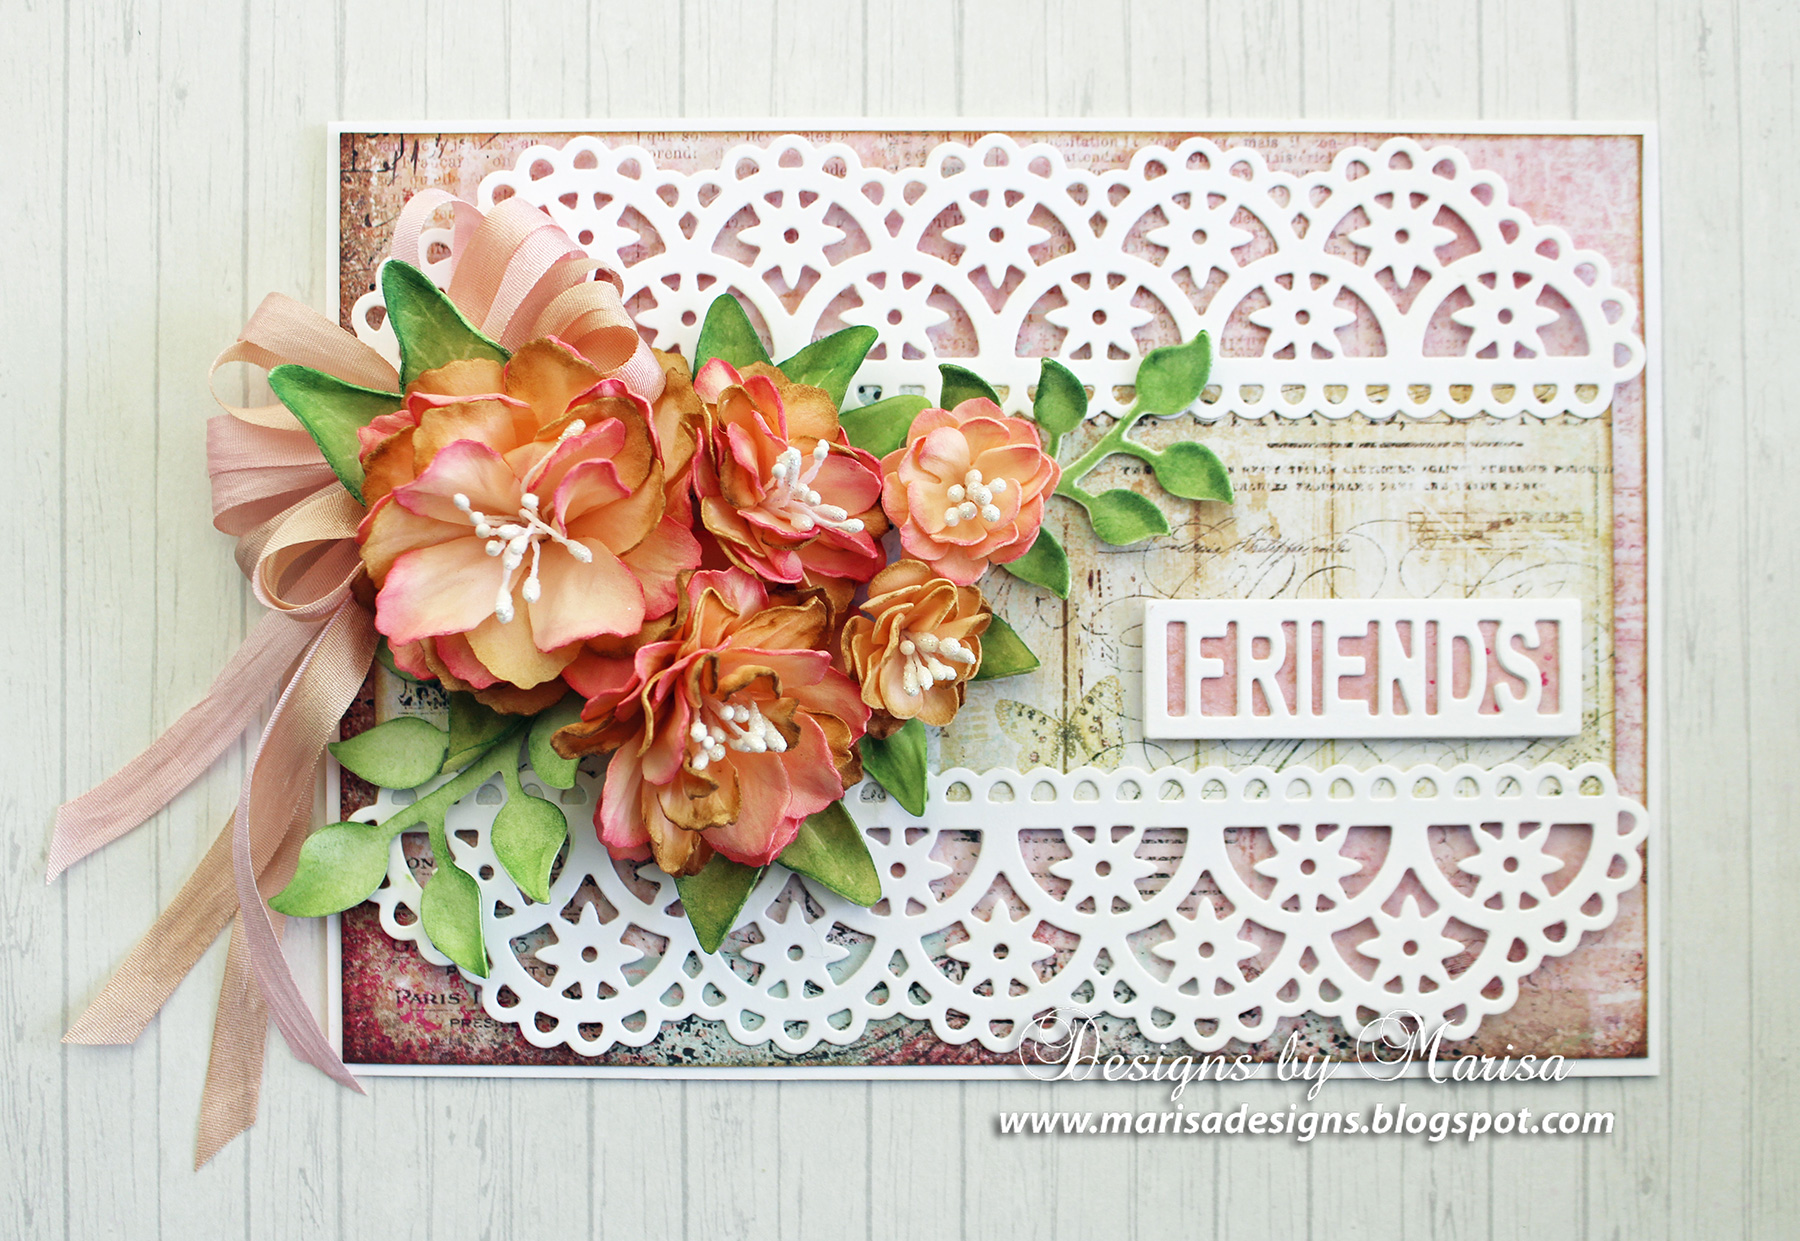
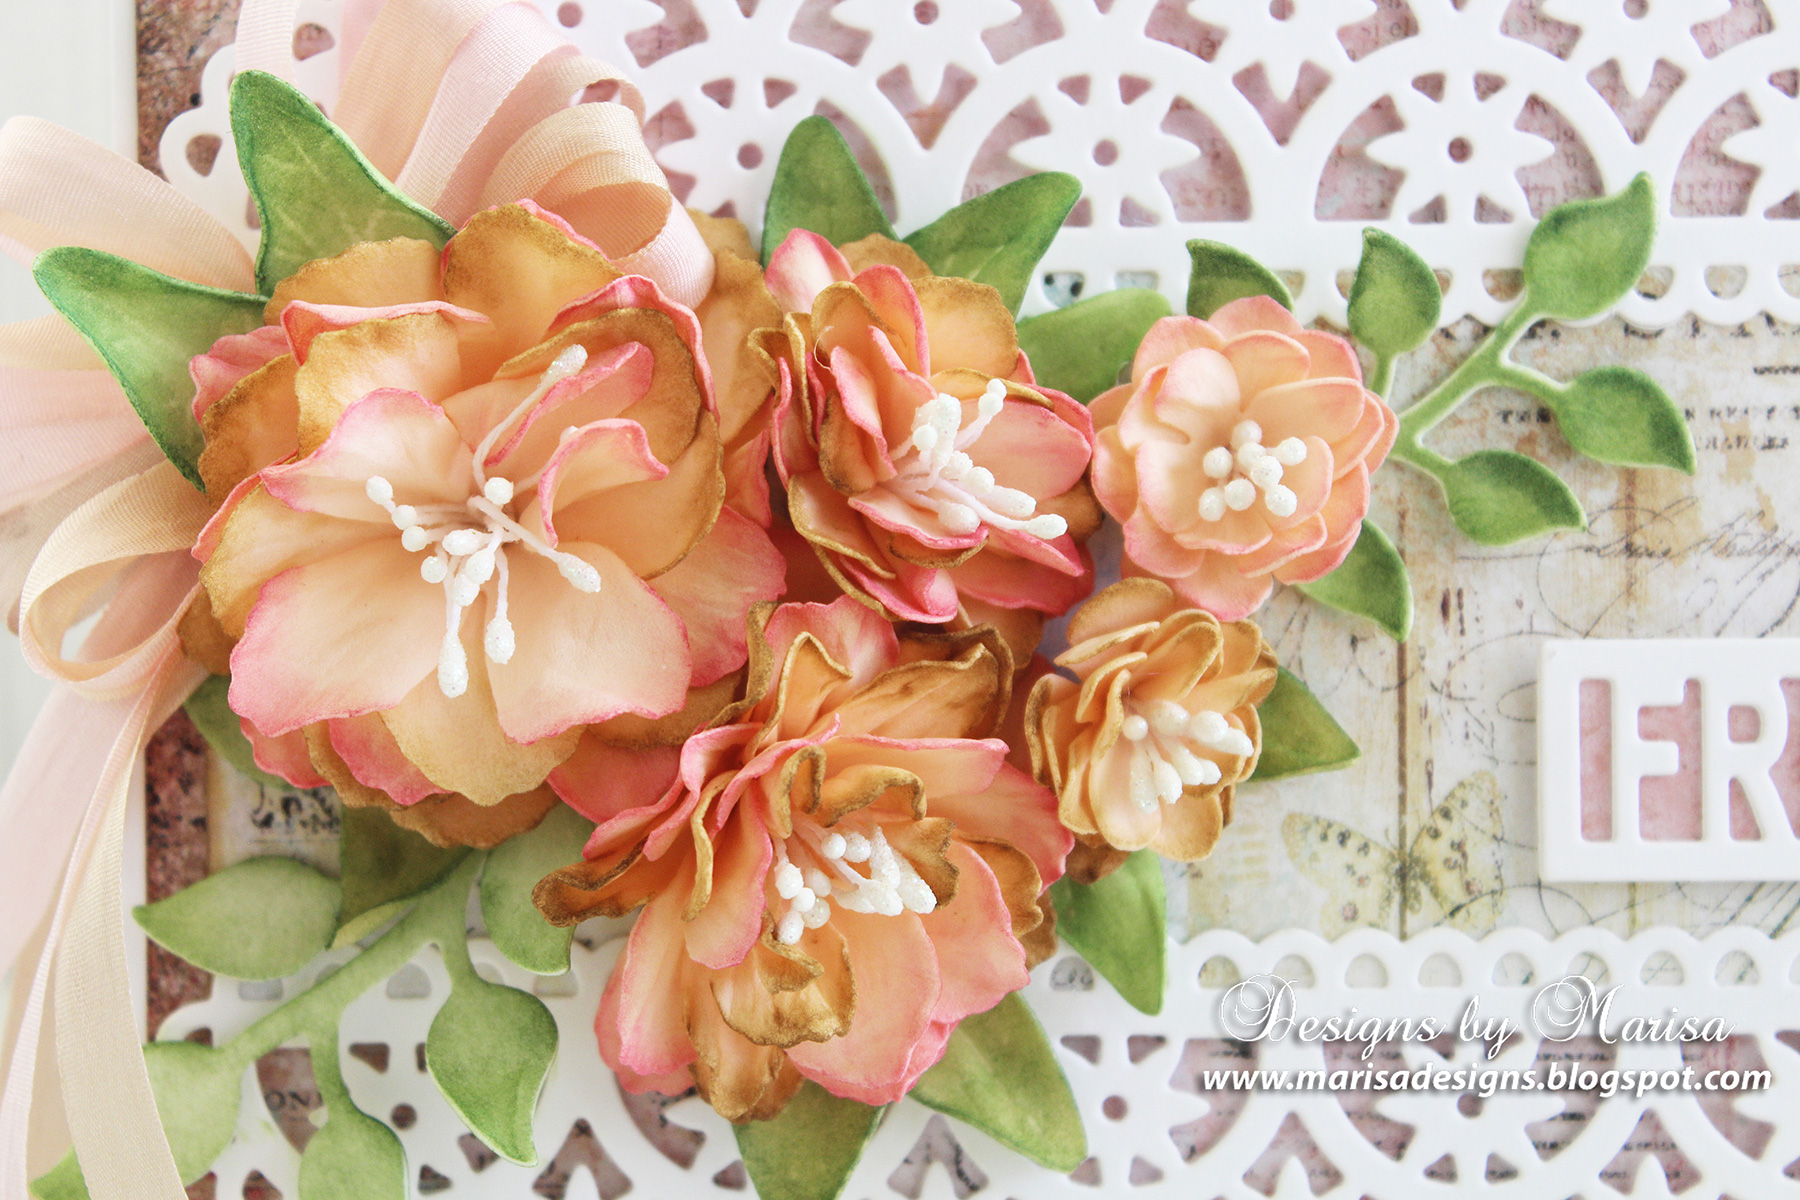
Hello crafty friends! I had so much fun creating this card with Flower Lace Borders die set from my Timeless Heart Collection. I also used my Texture Flowers die set and Foamiran to make the flowers. I really enjoy making flowers with Foamiran, the flowers are really easy to shape and they look very natural and soft to the touch.

Flowers and Lace Card by Marisa Job for Spellbinders using Flower Lace Borders S4-796, Textured Flowers S5-317, Layered Leaf Vines S4-795, Friends & Family Frames S5-315 dies #spellbinders #diecutting #cardmaking

Step by Step Instructions:

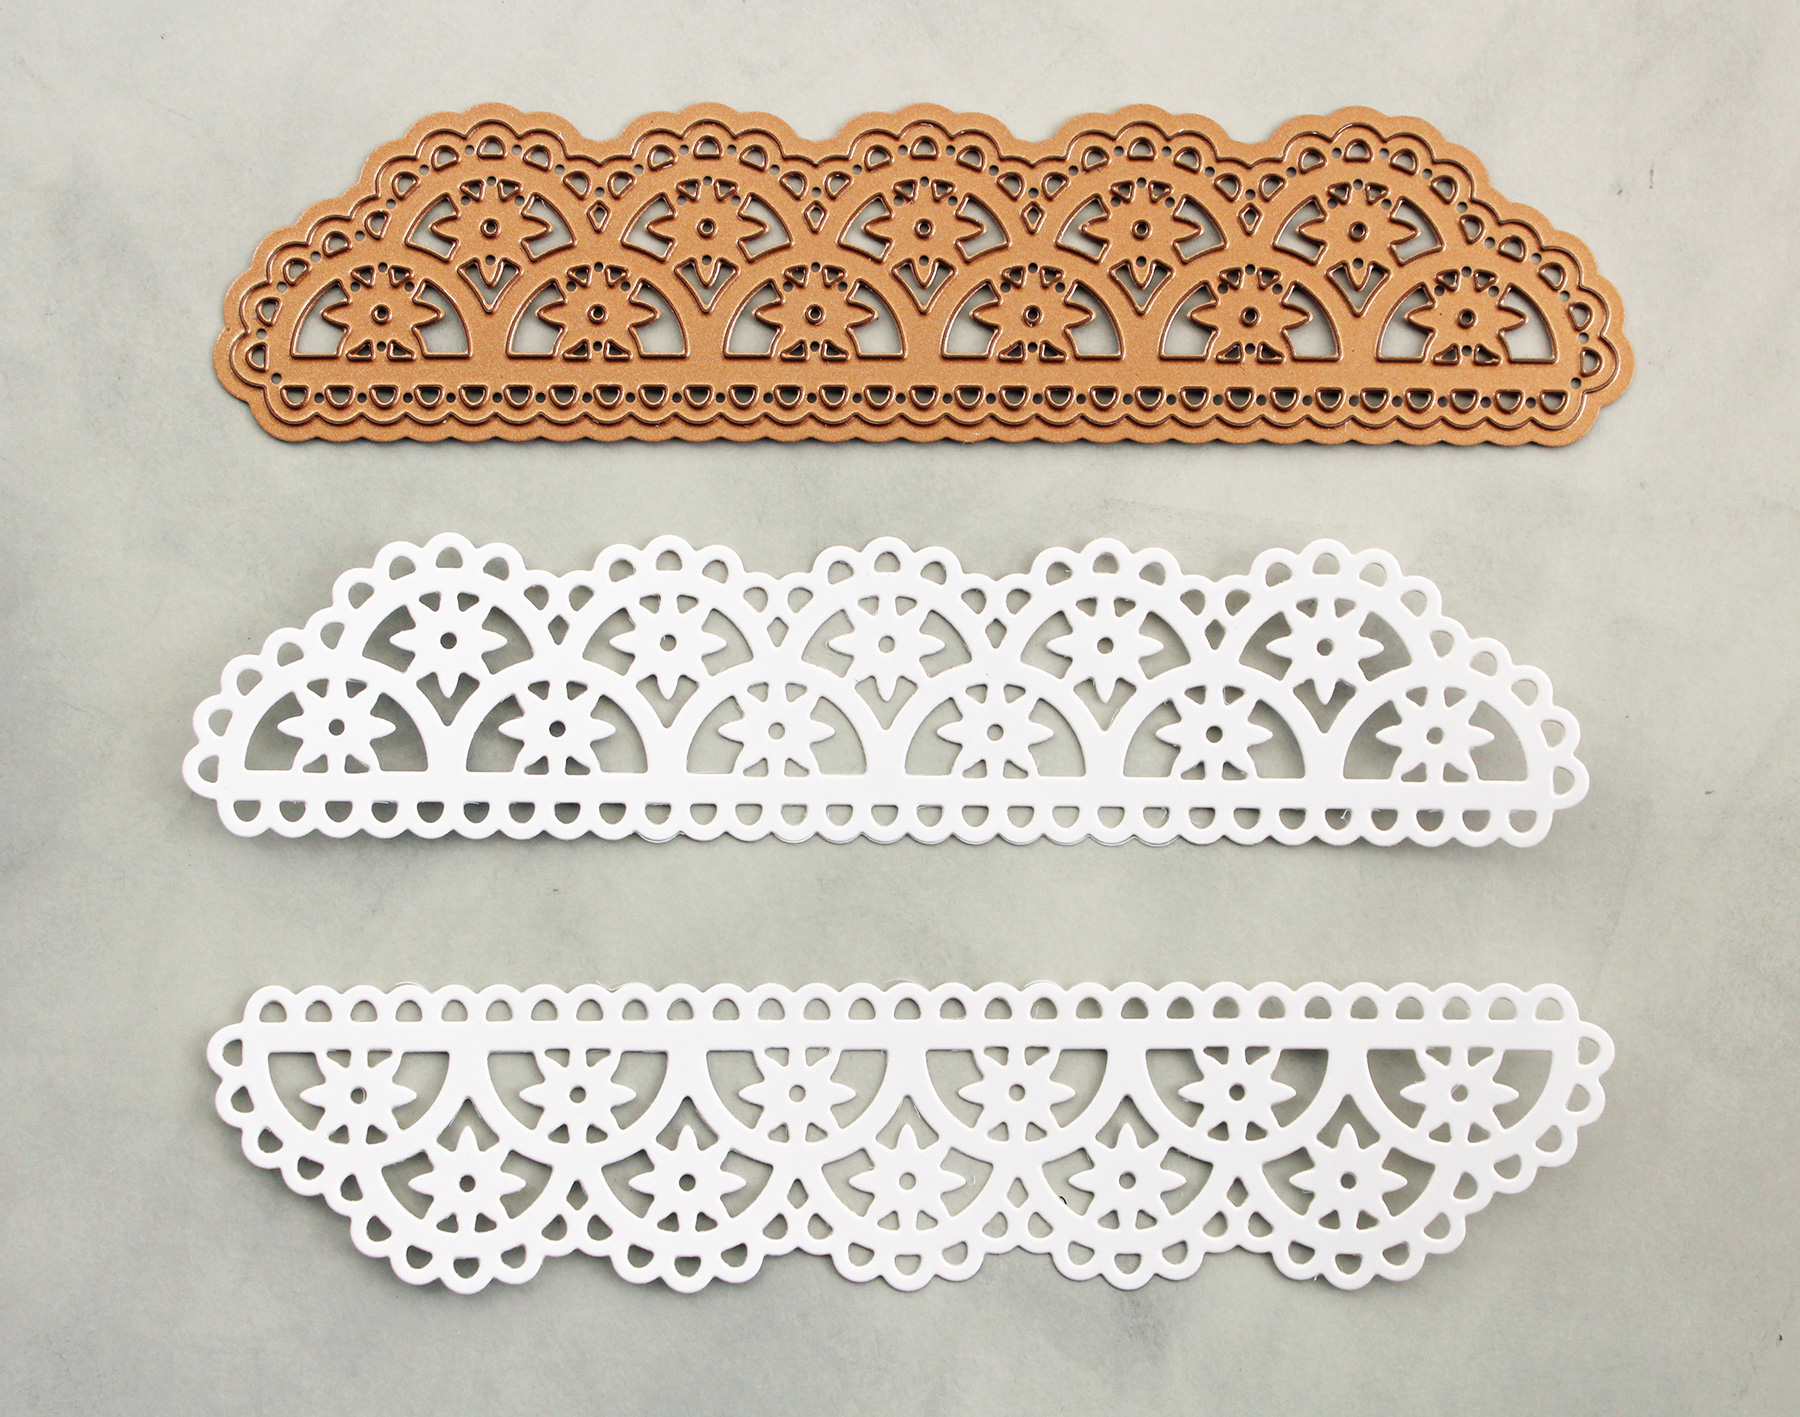
1. Create a 5” x 7” card base from white cardstock. Cover front of card with designer cardstock. 2. Die cut 2 lace borders with Flower Lace Borders die set from white card stock.

Flowers and Lace Card by Marisa Job for Spellbinders using Flower Lace Borders S4-796, Textured Flowers S5-317, Layered Leaf Vines S4-795, Friends & Family Frames S5-315 dies #spellbinders #diecutting #cardmaking

3. Cut a 6 ½” x 2 ½” panel from designer cardstock. Glue flower lace borders to panel and then adhere to card front using foam squares.

Flowers and Lace Card by Marisa Job for Spellbinders using Flower Lace Borders S4-796, Textured Flowers S5-317, Layered Leaf Vines S4-795, Friends & Family Frames S5-315 dies #spellbinders #diecutting #cardmaking

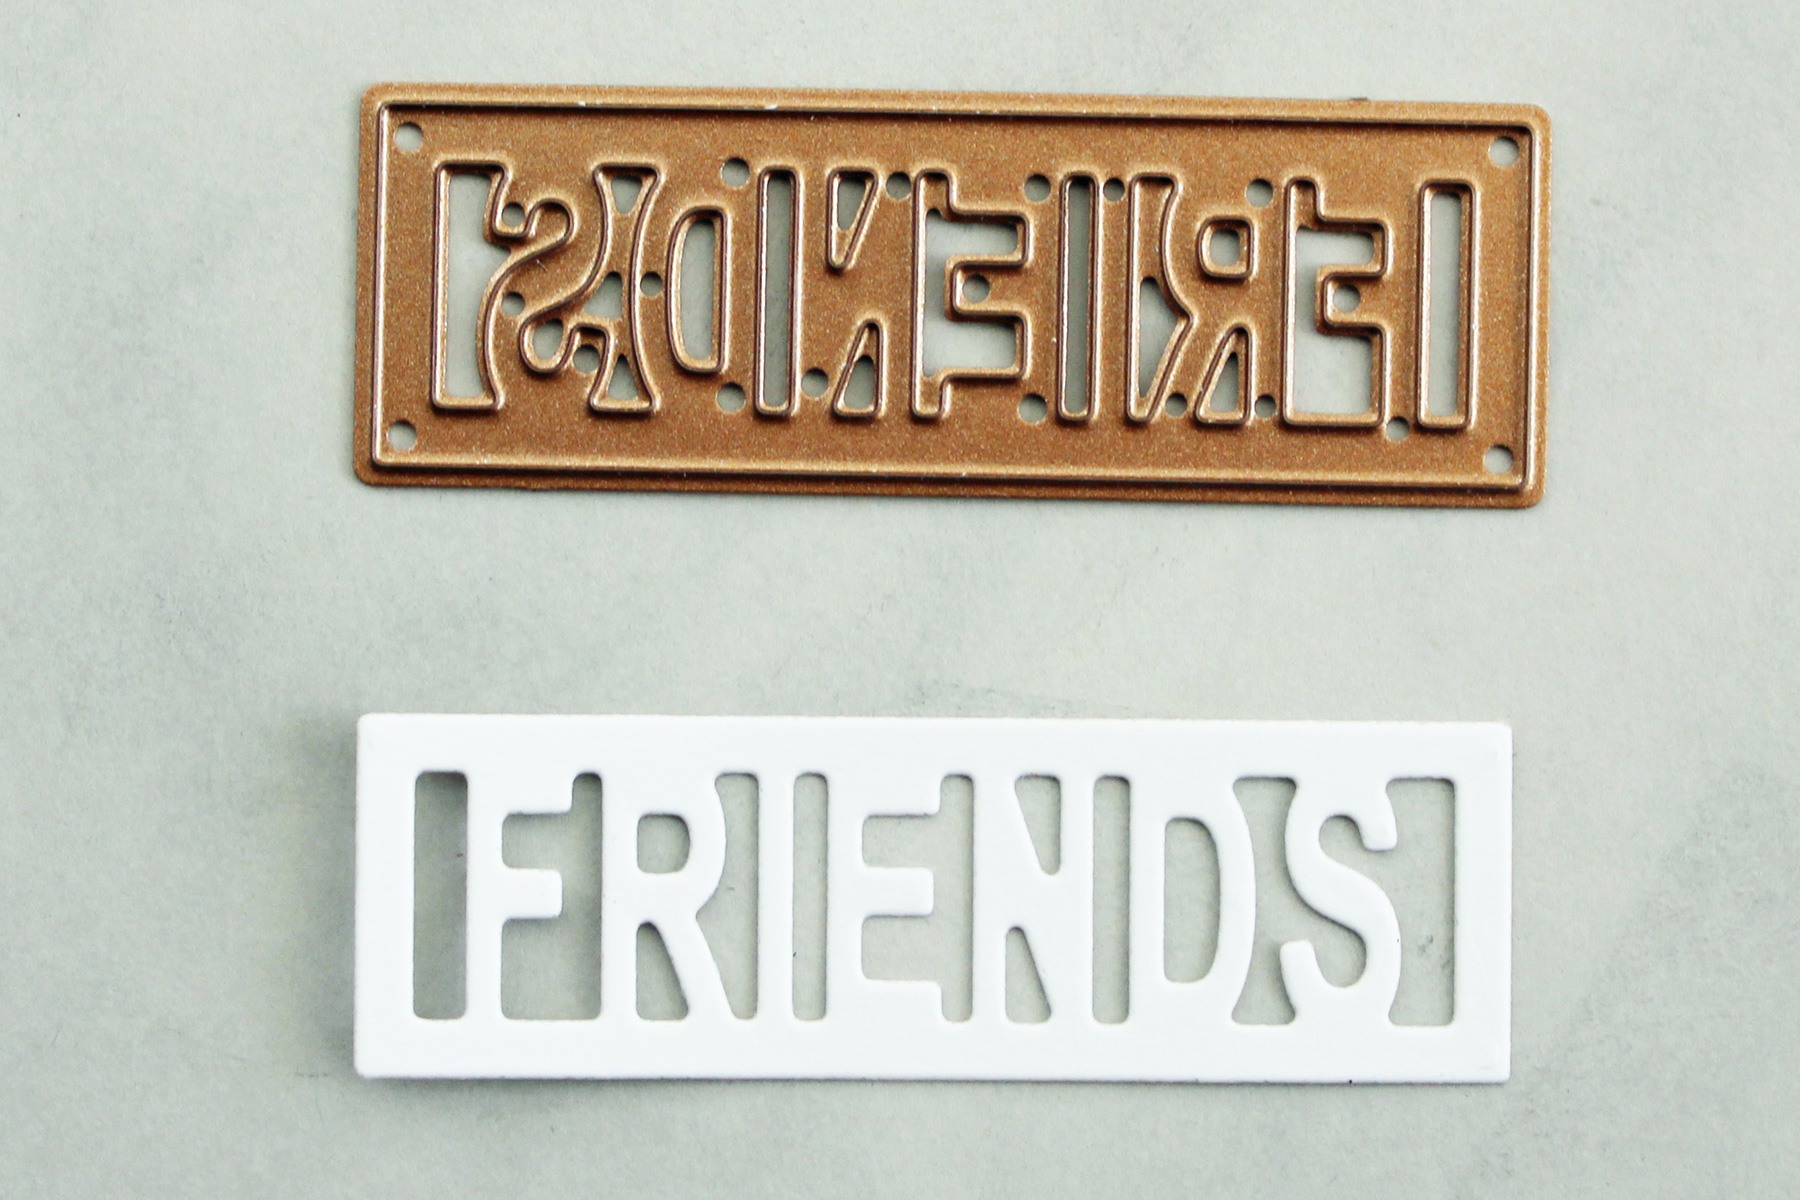
4. Die cut Friends sentiment with Friends & Family Frames die set from white cardstock. Adhere sentiment to card using foam squares.

Flowers and Lace Card by Marisa Job for Spellbinders using Flower Lace Borders S4-796, Textured Flowers S5-317, Layered Leaf Vines S4-795, Friends & Family Frames S5-315 dies #spellbinders #diecutting #cardmaking

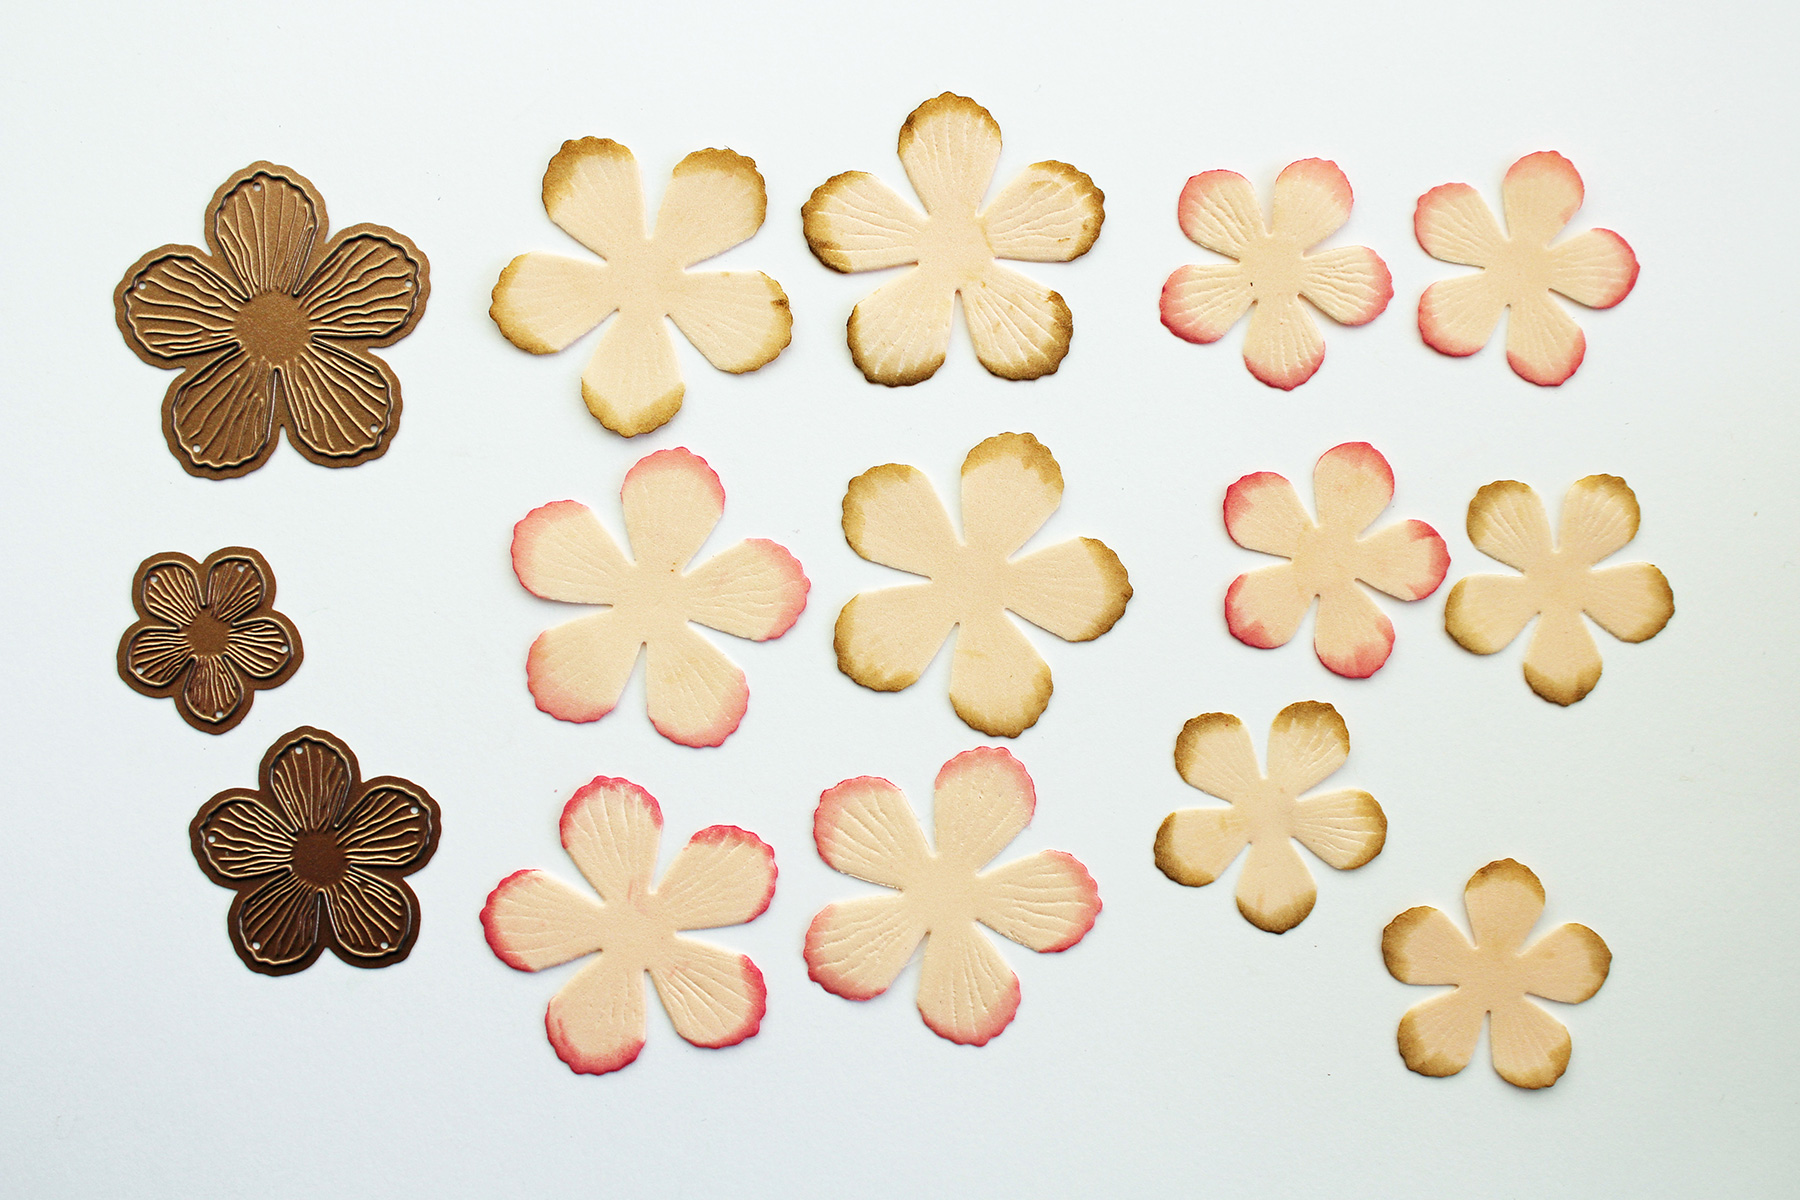
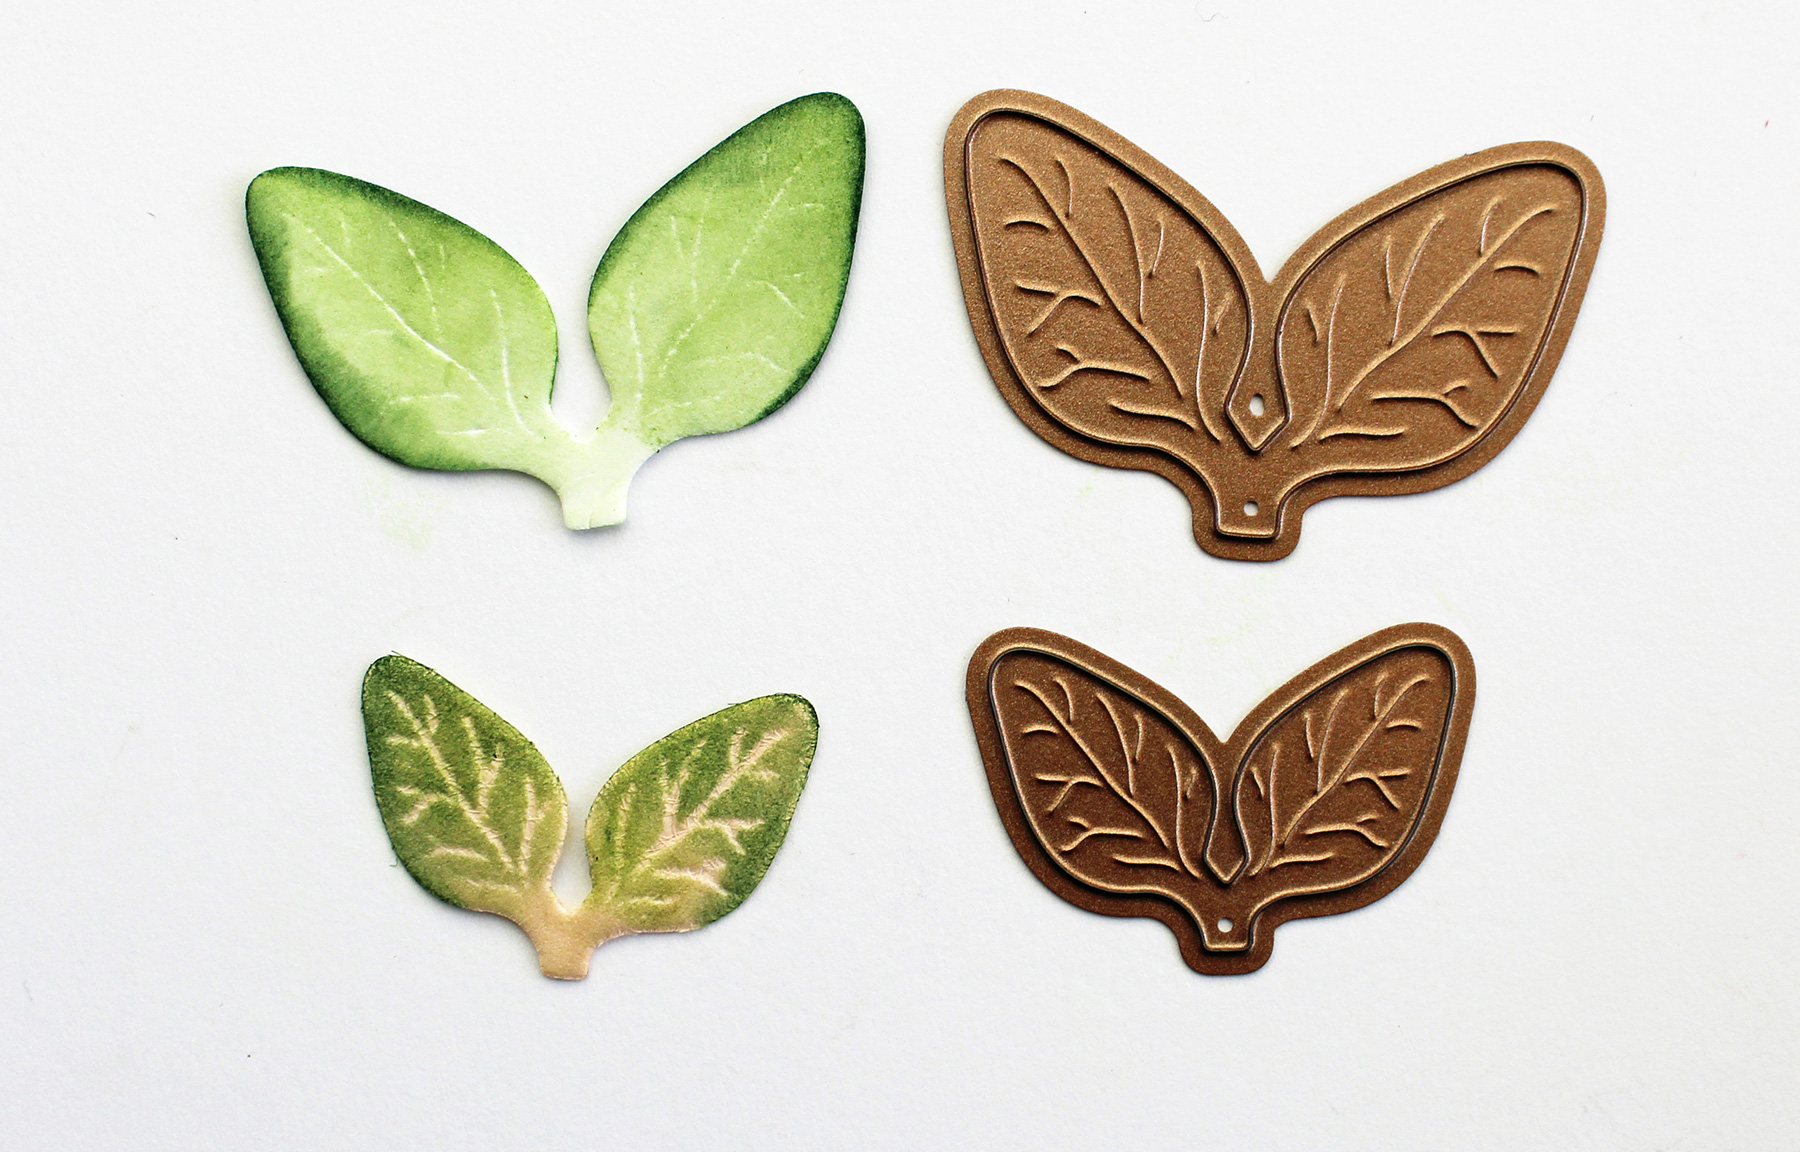
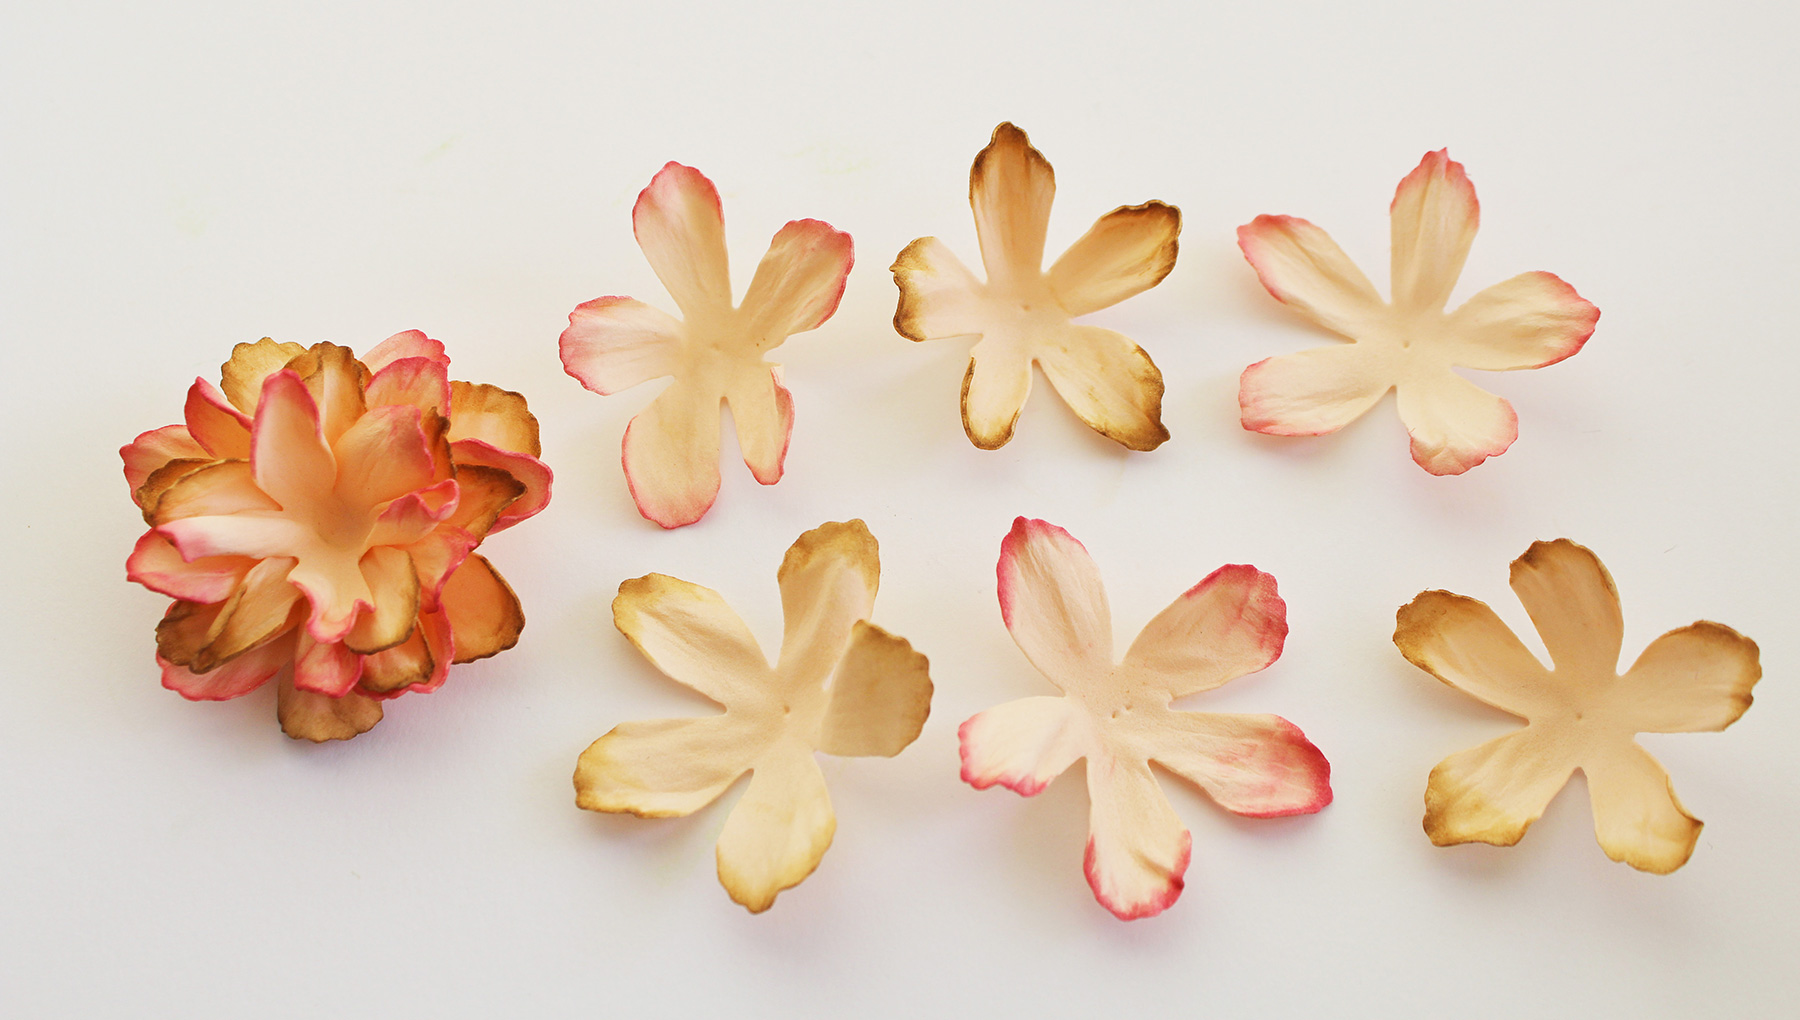
5. Die cut multiple flowers and leaves with Textured Flowers die set from Foamiran in peach color. Color edges of all flowers with brown and pink chalk inks. Color leaves with green chalk ink.

Flowers and Lace Card by Marisa Job for Spellbinders using Flower Lace Borders S4-796, Textured Flowers S5-317, Layered Leaf Vines S4-795, Friends & Family Frames S5-315 dies #spellbinders #diecutting #cardmaking

Flowers and Lace Card by Marisa Job for Spellbinders using Flower Lace Borders S4-796, Textured Flowers S5-317, Layered Leaf Vines S4-795, Friends & Family Frames S5-315 dies

6. Heat flowers with heat tool for a few seconds and then twist petals to shape. Layer petals together with hot glue gun.

Flowers and Lace Card by Marisa Job for Spellbinders using Flower Lace Borders S4-796, Textured Flowers S5-317, Layered Leaf Vines S4-795, Friends & Family Frames S5-315 dies

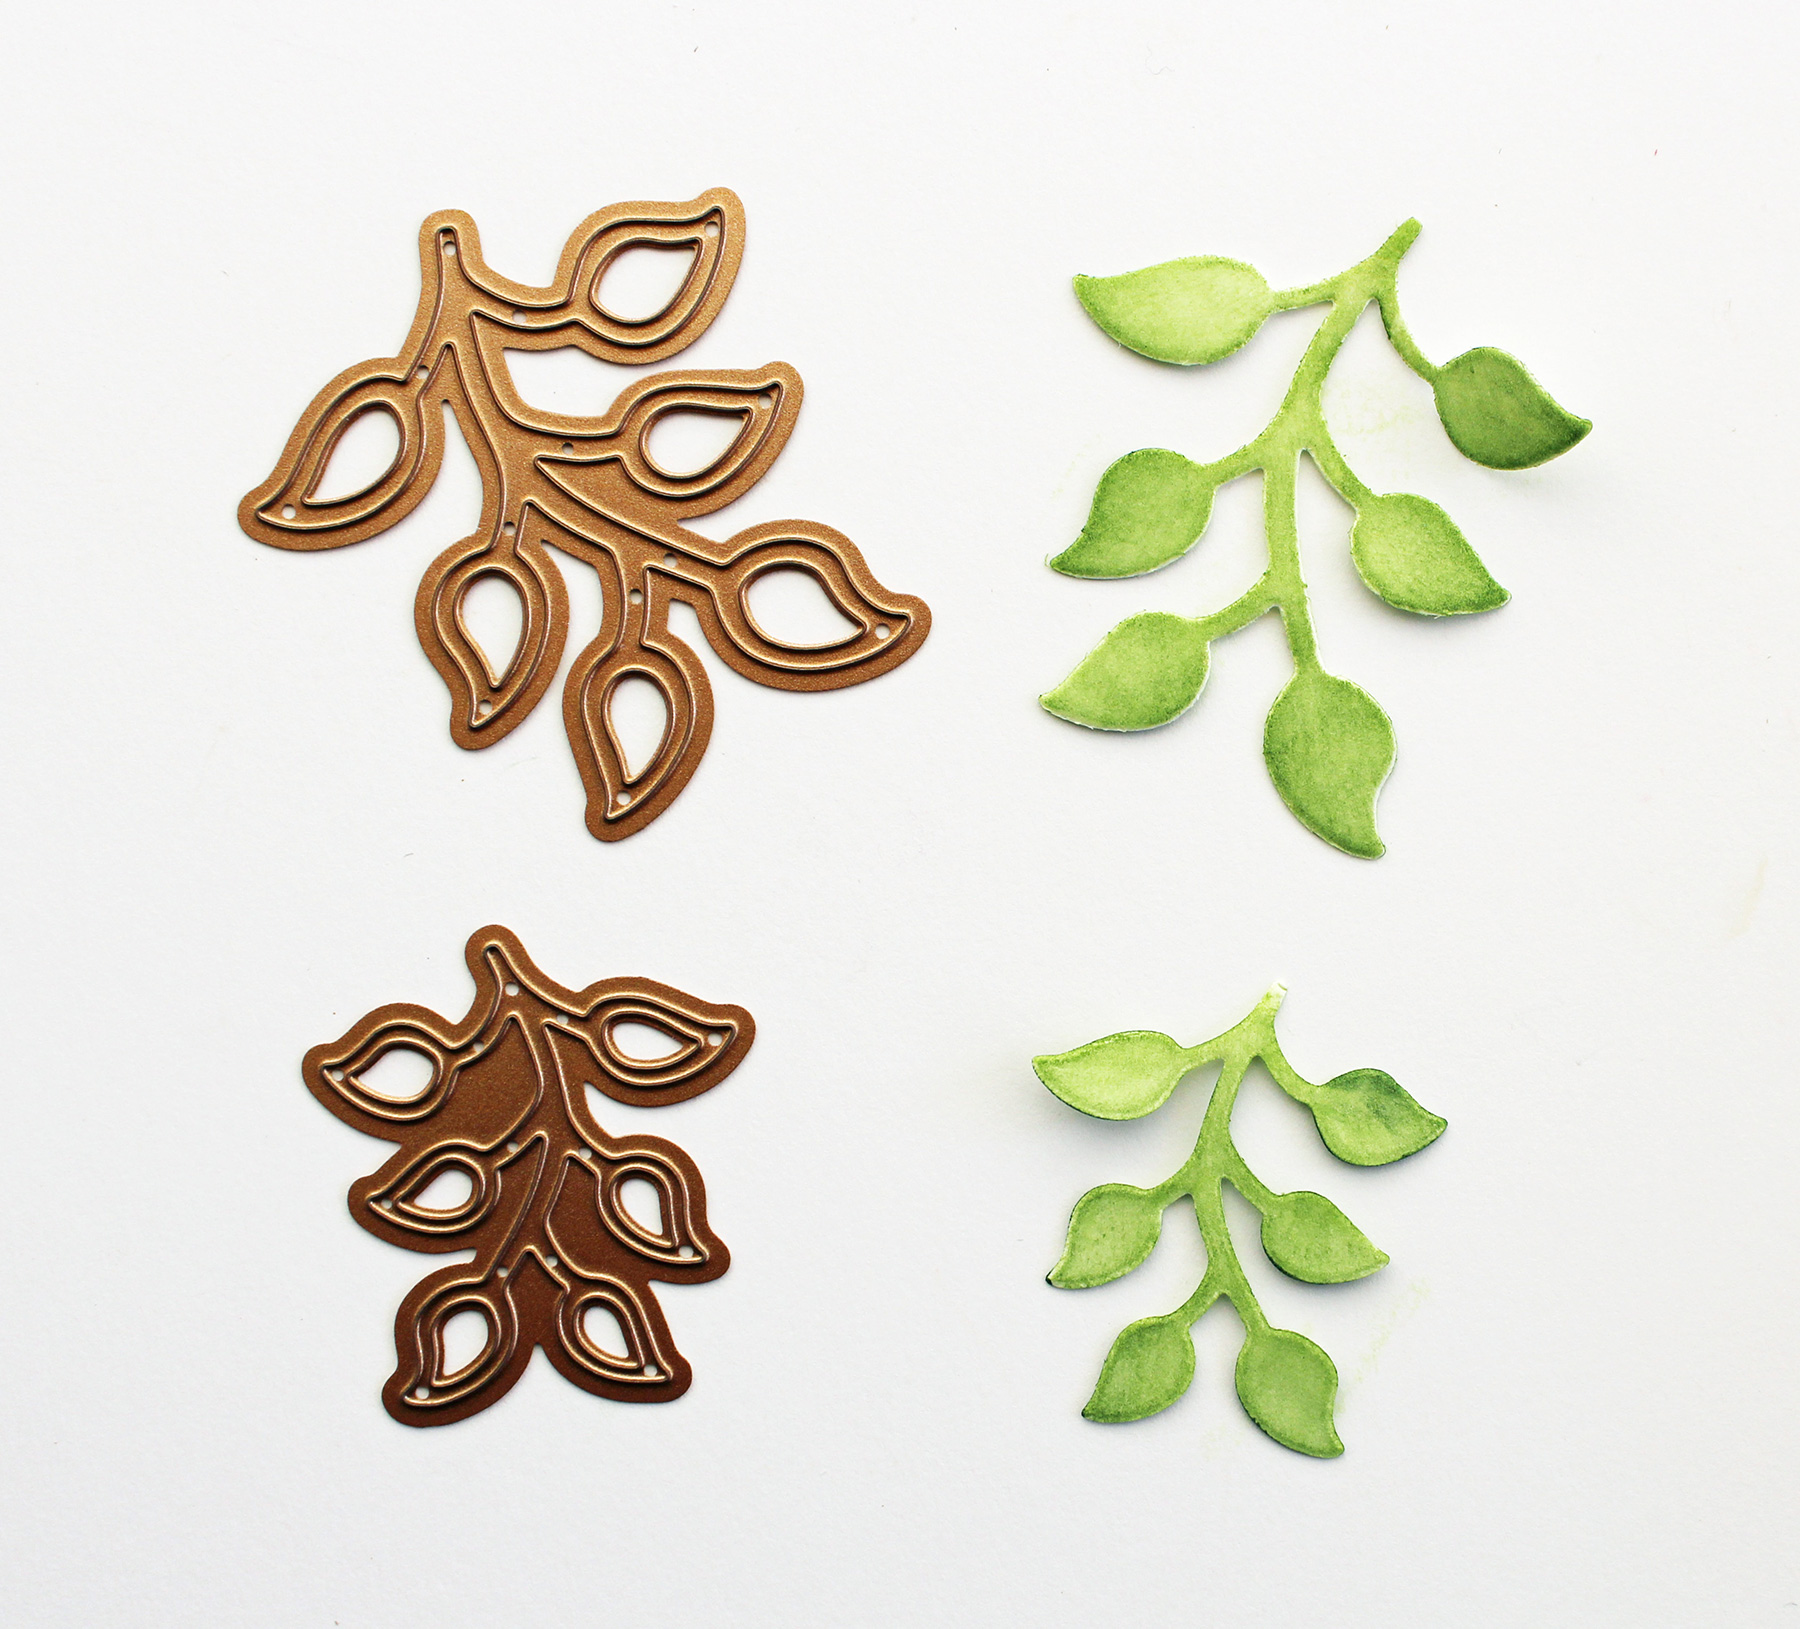
7. Die cut 2 leaf vines with Layered Leaf Vines die set from Foamiran, color with green chalk ink.

Flowers and Lace Card by Marisa Job for Spellbinders using Flower Lace Borders S4-796, Textured Flowers S5-317, Layered Leaf Vines S4-795, Friends & Family Frames S5-315 dies

8. Embellish center of flowers with stamens or micro-beads. Adhere flowers and leaves to card as pictured below. Create a bow with silk ribbon and glue under flower.

Flowers and Lace Card by Marisa Job for Spellbinders using Flower Lace Borders S4-796, Textured Flowers S5-317, Layered Leaf Vines S4-795, Friends & Family Frames S5-315 dies

Flowers and Lace Card by Marisa Job for Spellbinders using Flower Lace Borders S4-796, Textured Flowers S5-317, Layered Leaf Vines S4-795, Friends & Family Frames S5-315 dies

You can also use silver foil cardstock to die cut the flower lace and sentiment.

Flowers and Lace Card by Marisa Job for Spellbinders using Flower Lace Borders S4-796, Textured Flowers S5-317, Layered Leaf Vines S4-795, Friends & Family Frames S5-315 dies #spellbinders #diecutting #cardmaking

 Spellbinders Supplies:

 Other Supplies:

Neenah Papers White Cardstock, Blue Fern Studios – Artisan Paper Collection, Silver Foil Cardstock, Scrapbook Adhesives by 3L -  3D Foam Squares, Foamiran, Prima Marketing Chalk Inks – Teak Wall, Garden Grass and Vintage Pink, May Arts Silk Ribbon, Hot Glue Gun, Heat Tool. Thanks for visiting and have a wonderful week! Marisa Job www.marisadesigns.blogspot.com

Read more

Flowers and Lace by Marisa Job

Flowers and Lace by Marisa Job

Hello crafty friends! I had so much fun creating this card with Flower Lace Borders die set from my Timeless Heart Collection. I also used my Texture Flowers die set and Foamiran to make the flowers. I really enjoy making flowers with Foamiran, the flowers are really easy to shape and they look very natural and soft to the touch.

Flowers and Lace Card by Marisa Job for Spellbinders using Flower Lace Borders S4-796, Textured Flowers S5-317, Layered Leaf Vines S4-795, Friends & Family Frames S5-315 dies #spellbinders #diecutting #cardmaking

Step by Step Instructions:

1. Create a 5” x 7” card base from white cardstock. Cover front of card with designer cardstock. 2. Die cut 2 lace borders with Flower Lace Borders die set from white card stock.

Flowers and Lace Card by Marisa Job for Spellbinders using Flower Lace Borders S4-796, Textured Flowers S5-317, Layered Leaf Vines S4-795, Friends & Family Frames S5-315 dies #spellbinders #diecutting #cardmaking

3. Cut a 6 ½” x 2 ½” panel from designer cardstock. Glue flower lace borders to panel and then adhere to card front using foam squares.

Flowers and Lace Card by Marisa Job for Spellbinders using Flower Lace Borders S4-796, Textured Flowers S5-317, Layered Leaf Vines S4-795, Friends & Family Frames S5-315 dies #spellbinders #diecutting #cardmaking

4. Die cut Friends sentiment with Friends & Family Frames die set from white cardstock. Adhere sentiment to card using foam squares.

Flowers and Lace Card by Marisa Job for Spellbinders using Flower Lace Borders S4-796, Textured Flowers S5-317, Layered Leaf Vines S4-795, Friends & Family Frames S5-315 dies #spellbinders #diecutting #cardmaking

5. Die cut multiple flowers and leaves with Textured Flowers die set from Foamiran in peach color. Color edges of all flowers with brown and pink chalk inks. Color leaves with green chalk ink.

Flowers and Lace Card by Marisa Job for Spellbinders using Flower Lace Borders S4-796, Textured Flowers S5-317, Layered Leaf Vines S4-795, Friends & Family Frames S5-315 dies #spellbinders #diecutting #cardmaking

Flowers and Lace Card by Marisa Job for Spellbinders using Flower Lace Borders S4-796, Textured Flowers S5-317, Layered Leaf Vines S4-795, Friends & Family Frames S5-315 dies

6. Heat flowers with heat tool for a few seconds and then twist petals to shape. Layer petals together with hot glue gun.

Flowers and Lace Card by Marisa Job for Spellbinders using Flower Lace Borders S4-796, Textured Flowers S5-317, Layered Leaf Vines S4-795, Friends & Family Frames S5-315 dies

7. Die cut 2 leaf vines with Layered Leaf Vines die set from Foamiran, color with green chalk ink.

Flowers and Lace Card by Marisa Job for Spellbinders using Flower Lace Borders S4-796, Textured Flowers S5-317, Layered Leaf Vines S4-795, Friends & Family Frames S5-315 dies

8. Embellish center of flowers with stamens or micro-beads. Adhere flowers and leaves to card as pictured below. Create a bow with silk ribbon and glue under flower.

Flowers and Lace Card by Marisa Job for Spellbinders using Flower Lace Borders S4-796, Textured Flowers S5-317, Layered Leaf Vines S4-795, Friends & Family Frames S5-315 dies

Flowers and Lace Card by Marisa Job for Spellbinders using Flower Lace Borders S4-796, Textured Flowers S5-317, Layered Leaf Vines S4-795, Friends & Family Frames S5-315 dies

You can also use silver foil cardstock to die cut the flower lace and sentiment.

Flowers and Lace Card by Marisa Job for Spellbinders using Flower Lace Borders S4-796, Textured Flowers S5-317, Layered Leaf Vines S4-795, Friends & Family Frames S5-315 dies #spellbinders #diecutting #cardmaking

 Spellbinders Supplies:

 Other Supplies:

Neenah Papers White Cardstock, Blue Fern Studios – Artisan Paper Collection, Silver Foil Cardstock, Scrapbook Adhesives by 3L -  3D Foam Squares, Foamiran, Prima Marketing Chalk Inks – Teak Wall, Garden Grass and Vintage Pink, May Arts Silk Ribbon, Hot Glue Gun, Heat Tool. Thanks for visiting and have a wonderful week! Marisa Job www.marisadesigns.blogspot.com

Read more