☃️ Banner logo ☃️ Up to 50% Off ☃️

Spellbinders Blog

Quick Technique | Christmas Is The Day Card with Deck The Halls Die

Quick Technique | Christmas Is The Day Card with Deck The Halls Die

Hello Spellbinders' fans and welcome back for another episode from our brand new Quick Technique series!
Quick Technique is all about sharing simple projects using our products and showcasing fun and fresh techniques! We hope you’ll love this new installment on our blog and will give some (or possibly all?) of these techniques a try!
Today we are sharing a Christmas card created using Deck The Halls dies from the Joyous Celebrations collection from Sharyn Sowell (you can find more inspiration using dies from Sharyn here)!
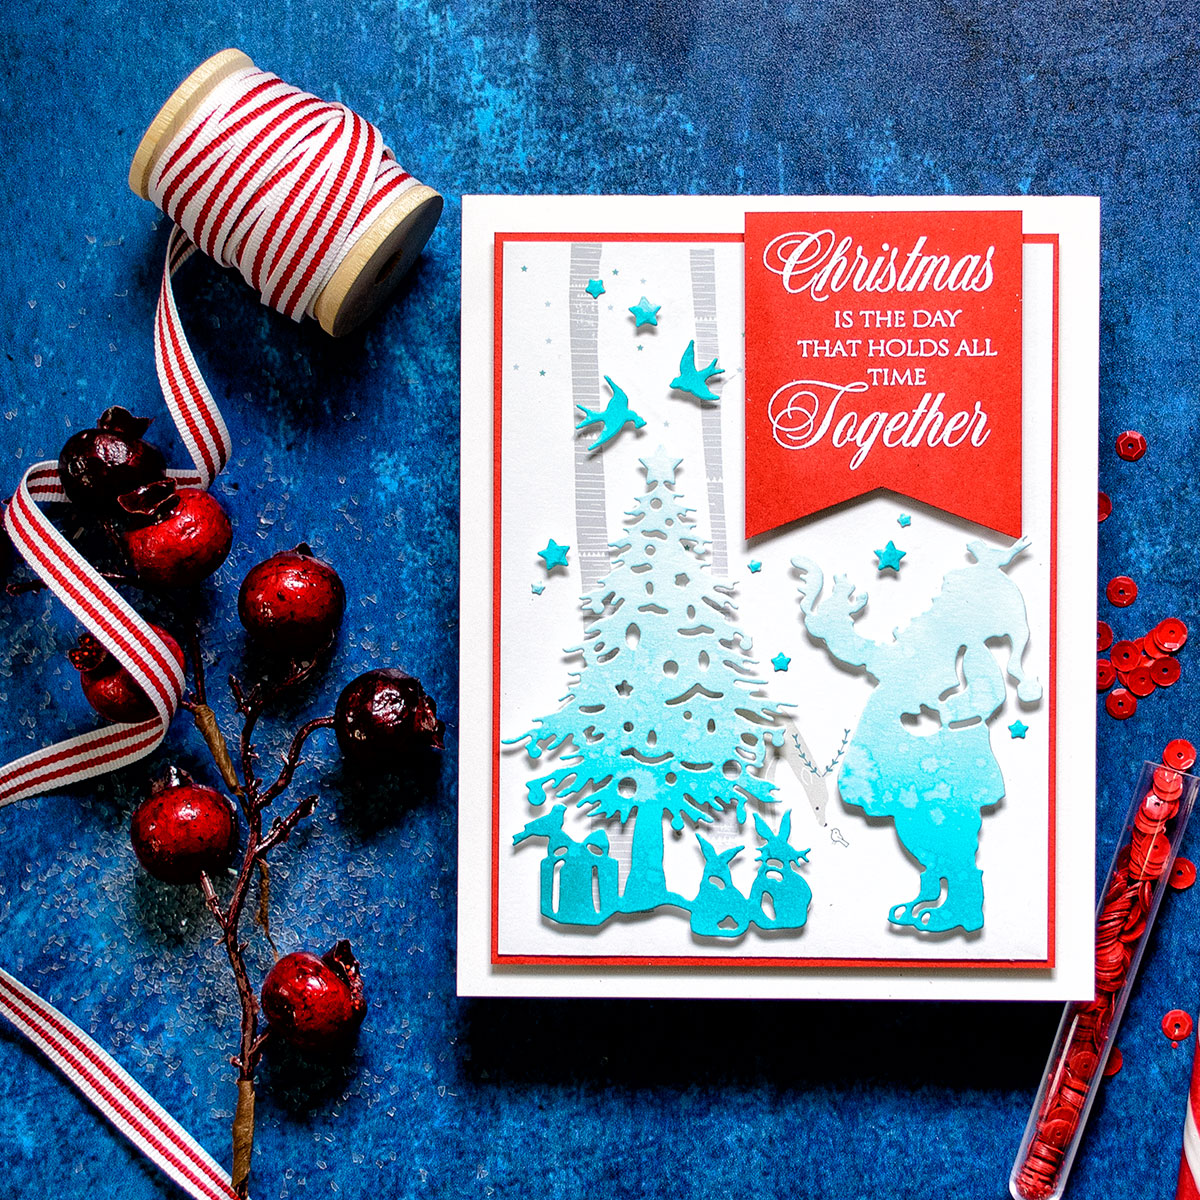
Quick Technique | Christmas Is The Day Card by Yana Smakula for Spellbinders with Deck The Halls Die

Project created by Yana Smakula

Quick Technique:

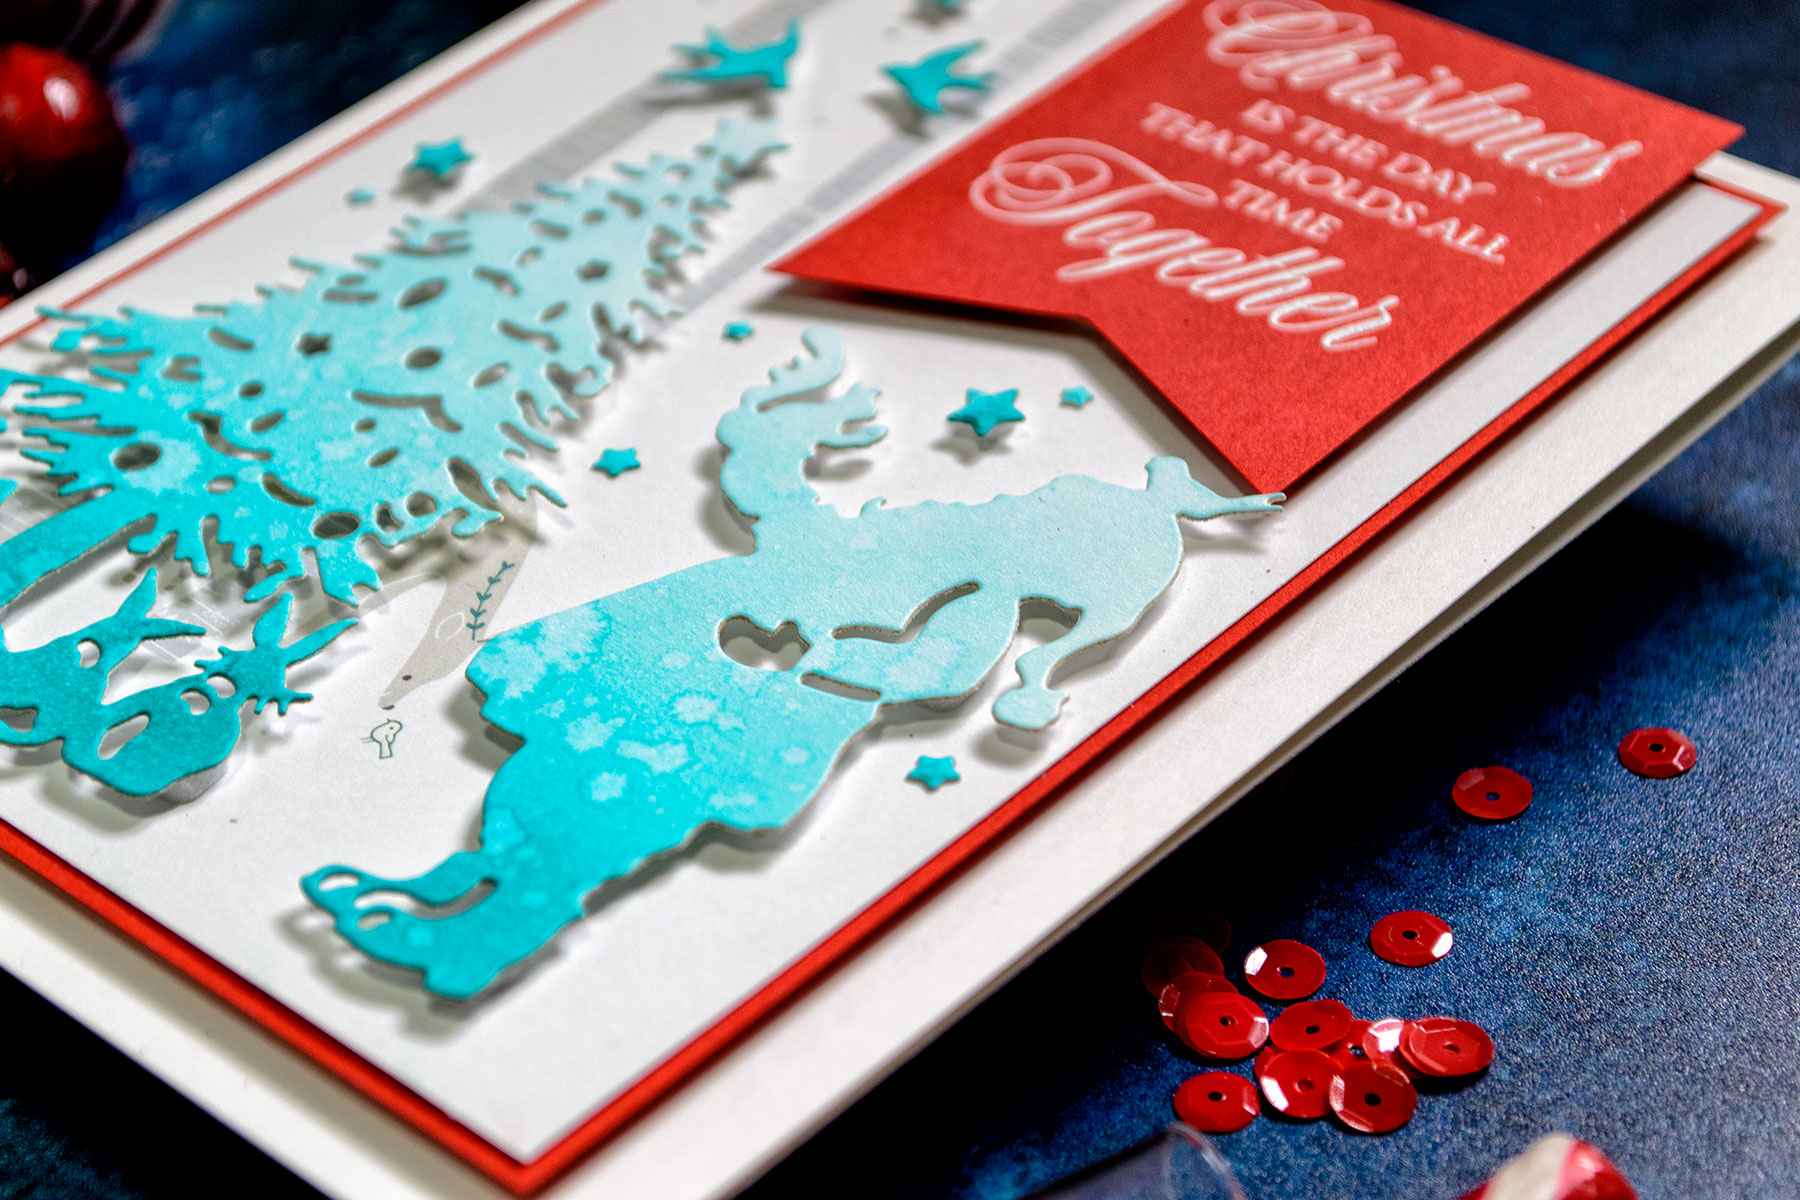
Blend Peacock Feathers and Tumbled Glass Distress inks onto white cardstock creating an ombre look. Spray with water to activate the ink. Let dry.  Die-cut scene making sure the darker blue ink blending is at the bottom. Die-cut stars and birds from the darkest part of the paper.

Quick Technique | Christmas Is The Day Card by Yana Smakula for Spellbinders with Deck The Halls Die

Instructions:

Looking for a full set of instructions to create this card? See below!
  • Create 5 ¼” x 6 ¾” card base.
  • Cut red cardstock panel to 4 ⅝” x 6 ⅛”.
  • Cut patterned paper to 4 ½” x 6”. Adhere onto the red panel. Foam mount onto the card.
  • Blend Peacock Feathers and Tumbled Glass Distress inks onto white cardstock creating an ombre look. Spray with water to activate the ink. Let dry.
  • Die-cut scene making sure the darker blue ink blending is at the bottom. Die-cut stars and birds from the darkest part of the paper.
  • Foam mount scene onto the card. Foam mount birds and stars.
  • White heat emboss a sentiment onto red cardstock panel. Trim one end into a V-shape. Foam mount onto the card.
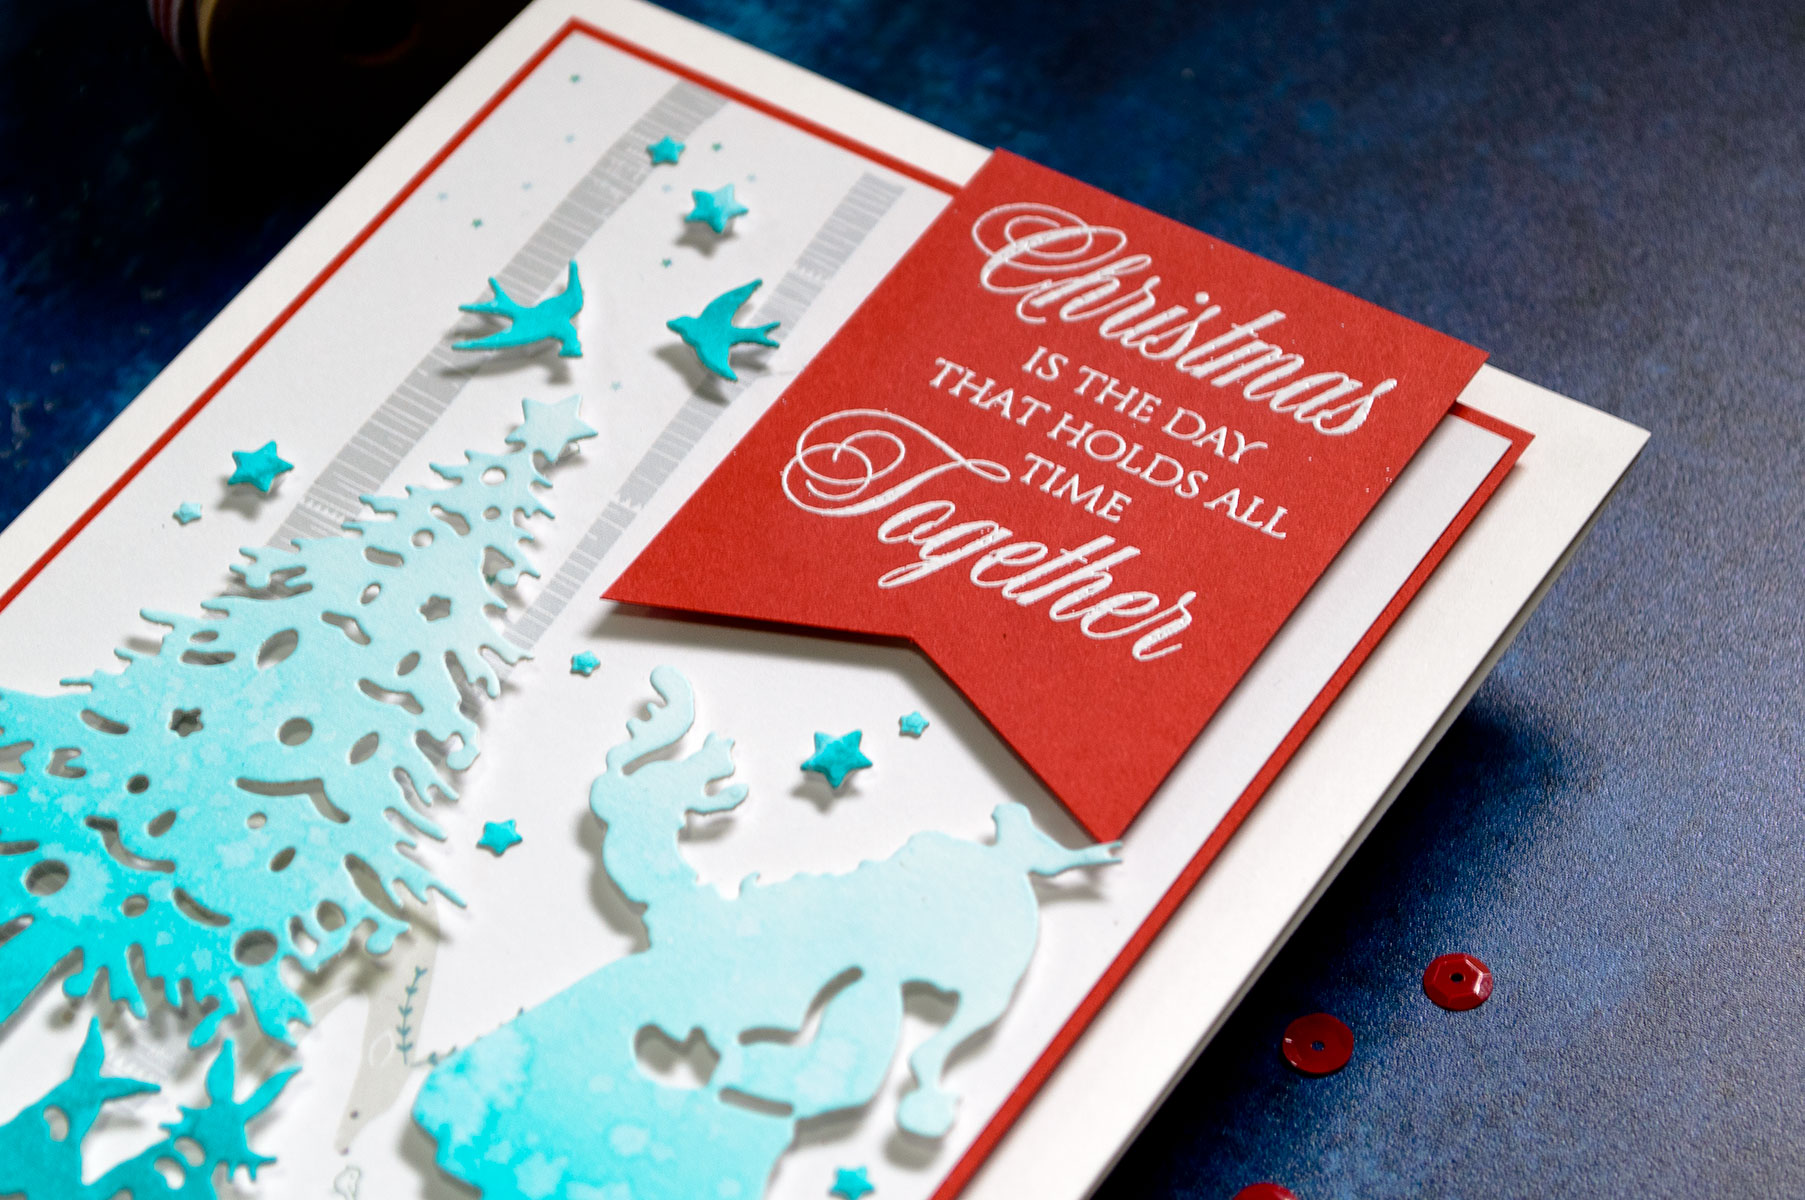
Quick Technique | Christmas Is The Day Card by Yana Smakula for Spellbinders with Deck The Halls Die

Spellbinders supplies:

Other Supplies: White Cardstock (Neenah Solar White 80 LB); Colored Cardstock (My Colors Cardstock - Scarlet; Patterned Paper (Pinkfresh Studio - Christmas Wishes); Foam Adhesive; Tape Runner; Distress Inks (Tumbled Glass, Peacock Feathers); Clear Stamp (Penny Black - Yuletide Wishes); Clear Embossing Ink; White Embossing Powder; Heat Gun; Ink Blending Tool; Fun Foam; Water Mister Bottle.

Quick Technique | Christmas Is The Day Card by Yana Smakula for Spellbinders with Deck The Halls Die Quick Technique | Christmas Is The Day Card by Yana Smakula for Spellbinders with Deck The Halls Die

Have you ever tried this technique? Will you give it a try? Let us know in the comments below! And have fun die-cutting!

Read more

Quick Technique | Christmas Is The Day Card with Deck The Halls Die

Quick Technique | Christmas Is The Day Card with Deck The Halls Die

Hello Spellbinders' fans and welcome back for another episode from our brand new Quick Technique series!
Quick Technique is all about sharing simple projects using our products and showcasing fun and fresh techniques! We hope you’ll love this new installment on our blog and will give some (or possibly all?) of these techniques a try!
Today we are sharing a Christmas card created using Deck The Halls dies from the Joyous Celebrations collection from Sharyn Sowell (you can find more inspiration using dies from Sharyn here)!

Quick Technique | Christmas Is The Day Card by Yana Smakula for Spellbinders with Deck The Halls Die

Project created by Yana Smakula

Quick Technique:

Blend Peacock Feathers and Tumbled Glass Distress inks onto white cardstock creating an ombre look. Spray with water to activate the ink. Let dry.  Die-cut scene making sure the darker blue ink blending is at the bottom. Die-cut stars and birds from the darkest part of the paper.

Quick Technique | Christmas Is The Day Card by Yana Smakula for Spellbinders with Deck The Halls Die

Instructions:

Looking for a full set of instructions to create this card? See below!
  • Create 5 ¼” x 6 ¾” card base.
  • Cut red cardstock panel to 4 ⅝” x 6 ⅛”.
  • Cut patterned paper to 4 ½” x 6”. Adhere onto the red panel. Foam mount onto the card.
  • Blend Peacock Feathers and Tumbled Glass Distress inks onto white cardstock creating an ombre look. Spray with water to activate the ink. Let dry.
  • Die-cut scene making sure the darker blue ink blending is at the bottom. Die-cut stars and birds from the darkest part of the paper.
  • Foam mount scene onto the card. Foam mount birds and stars.
  • White heat emboss a sentiment onto red cardstock panel. Trim one end into a V-shape. Foam mount onto the card.

Quick Technique | Christmas Is The Day Card by Yana Smakula for Spellbinders with Deck The Halls Die

Spellbinders supplies:

Other Supplies: White Cardstock (Neenah Solar White 80 LB); Colored Cardstock (My Colors Cardstock - Scarlet; Patterned Paper (Pinkfresh Studio - Christmas Wishes); Foam Adhesive; Tape Runner; Distress Inks (Tumbled Glass, Peacock Feathers); Clear Stamp (Penny Black - Yuletide Wishes); Clear Embossing Ink; White Embossing Powder; Heat Gun; Ink Blending Tool; Fun Foam; Water Mister Bottle.

Quick Technique | Christmas Is The Day Card by Yana Smakula for Spellbinders with Deck The Halls Die Quick Technique | Christmas Is The Day Card by Yana Smakula for Spellbinders with Deck The Halls Die

Have you ever tried this technique? Will you give it a try? Let us know in the comments below! And have fun die-cutting!

Read more

Embellish Your Mini Album with Spellbinders Dies

Embellish Your Mini Album with Spellbinders Dies

Hello everyone, it’s Elena here today. I have already shared with you that I like to create mini albums for kids. You might have seen the cover I made for my mini album here. Today I would like to show how easy it is to create embellishments for your albums with Spellbinders dies.

Embellish Your Mini Album with Spellbinders Dies. Project by Elena Olinevich

I love to do a lot of die cutting while creating my albums . It saves me a lot of time and money, as all of them can be easily made from the paper or fabric. There are some easy tips you can follow. I like using all kinds of frames, doily dies. They always look beautiful. I used some dies from the past collections: Majestic Oval and Triple Tear dies.

Embellish Your Mini Album with Spellbinders Dies. Project by Elena Olinevich

You can mix elegant and classy with some trendy ones, for instance I used Geo Flower.

Embellish Your Mini Album with Spellbinders Dies. Project by Elena Olinevich

But it’s easy to create with My Little Red Wagon dies by Debi Adams. I used Ella-Fant dies, there are 2 options to create 2 different elephants with them. Definitely, it is one of my favorite die from now. For my first elephant I used the floral paper to create the die cut:

Embellish Your Mini Album with Spellbinders Dies. Project by Elena Olinevich

For my other elephant I used pale pink cardstock to die-cut it, then I dry embossed it and topped the eyes of it with tiny pink pearls

Embellish Your Mini Album with Spellbinders Dies. Project by Elena Olinevich

The bows are always on demand. I used the glittered cardstock to create my bow with the Contour Bow-tique Steel Rule Die. I have used it so many times and still adore it.

Embellish Your Mini Album with Spellbinders Dies. Project by Elena Olinevich

Moreover you can use the negative space as a photo frame. I added stitching on the edge to attach 2 paper sheets, one with the negative frame. And I can assure you that the photos look great framed this way.

Embellish Your Mini Album with Spellbinders Dies. Project by Elena Olinevich

To create this frame I used Classic Label 33 Dies. It seems they are perfect for this purpose:

Embellish Your Mini Album with Spellbinders Dies. Project by Elena Olinevich

The good thing is that you can use the die cut separately as an embellishment meanwhile the negative space, even if it has a decorative edge. This is how I used the negative from the Classic Label 33 Decorative Elements Dies.

Embellish Your Mini Album with Spellbinders Dies. Project by Elena Olinevich

The feathers dies are always versatile. You can use them for any kind of the project, even for the boys and girls. I used one of the feather from the Feathers Set.

Embellish Your Mini Album with Spellbinders Dies. Project by Elena Olinevich

And what I like to do and usually do for my covers - is to die cut the frame and to stitch it to my cover, even a fabric one. I have already shared one of such kind of a cover in one of my previous post, I have already mentioned earlier in this post. I used the same oval frame from the Classic Label 33 set.

Embellish Your Mini Album with Spellbinders Dies. Project by Elena Olinevich

Spellbinders Supplies:

I hope you have like my mini album and I have inspired you to give it a try, too!

Read more