Hello, fellow makers! I'm thrilled to be sharing this fun and easy aloha sign as a guest maker on the Spellbinder's blog today! I love this little
Pineapple Contour Steel Rule Die and knew I just had to make something cute for our front door with it, so I came up with the following design.
I wanted something that looked tropical and beachy but still reflected my somewhat farmhouse leaning style.
Here are the supplies you'll need to get started:
- Platinum™ 6 Die Cutting and Embossing Machine - 6" Platform
- Pineapple Contour™ Steel Rule Die
- 1/38" balsa wood (your local hobby shop should carry this - and you will be able to get 5 pineapples from one board of balsa wood)
- 3 - 1"x3"x16" pine boards (your local Home Depot can cut these for you for little to no charge!)
- 2 small furring strips (any smaller strips of scrap wood will work great!)
- Wood glue
- Spray paint or acrylic paint in desired colors
- Pencil
- Ball point pen
- Thin paint brush
- Black acrylic paint
- Sandpaper
- Lint free cloth
- Minwax White Wash Pickling Stain
- Drill
- 3/8" drill bit
- Jute twine rope/string
Let's get started!
Step 1:
Using your Platinum™ 6 machine, cut your pineapples with the Pineapple Contour™ Steel Rule Die and balsa wood. Your "sandwich" should be layered as pictured below (from bottom UP): Acrylic Plate, Pineapple Contour™ Steel Rule Die, Balsa Wood and top with Acrylic Plate. I cut five pineapples out for two reasons: 1. I like decorating with odd numbers and 2. for five members of my family.


Step 2:
Paint your pineapples! I used Krylon Short Cuts spray paint in the following colors - Hot Pink, Sun Yellow, and Flat White.

Step 3:
While your pineapples are drying - let's get the base of your sign ready. You'll want to space your boards .25" apart from one another and glue your furring strips to the back, about 3.5" in from both sides of each board. Let the glue dry for about 30 minutes before flipping sign base over to complete your project.


Step 4:
Stain your sign using a lint free cloth and the Minwax White Wash Pickling stain. This stain is water based and dries quickly! Once dry, you can move on to the next step.


Step 5:
Mark and drill the holes for your rope. Mark each hole .75" from the top and bottom of each board, and .75" from the ends of each board.


Step 6:
Paint your "aloha" sentiment. I've enclosed a free downloadable link to the exact size and font I used. Feel free to click
HERE to print your own version for tracing or reference.

Once printed use a pencil and draw on the back side of your aloha sentiment.

Secure your sentiment down using painters tape. I also aligned my pineapples at this point just to make sure my "aloha" wouldn't be hidden or covered up at all.

Use a ball point pen to trace the letters - this is where the magic happens!!


Using black acrylic paint and a small paintbrush, go ahead and paint inside the lines (or outside - whatever you feel like!). No pressure here! We are going to sand down this word just as soon as it's dry, so your work here definitely does NOT need to be perfect.


Step 7:
Using wood glue and your creativity as your guide - secure the fruit!

Let the glue dry.
Step 8:
Our last and possibly most gratifying step! Thread your jute twine through the holes and tie into a knot/bow for hanging.


I hope you enjoyed this step-by-step guide to making your very own fun and easy aloha sign! Make sure to tag us Instagram once you've made your sign. We would love to see it!


Read more


 />
/>


 I started with die cutting the papers using
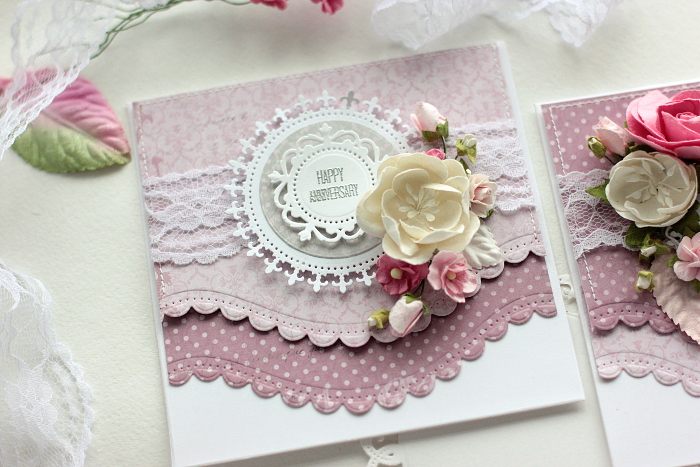
  This scalloped edge looks nice, but in case to separate your two paper layers, I advice you to mount the upper layer on the foam pads. You will notice how it pops up from the background.
 To help to create a flower cluster I've added the circle using the
  For my second card I used the same papers that I mixed by order.
 To place my sentiment I used my most often used die from
  To make the cards a bit different, I mixed not only the paper order, but mirrored the flowers as well.
 Actually it's quite easy to create many cards that look different using the same papers and embellishments. Now it's your turn to try .
Supplies:
Actually it's quite easy to create many cards that look different using the same papers and embellishments. Now it's your turn to try .
Supplies:
